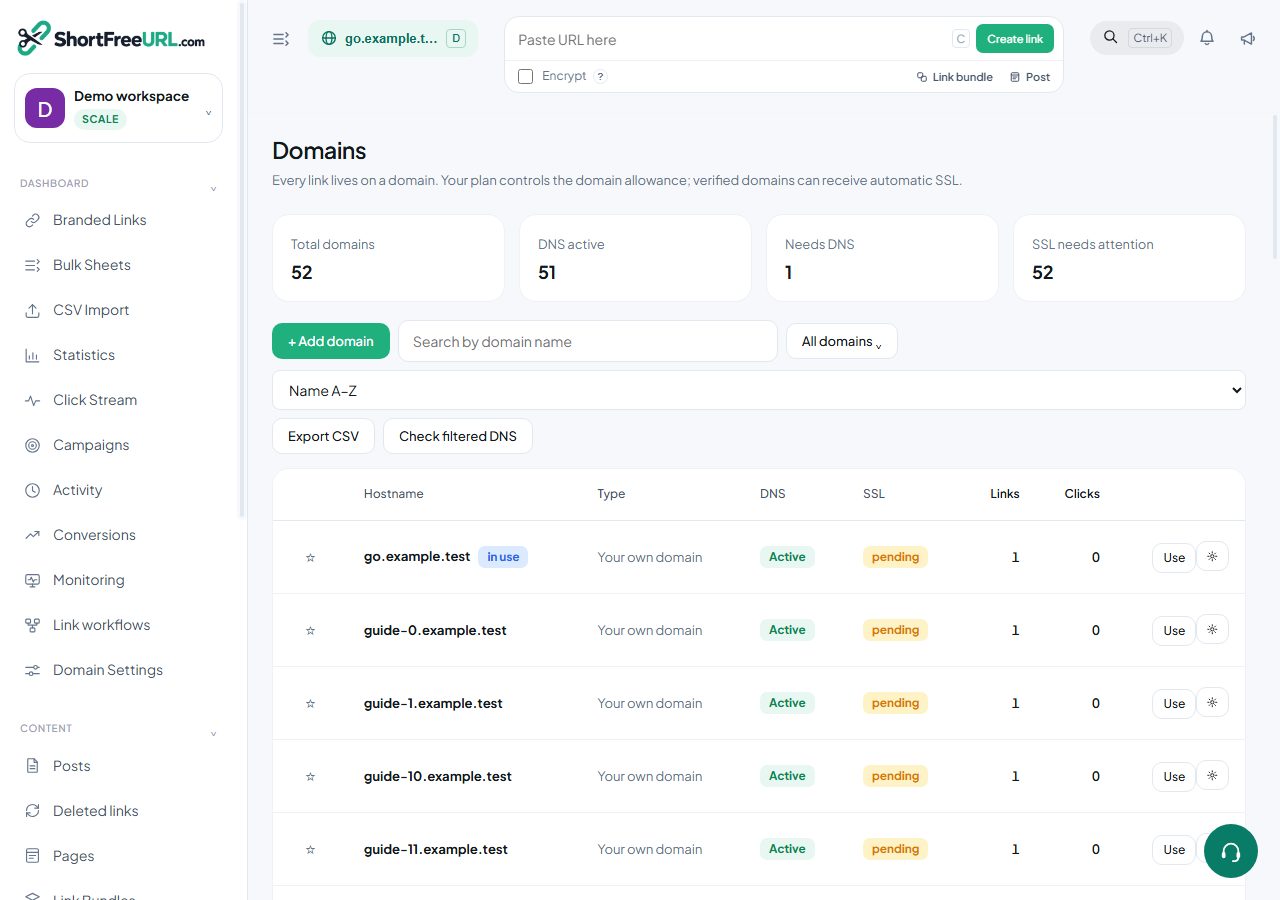
1. Find your domain and its DNS host
Sign in to Namecheap → Domain List. The domain name shown there (for example, yourbrand.com) is what you enter in ShortFreeURL. Open Manage → Nameservers. Buying a domain at Namecheap does not necessarily mean Namecheap hosts its DNS. If it uses Cloudflare or another provider’s nameservers, edit DNS at that provider instead. Namecheap’s Advanced DNS host records are available when Namecheap DNS is authoritative.
2. Choose a safe short-link hostname
If your main domain already runs a website or email, use go.yourbrand.com (or another unused subdomain). That changes only the go CNAME. Moving the bare domain can replace its website A and www records; review that separately. Keep existing MX, TXT and other unrelated records.
3. Enable the Namecheap API
Namecheap → Profile → Tools → Business & Dev Tools → Manage Namecheap API Access. Enable API access and copy the API key. Namecheap may require account eligibility. Add the public outbound IPv4 of your deployed ShortFreeURL server to the API allowlist. It is not necessarily the short-link A-record IP. Namecheap accepts only IPv4 in this allowlist. Never send the key or Namecheap password in chat or a support ticket. Official Namecheap API instructions.
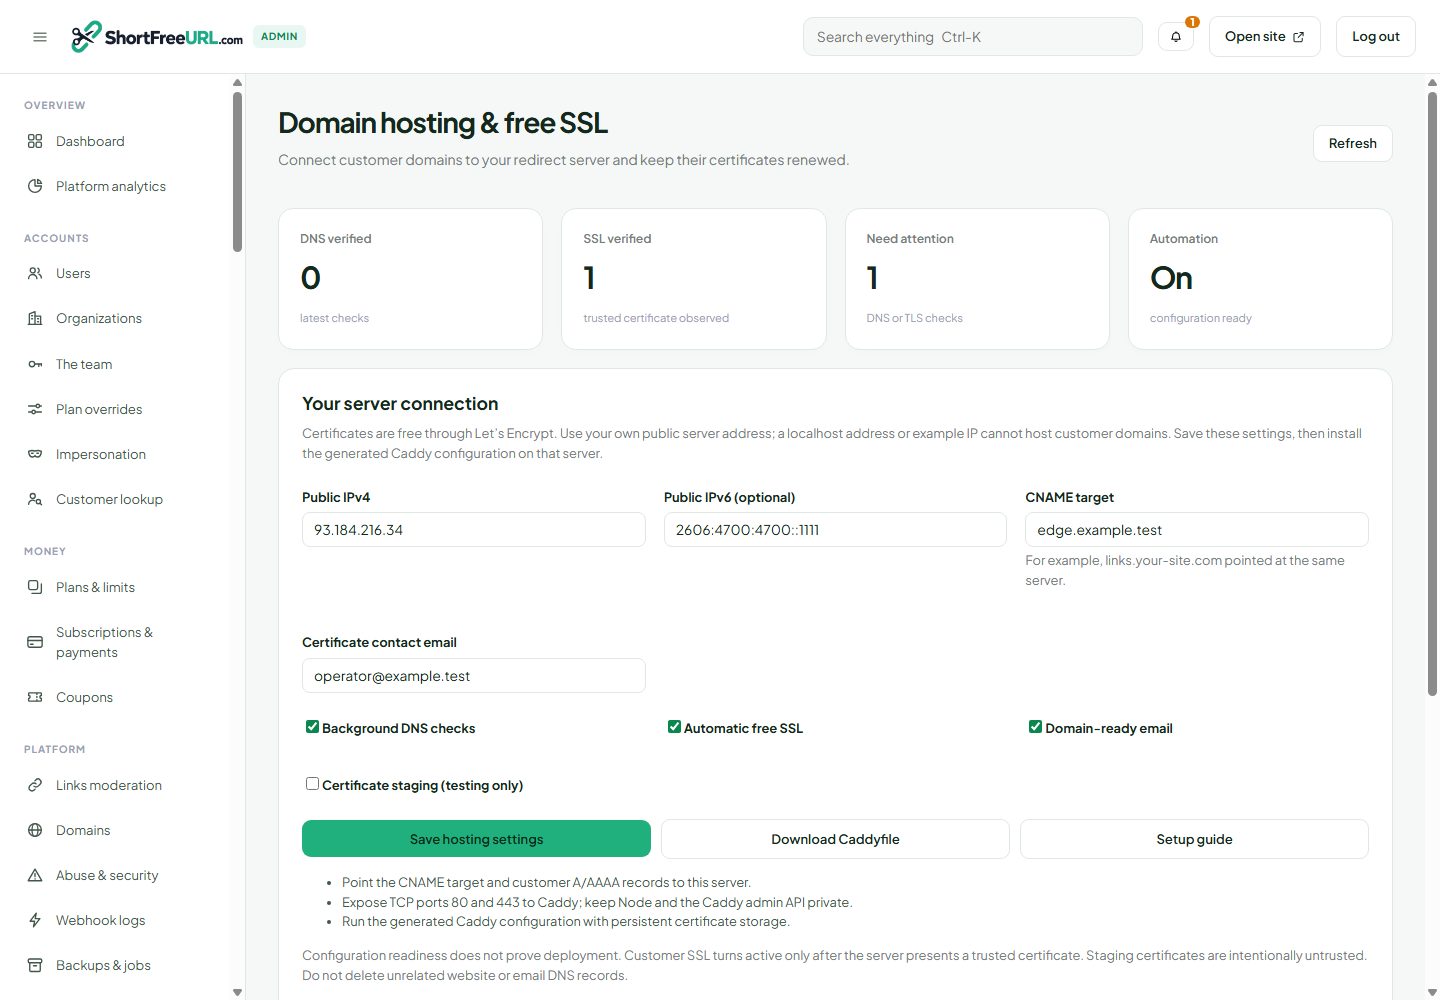
4. Finish operator hosting setup
The operator opens Admin → Domain hosting & SSL and saves the real public redirect IPv4, CNAME target and certificate-contact email. Point the target at the server and deploy Caddy on ports 80 and 443. A localhost address or documentation sample IP cannot host customer domains. The Connect form can verify your account, but the app refuses to write DNS until this public hosting setup is ready. See automatic SSL setup.
5. Connect and verify
Open Dashboard → Integrations & API → Registrars & DNS → Connect an account; choose Namecheap. Enter your Namecheap username, API key and allowlisted outbound IPv4 in the secure form. The app checks the key by listing domains before saving the encrypted connection. Next choose go.yourbrand.com; Namecheap DNS records are read and preserved before the new record is submitted. Namecheap’s setHosts API replaces a whole zone, so conflicting or unreadable records stop the automatic change rather than risking your website or mail. Official getHosts · Official setHosts.
If these are the operator’s own domains for customers, open Admin → DNS providers → My Namecheap domains for short links instead. Connect the Namecheap API account once, choose Select domains, tick the registered domains to use, and choose a short-link prefix (normally go). The system submits go and *.go CNAME records while preserving unrelated DNS records. After DNS and HTTPS are verified, customers can claim names such as brand.go.yourbrand.com and make short links on them. The base stays unavailable while verification is pending. You can pause new claims or disconnect the saved API key from the same admin page; disconnecting does not delete existing DNS records. Namecheap does not provide third-party OAuth login for this API, so use its API username, key and allowlisted public outbound IPv4; never enter the Namecheap password in this app.
6. Check DNS and HTTPS
Open Dashboard → Domains → your hostname → Settings. Refresh DNS and SSL status. DNS propagation can take time; an issued certificate requires the hostname to reach your public Caddy server. Keep the domain on its original nameservers unless you deliberately migrate the whole DNS zone.
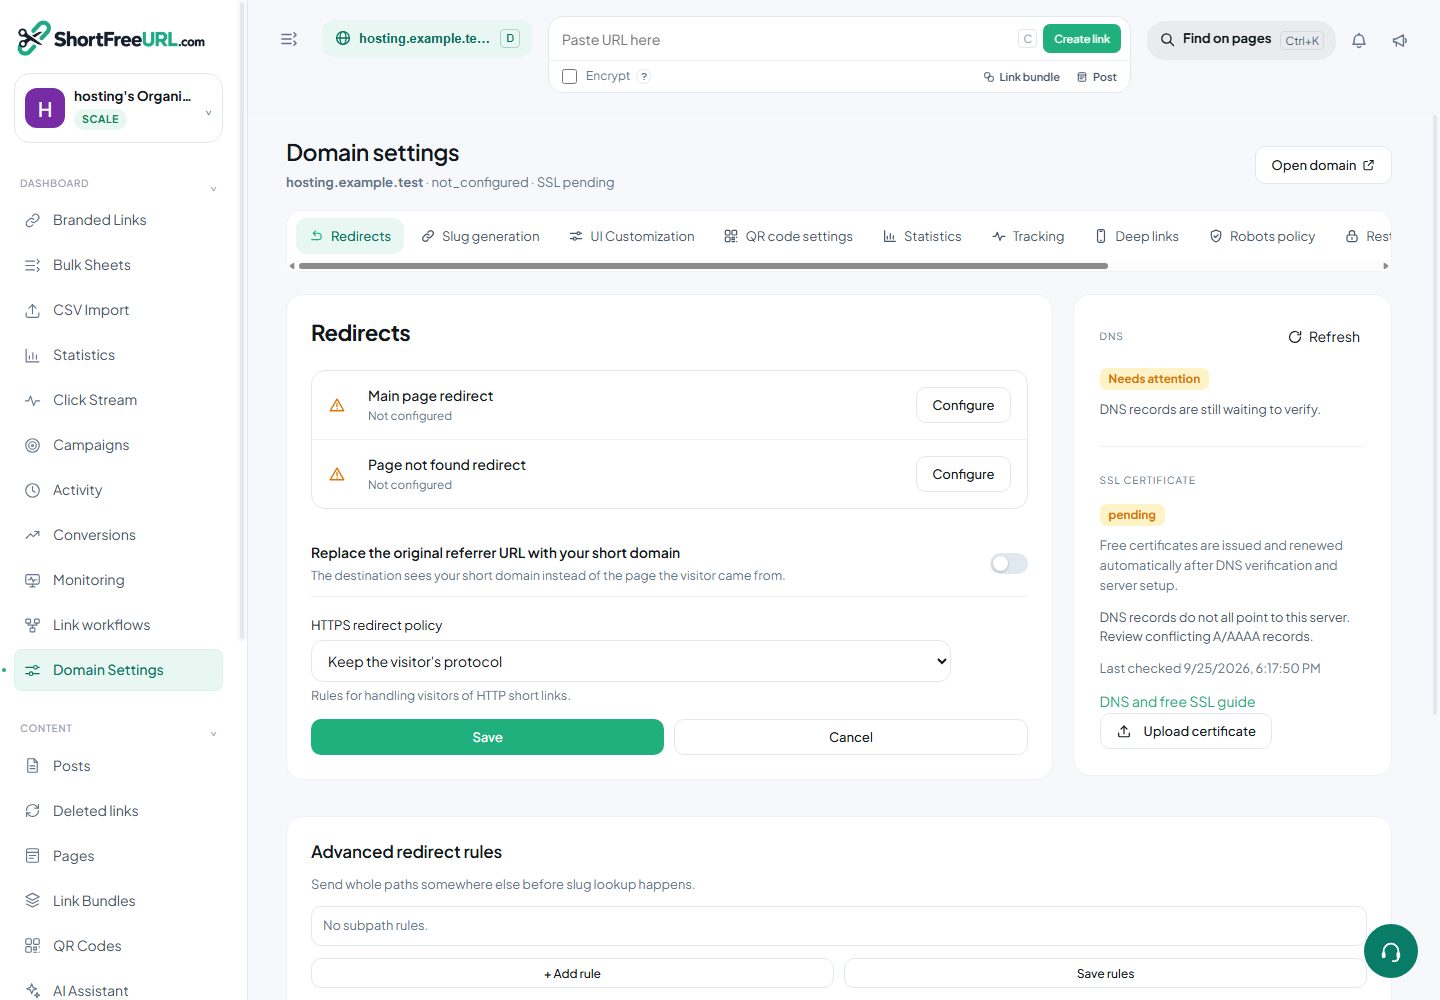
Manual alternative
In Namecheap → Domain List → Manage → Advanced DNS, add a CNAME with Host go and Value equal to the CNAME target shown in your ShortFreeURL dashboard. If Advanced DNS is unavailable, use the DNS provider shown by Nameservers. Do not copy another service’s example IP or delete every A, AAAA or CNAME record.
Find this in your dashboard
- Sign in and select the workspace and domain you want to manage.
- Open Domains. Review the article’s steps and your plan’s available controls.
- Save your changes, reopen the record and verify the saved result. For routing changes, check the short link with a test visit.