

Documentation
Setup, the link editor, analytics, API keys, billing and troubleshooting.
Getting started
Getting started with ShortFreeURL
- Create your account, then add a domain — a free subdomain, a domain you already own, or one you buy in-app.
- Create your first link from the "Paste URL here" bar at the top of the dashboard. Press C anywhere to open it.
- Open Statistics to see clicks appear. Bot traffic is separated from human traffic automatically.
- Invite your team from Organization Settings, and set folder defaults so everyone tags links the same way.
Create your first short link
A link is made of two things: the domain it lives on and the slug that follows it. Once a domain is connected, creating a link takes one paste.
The quickest path
Paste a destination into the "Paste URL here" bar at the top of the dashboard and press Enter. Pressing C anywhere in the app opens the same dialog. ShortFreeURL picks a random six-character slug on the domain marked as your favourite, or the default domain set in your profile.
If you want a readable slug, type it in the Link slug field. Slugs may contain letters, numbers and the characters . _ ~ - / — a slash is allowed, so go.acme.com/docs/api is a single link, not a folder. Slugs are matched case-insensitively unless the domain has case sensitivity turned on.
What the create dialog fills in for you
- Title — fetched from the destination page's
<title>and Open Graph tags. - Slug suggestions — the AI suggestion button proposes readable slugs from the destination. Ignore them and type your own if you prefer.
- Tags — suggested from the page content. Tags are free text and shared across the domain.
- Folder defaults — if you pick a folder that carries defaults, its redirect type, UTM values and QR style are applied unless you override them.
Duplicates
By default a domain refuses a second link pointing at the same destination and returns a 409 with the existing link attached, so you reuse it instead of creating near-identical links. Turn "Allow duplicates" on in Domain settings if your workflow needs one link per campaign to the same page.
After it is created
Copy the short URL with the copy button, or open the row menu for QR, Statistics, Duplicate and Archive. Archiving hides a link from the table without breaking it — the redirect keeps working. Deleting is permanent and frees the slug for reuse.
Clicks appear in Statistics within seconds. Nothing is sampled: every request that reaches the redirector is written to the click log, bots included, and separated afterwards.
Choosing between a free subdomain, your own domain and buying one
Every link needs a domain. ShortFreeURL offers three ways to get one, and you can mix them in the same account.
A free subdomain
Pick a name and you get yourname.<shared domain>. It is active immediately, SSL included, with no DNS work. Restrictions worth knowing before you commit:
- The name must be at least three characters, letters, numbers and hyphens only.
- Reserved names — www, api, app, admin, mail, help, docs, go, link, status and around forty others — are refused.
- You must verify your email or phone before claiming one. That is an abuse-prevention rule, not an upsell.
- The free plan includes one free subdomain.
Some operators offer more than one shared base domain; the picker lists the ones your plan is allowed to use.
A domain you already own
This is the right answer for anything customer-facing. Use a subdomain such as go., get. or link. rather than your apex domain — an apex that already serves your website cannot also point at the redirector. You add an A record and a CNAME, press Refresh, and the domain moves to Active once DNS resolves. SSL is issued automatically.
If your DNS is hosted somewhere with an API — Cloudflare, GoDaddy, Namecheap, DigitalOcean, Route 53, Porkbun and others — connect the registrar instead and ShortFreeURL writes both records for you.
Buying one in-app
The domain search shows availability and yearly prices across .com, .co, .io, .in, .link, .site, .store, .xyz, .app and .me, priced in USD or INR depending on your billing country. A purchased domain is created already active with its DNS records recorded, and appears under Purchased domains where you can toggle auto-renew.
Which to pick
Start on a free subdomain if you are evaluating. Move to your own domain before you print anything or send a campaign: link text is read by recipients, and a branded host measurably changes whether a link looks safe to click. Links are not portable between domains, but Duplicate to domain copies them across in bulk.
A tour of the dashboard
The dashboard is organised around one domain at a time. The domain switcher at the top left decides what the links table, statistics and folder list show.
Links table
The table lists non-archived links on the current domain, newest first. Sorting is available on created date, updated date, clicks, conversions, title, slug and expiry. Paging is offset-based, up to 150 rows per page.
The search box accepts plain text — matched against slug, title, destination and tags — and a field syntax:
path:spring title:"Spring sale" tag:promo
clicks:>500 created:>2026-01-01 expires:none
archived:true cloaking:true redirecttype:301 by:priya@acme.com
Terms combine with AND. Adding archived: anywhere in the query turns off the default filter that hides archived links.
Selection and bulk actions
Select rows and the bulk bar appears: delete (maximum 150 at a time), archive, unarchive, add or remove tags, set UTM values, set expiration, move to folder, update fields such as redirect type and cloaking, duplicate to another domain, and export the selection as CSV.
Folders and tags
Folders belong to a domain and can carry defaults — redirect type, QR style, tracking code, UTM values and an auto-delete period — applied to every link created inside them. Tags are free text with no hierarchy; the tag list is derived from the links themselves and doubles as autocomplete.
Statistics
Statistics has its own page per domain and per link, plus an organisation-wide overview on the home screen. Every card obeys the current date range and filters.
Elsewhere in the navigation
- Bulk — CSV import, the in-browser bulk sheet, exports and the Bitly migration guide.
- QR codes — the studio, published codes and bulk export.
- Bundles and Posts — a link-in-bio page and a markdown page, each living on a short link of its own.
- Settings — profile, organization, teams, API keys, integrations and audit log.
Keyboard shortcut C opens the create dialog from anywhere.
Inviting teammates and choosing roles
An organization owns domains, links and billing. People are added to the organization, and optionally grouped into teams that own a subset of domains.
Roles
- Owner — one per organization. Can transfer domains, transfer ownership and delete the organization. Ownership transfer demotes the previous owner to admin in the same action.
- Admin — everything except ownership transfer: billing, member management, API keys, audit log, domain deletion and statistics deletion.
- User — creates and edits links, folders, bundles, posts and QR codes.
- Readonly — sees links and statistics, changes nothing. Write endpoints return 403.
Sending invitations
Settings, then Organization, then Invite. Enter the email address and the role; optionally attach the invitation to a team. The invitation is emailed as a link valid for fourteen days. You can resend it or revoke it while it is pending.
An invitee who already has an account joins on click. Someone new is routed to registration with the address pre-filled, and joins as soon as they finish signing up.
Teams
A team groups people and owns domains. Assign a domain to a team and only that team's members see it in the switcher. Teams also hold two settings that belong to a group rather than an individual: enforced two-factor authentication, and SAML single sign-on with its own entry point, certificate, entity ID and ACS URL.
Link-level permissions
A single link can be restricted to named users. Anyone outside that list — except the link's creator and the organization's owners and admins — gets a 404 from the API rather than a 403, so a restricted link does not reveal its own existence.
Practical advice
Give day-to-day contributors the User role and reserve Admin for the two or three people who handle billing and domains. Create folders per team or campaign and set folder defaults, so everyone tags and tracks links the same way without being told to.
Migrating from another shortener
Moving a branded domain from Bitly, Rebrandly, TinyURL, Cutt.ly or Short.io is mostly a DNS change plus a CSV import. The order matters, because the goal is that no existing printed or shared link ever 404s.
Step 1: export and import your links
Export from the old provider and upload the CSV under Bulk, then CSV import. Templates are recognised for Bitly, Rebrandly, TinyURL, Cutt.ly, Short.io and a generic layout, and headers are mapped automatically — Bitlink, slashtag, alias, keyword, back-half and custom back-half all map onto the slug, and destination, long URL and original URL onto the target.
Preview the file first. The preview shows the detected headers, the field each maps to, the row count and the first twenty rows, and lets you correct any mapping before anything is written. Imports are capped at 10,000 rows per file.
Step 2: point DNS at ShortFreeURL
Change the A record for the branded domain to the redirect IP shown in the dashboard, and the www CNAME to the CNAME target. Leave the domain attached at the old provider for now.
Step 3: fallback resolution covers the gap
While the Bitly migration is enabled, any slug that ShortFreeURL does not recognise is looked up against your old domain, redirected, and cached. Links created after your export — or links that failed to import — keep working during the switch instead of returning 404.
Step 4: finish the move
Watch the click stream for requests still being served by fallback. Once that drops to zero, usually after about thirty days, turn fallback off and remove the domain from the old provider.
What does not come across
Historical click data stays with the old provider; nothing about the export format carries it. Export their analytics separately if you need it. QR codes that encode the old short URL keep working as long as the domain points here — that is the whole point of moving the domain rather than the links.
What happens when someone clicks a short link
Understanding the order of the redirect pipeline explains most surprises: why a rule did not fire, why a link showed a page instead of redirecting, why a click was not counted.
The order of operations
- Domain lookup. The hostname is resolved to one of your domains. A suspended domain shows a disabled page and stops here.
- Special paths. The empty path uses the domain's main page redirect, or shows the 404 page.
robots.txt,/.well-known/assetlinks.jsonandapple-app-site-associationare answered from Domain settings. - Subpath rules. Whole prefixes configured under Redirects are sent onwards before any slug lookup happens.
- Slug lookup. No match means the domain's 404 redirect, or the themed not-found page.
- Moderation. A link disabled by abuse review returns 410.
- Content links. If the slug belongs to a bundle or a published post, that page renders instead of redirecting.
- Encryption and password. An encrypted link serves the decryption page; a protected link serves the password page until the cookie is set.
- Expiry. An expired link goes to its fallback destination, or shows the expired page with 410.
- Anti-scrape. With Prevent scraping on, suspicious automated traffic gets a browser check first. Preview bots are exempt.
- Destination selection. Geo rules first, then iOS and Android destinations, then A/B variations. Geo wins over the others when it matches.
- URL assembly. Query parameters are merged, UTM values applied, a
clidadded if conversion tracking is on, and the URL signed if signing is enabled. - Logging, then delivery. The click is written, then the redirect is sent with the link's status code.
The two exits that are not redirects
A preview crawler on a link that has social metadata gets an HTML page carrying those tags instead of a 302, because a crawler that follows a redirect reads the destination's tags and ignores yours. A cloaked link serves a framing page. Both are counted as clicks.
Overrides you can use while testing
?qr=1marks the click as a QR scan.?ms_geo=INor?ms_geo=IN-MH/Punepreviews a geo rule from anywhere and is excluded from statistics.?ms_nomerge=1skips query merging for one request.
Domains
Adding a custom domain
- Add an A record for your host pointing at the redirect IP shown in the dashboard.
- Add a CNAME for www pointing at the CNAME target.
- Press Refresh. The state moves from Not configured, through Extra records, to Active.
- SSL is issued automatically once DNS resolves. If SSL is stuck, the cause is almost always a stale AAAA record or a CAA record blocking issuance.
- Do not point an apex domain that already serves your website at the redirect IP — use a subdomain instead.
Connecting a domain you already own
A branded domain needs two DNS records and about fifteen minutes of propagation. Nothing else — SSL is issued for you once the records resolve.
Pick the right hostname
Use a subdomain: go., get., link., s.. If your website already lives at the apex of the domain, pointing the apex A record here moves your whole site, which is almost never what you want. A subdomain leaves the website alone.
The records
Add the domain in the dashboard and the exact values are shown on screen:
A       @ (or the subdomain)    <the redirect IP shown in the dashboard>
CNAME   www                     <the CNAME target shown in the dashboard>
Press Refresh DNS check after saving them. The domain moves through three states:
- Pending — nothing resolves here yet. The panel shows the A records it can currently see, next to the one it expects, which is usually enough to spot a typo.
- Extra records — the A record resolves but
wwwis not pointing here yet. Links already work; thewwwform does not. - Active — both records are in place. SSL is issued automatically.
SSL
Certificates are requested and renewed for you. If you have to use a certificate issued elsewhere — an internal CA, or a wildcard you already deploy — upload the full chain and the private key in PEM format under Domain settings, Redirects, DNS and SSL. Automatic renewal stops while a custom certificate is in place, so put its expiry in a calendar.
Common blockers
- Cloudflare proxying. The orange cloud in front of an A record can interfere with certificate issuance. Set the record to DNS-only until the domain is active.
- CAA records. A restrictive CAA record on the parent domain prevents issuance. Either add the issuer used here, or remove the restriction.
- An existing CNAME on the same name. DNS does not allow a CNAME beside other records at the same name. Remove the old one first.
Once the domain is active, mark it as your favourite so new links default to it, then set a main page redirect and a 404 redirect before you share anything.
Letting ShortFreeURL write your DNS records
If your DNS is hosted somewhere with an API, connect the account once and adding a domain becomes a single click instead of a copy-paste exercise in another tab.
What a connection does
Under Integrations, Registrars and DNS, connect an account with an API token. From then on, adding a domain hosted at that provider writes both records — the A record and the www CNAME — over the provider's API, then re-checks DNS for you. Credentials are encrypted at rest and never returned to the browser; the dashboard only ever sees the provider name, your label, the domain count and whether the connection still works.
Providers
The provider list is shown in the dashboard, and each entry is marked either automatic or guide. Automatic providers sign in and write the records. Guide providers get step-by-step instructions for that specific control panel, because their API either does not exist or does not expose record writing.
Working with a connection
- Refresh re-lists the domains in the account, which is how a newly registered domain appears.
- Attach connects one of those domains and writes its records.
- Push rewrites the records for a domain that has drifted — useful after someone edits DNS by hand.
- Disconnect removes the stored credentials only. Domains already connected keep working, because the records live at the provider, not here.
Buying a domain instead
The domain search buys a domain in-app across a set of common TLDs, priced in USD or INR depending on your billing country. A purchased domain is created already active with its records recorded, so there is no DNS step at all. It appears under Purchased domains, where auto-renew can be toggled.
Which approach to choose
If you manage one or two domains and rarely change them, adding the records by hand is fine and gives you a clear audit trail in your own DNS panel. If you run many campaign domains, or people outside your infrastructure team add domains, connecting the account removes an entire class of support ticket: the wrong record type, the trailing dot, the record added to the wrong zone.
Redirect settings for a domain
Domain settings, Redirects, holds the behaviour that applies to every link on the domain, plus the handful of paths that are not links at all.
Main page redirect and 404 redirect
The main page redirect is where https://go.example.com/ sends someone. Set it to your website. Without it, the bare domain shows the themed not-found page, which looks broken to anyone who trims a link back to its domain out of curiosity.
The 404 redirect catches every slug that does not exist — deleted links, typos, links from a shortener you have since left. Point it at a page that helps, such as your homepage or an offers page. Set this before you delete links in bulk.
Subpath rules
A subpath rule sends a whole path somewhere else before slug lookup happens:
blog   →  https://blog.example.com     301
docs   →  https://example.com/help     302
Rules are matched in order and can match either the exact path or, when the prefix option is set, everything beneath it. They are useful when a branded short domain doubles as a vanity host for a couple of real sections.
Protocol handling
HTTPS level decides what happens to a plain HTTP request: keep the visitor's protocol, upgrade to HTTPS, or upgrade and send an HSTS header. Upgrade is the sensible default. HSTS is a commitment — browsers remember it — so turn it on only if the domain will always be HTTPS.
Redirect type
The domain-level default status code is inherited by every new link, and can be overridden per folder and per link. 302 is the right default for marketing links: the browser asks every time, so click counts stay accurate and destination changes take effect immediately.
Two switches worth understanding
- Referrer hiding replaces the original referrer with your short domain, so the destination sees the short link rather than the page the visitor came from.
- JavaScript redirect serves a small HTML page that redirects with JavaScript instead of an HTTP redirect. It changes how some analytics tools attribute the visit, and it is slower, so use it only when you need that behaviour.
The Danger zone at the bottom holds domain transfer, statistics deletion, bulk deletion of old links and domain deletion. All four are irreversible.
Slug rules, reserved slugs and duplicates
Slugs are the part of the link people actually read. Domain settings, Slug generation, controls how automatic ones are made and what a person is allowed to type.
The automatic rule
When you create a link without typing a slug, one is generated using the domain's rule:
- Incremental — 1, 2, 3 and so on. Short and guessable; only sensible on an internal domain.
- Random 4 — around 1.7 million combinations.
- Random 6 — around 2 billion combinations. The default, and the right answer for almost everyone.
- Random 8, 10 or 12 — longer and progressively harder to enumerate. Use 12 when links point at something that should not be discovered by scanning.
Generation retries on collision, so a busy domain does not fail to create a link.
What a slug may contain
Letters, numbers and the characters . _ ~ - /. A slash is allowed, so go.example.com/docs/api is one link rather than a folder. A global reserved list rejects slugs that would collide with system paths, and you can add your own reserved list per domain — brand names, terms you plan to use later, anything you do not want a colleague claiming by accident.
Case sensitivity
Off by default: /Promo and /promo are the same link. Turning it on doubles your effective namespace and roughly doubles your support tickets, because nobody transcribes capitals correctly from print. Leave it off unless you are importing a case-sensitive namespace from elsewhere.
Duplicate destinations
By default, creating a second link to a destination that already has one is refused with a 409 and the existing link attached, so you can reuse it. That is usually right: near-identical links split your click data for no reason.
Turn Allow duplicate destinations on when your workflow genuinely needs one link per campaign or per channel pointing at the same page — which is a reasonable thing to want, since the UTM values differ even when the destination does not.
AI slug suggestions
With AI slug generation enabled, the create dialog and the editor can propose readable slugs from the destination page, and suggest tags from its content. Suggestions are suggestions: type your own whenever you have a better one.
Robots policy and what search engines see
Short links should generally not be indexed. They are pointers, they duplicate content that already has a canonical home, and an indexed short link competes with the page it points at.
Search engine policy
Domain settings, Robots policy, offers three values:
- Allow indexing — crawlers may index short links. Rarely what you want.
- Don't index short links — a noindex directive. Crawlers may follow the redirect but should not list the short URL.
- Don't follow short links — crawlers are asked not to follow. This also stops well-behaved preview bots from consuming clicks against a click limit, which matters if you use limited links.
robots.txt behaviour
The domain serves its own robots.txt, and you choose how:
- Redirect to the origin robots.txt — a 301 to the
robots.txtof your main page redirect's origin, so one file governs everything. - Redirect to origin (302, immediate) — the same, without the permanent cache.
- Serve a custom robots.txt — the text you paste is served verbatim. Use this when you want rules specific to the short domain.
- Disallow everything — serves
User-agent: *andDisallow: /.
With no explicit mode, a file is generated from the search engine policy above. There is a link in the settings panel to open the live file, which is worth checking after any change.
Preview bots are a separate concern
Messaging apps and social networks fetch a link before showing a card. Those requests are recorded as clicks with the bot flagged, and they count against a click limit unless you set the policy to "Don't follow". If a link has social metadata set, a preview crawler is served an HTML page carrying those tags rather than a redirect — otherwise the crawler follows the redirect and reads the destination's tags, and everything you configured is ignored.
Statistics and bots
Bot traffic is never dropped silently. Every request that reaches the redirector is logged, with a human flag and the detected bot name, and separated afterwards in reporting. That is why the statistics dashboard shows total clicks and human clicks as two different numbers, and why a link that looks busy the moment you post it usually is not.
Cleaning up, transferring and deleting a domain
Domains accumulate links, and links accumulate clicks. The maintenance tools live at the bottom of Domain settings, under Danger zone, plus two settings under Statistics.
Auto-delete old links
Under Domain settings, Statistics, Auto-delete links after (days) removes links older than the given age automatically. Leave it empty to keep everything. It suits domains used for transactional or generated links — one-time invitations, receipts, per-order tracking — where thousands of links accumulate and none of them matter after a month.
Folders can carry their own auto-delete period as a default, which is a gentler way to apply the same idea to one workflow rather than a whole domain.
Deleting old links by hand
Delete old links in the Danger zone takes a cutoff date, previews how many links would go, and then deletes them. Set a 404 redirect first: anyone following a deleted link should land somewhere useful rather than on a not-found page.
Deleting statistics
Delete statistics removes the click history for the domain while leaving the links intact. It is the right tool after a load test, a bot flood, or a period of internal traffic you forgot to exclude. It cannot be undone, and it is restricted to owners and admins.
If the problem is only your own traffic, the better fix is the IP exclusion list under Statistics — clicks from those addresses are never recorded in the first place.
Transferring a domain
Transfer domain moves a domain, its links and its click history to another organization by email address. The recipient must already have an account. Use it when a domain belongs to a client, or when you are splitting one workspace into several.
Deleting a domain
Deleting a domain deletes its links and their statistics. Every short URL on it stops working immediately, including printed QR codes and anything embedded in emails already sent. If the goal is only to stop using the domain for new links, remove it from favourites and let existing links keep resolving instead.
Before any of these
Export first. The links table exports the current selection as CSV, and statistics export as XLS, which gives you something to restore from or to hand to whoever asks what was there before.
Connect your domain with free automatic SSL
1. Choose your short-link hostname
Open Dashboard → Add Domain. If your main domain already hosts a website, choose a subdomain such as go.yourbrand.com. Keep the website’s DNS records. Add the hostname to your workspace before pointing DNS.
2. Copy the records for your installation
The setup screen shows the operator’s A record for an apex domain, an optional AAAA record for IPv6, or a CNAME for a subdomain. Names under suffixes such as co.uk and co.in use the correct root and subdomain names. Do not copy IP addresses from example screenshots. If the screen says server setup is required, the administrator must complete the next section first.
Change only the records for the chosen short-link hostname. Keep unrelated MX, TXT, website and verification records. A CNAME cannot share a hostname with A/AAAA records. A and AAAA can coexist when both point to the configured server. Review conflicting records instead of deleting every record in your DNS zone.
3. Check DNS and SSL separately
Open Domain settings → Redirects and press Refresh. DNS verified means every returned A/AAAA address matches this installation. SSL verified means an HTTPS check observed a trusted certificate for the exact hostname. DNS readiness alone does not mean a certificate has been issued.
The background job checks bounded batches each minute. Failed checks retry with increasing delay up to 30 minutes; healthy domains are rechecked every six hours. Caddy handles certificate issuance and renewal. DNS propagation and certificate-authority limits can add delay. A domain-ready email is queued once after both checks succeed; delivery status is available in the admin mail centre.
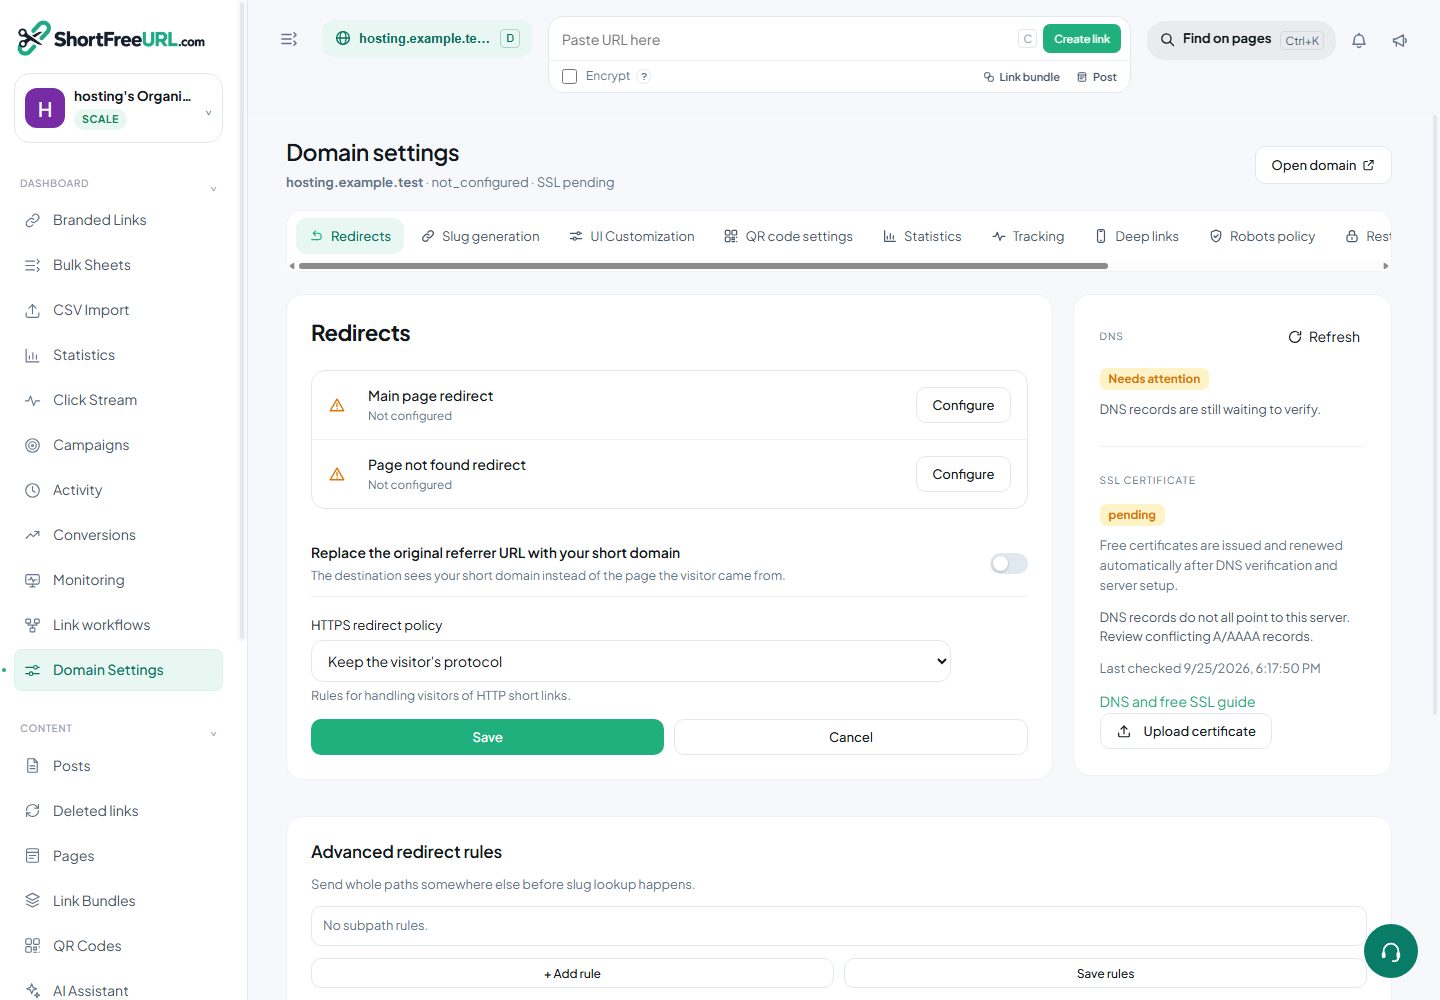
4. Administrator: configure your public server
Open Admin → Domain hosting & SSL. Enter the public IPv4 of the server running the redirect application, optional working IPv6, your CNAME target and a certificate-contact email. Point the CNAME target at the same server. Save with background checks and automatic SSL enabled. The application refuses localhost, private addresses and documentation example addresses.
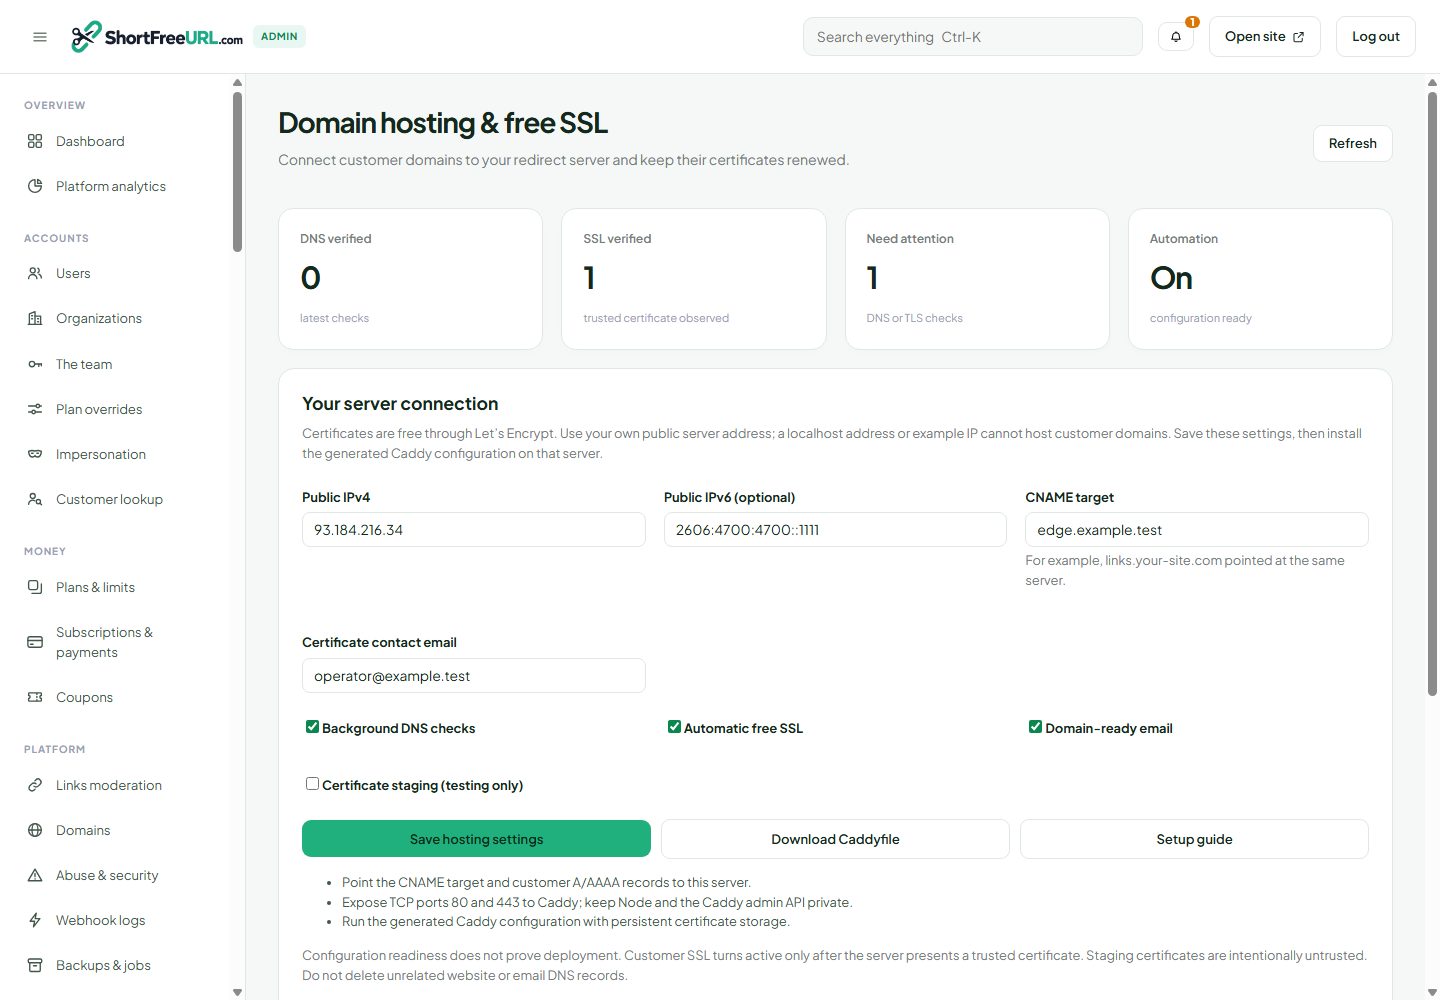
5. Deploy the HTTPS proxy
Install Caddy on that public server using its official installation guide. Download the Caddyfile from the admin page. Check SITE_HOST, APP_HOST, API_HOST, STATS_HOST, DOCS_HOST, DEVELOPERS_HOST and ADMIN_HOST in the application environment: the generated file includes those configured hostnames. Use your own hostnames and point them at this server. Keep the application port and Caddy’s admin API private. Make TCP ports 80 and 443 reachable; UDP 443 is optional for HTTP/3. Persist Caddy’s data directory so certificate keys and renewal state survive restarts.
Validate the downloaded file with caddy validate --config Caddyfile --adapter caddyfile. Install it as your Caddy service configuration, then reload that service. The app must run on the same machine at the loopback port shown in the file. Configure production session secrets, HTTPS app URLs and a mail transport before accepting customers. See the deployment guide in the source delivery for the system-service layout.
The generated on-demand TLS configuration asks the application before provisioning a customer hostname. Unknown, suspended or inactive-workspace domains are denied; DNS must match the operator’s server. External requests to the internal authorization route are blocked by the generated Caddyfile. Each exact customer hostname receives a certificate: a wildcard certificate and a paid certificate service are not required.
6. Test and operate
Use certificate staging while testing issuance repeatedly. Staging certificates are intentionally untrusted and will not show SSL verified. Switch to production issuance for customer traffic. Visit the customer HTTPS link and verify DNS & SSL again. In the admin page, search by domain or customer, inspect the latest error and use Check DNS & SSL. Backups & jobs shows the background domain-hosting job. Pausing automation stops new checks; pausing automatic SSL denies new certificate authorizations. Existing valid certificates are not deleted.
A readiness indicator validates settings only. It does not prove Caddy is installed, firewall ports are open, or a certificate has been issued. This feature provides free certificates; a public server, domain registration and optional mail-provider charges remain separate. Localhost alone cannot serve real customer domains.
Troubleshooting
Missing DNS: check the record name, authoritative provider and TTL. Mixed addresses: fix conflicting A/AAAA records, including unused IPv6. DNS ready but SSL pending: check Caddy service logs, public ports, certificate storage permissions and any CAA policy. Suspended domain: resolve the suspension in admin; a customer refresh cannot reactivate it. Uploaded custom certificates are stored for operator deployment and do not become active merely by uploading them.
Caddy installation · Automatic HTTPS · Caddy on-demand authorization · Let’s Encrypt validation
Connect a Namecheap domain and subdomain
1. Find your domain and its DNS host
Sign in to Namecheap → Domain List. The domain name shown there (for example, yourbrand.com) is what you enter in ShortFreeURL. Open Manage → Nameservers. Buying a domain at Namecheap does not necessarily mean Namecheap hosts its DNS. If it uses Cloudflare or another provider’s nameservers, edit DNS at that provider instead. Namecheap’s Advanced DNS host records are available when Namecheap DNS is authoritative.
2. Choose a safe short-link hostname
If your main domain already runs a website or email, use go.yourbrand.com (or another unused subdomain). That changes only the go CNAME. Moving the bare domain can replace its website A and www records; review that separately. Keep existing MX, TXT and other unrelated records.
3. Enable the Namecheap API
Namecheap → Profile → Tools → Business & Dev Tools → Manage Namecheap API Access. Enable API access and copy the API key. Namecheap may require account eligibility. Add the public outbound IPv4 of your deployed ShortFreeURL server to the API allowlist. It is not necessarily the short-link A-record IP. Namecheap accepts only IPv4 in this allowlist. Never send the key or Namecheap password in chat or a support ticket. Official Namecheap API instructions.
4. Finish operator hosting setup
The operator opens Admin → Domain hosting & SSL and saves the real public redirect IPv4, CNAME target and certificate-contact email. Point the target at the server and deploy Caddy on ports 80 and 443. A localhost address or documentation sample IP cannot host customer domains. The Connect form can verify your account, but the app refuses to write DNS until this public hosting setup is ready. See automatic SSL setup.
5. Connect and verify
Open Dashboard → Integrations & API → Registrars & DNS → Connect an account; choose Namecheap. Enter your Namecheap username, API key and allowlisted outbound IPv4 in the secure form. The app checks the key by listing domains before saving the encrypted connection. Next choose go.yourbrand.com; Namecheap DNS records are read and preserved before the new record is submitted. Namecheap’s setHosts API replaces a whole zone, so conflicting or unreadable records stop the automatic change rather than risking your website or mail. Official getHosts · Official setHosts.
If these are the operator’s own domains for customers, open Admin → DNS providers → My Namecheap domains for short links instead. Connect the Namecheap API account once, choose Select domains, tick the registered domains to use, and choose a short-link prefix (normally go). The system submits go and *.go CNAME records while preserving unrelated DNS records. After DNS and HTTPS are verified, customers can claim names such as brand.go.yourbrand.com and make short links on them. The base stays unavailable while verification is pending. You can pause new claims or disconnect the saved API key from the same admin page; disconnecting does not delete existing DNS records. Namecheap does not provide third-party OAuth login for this API, so use its API username, key and allowlisted public outbound IPv4; never enter the Namecheap password in this app.
6. Check DNS and HTTPS
Open Dashboard → Domains → your hostname → Settings. Refresh DNS and SSL status. DNS propagation can take time; an issued certificate requires the hostname to reach your public Caddy server. Keep the domain on its original nameservers unless you deliberately migrate the whole DNS zone.
Manual alternative
In Namecheap → Domain List → Manage → Advanced DNS, add a CNAME with Host go and Value equal to the CNAME target shown in your ShortFreeURL dashboard. If Advanced DNS is unavailable, use the DNS provider shown by Nameservers. Do not copy another service’s example IP or delete every A, AAAA or CNAME record.
Buy a domain — registrar setup, payment and verification
1. Administrator: connect the registrar
Open Admin → DNS providers → Domain marketplace pricing. Select Sandbox, enter the Name.com API username and token, choose your percentage margin, and save. Test the saved connection. The token is encrypted and never returned to the browser. Configure Stripe or PayPal in Platform providers using the same test/live environment as the registrar.
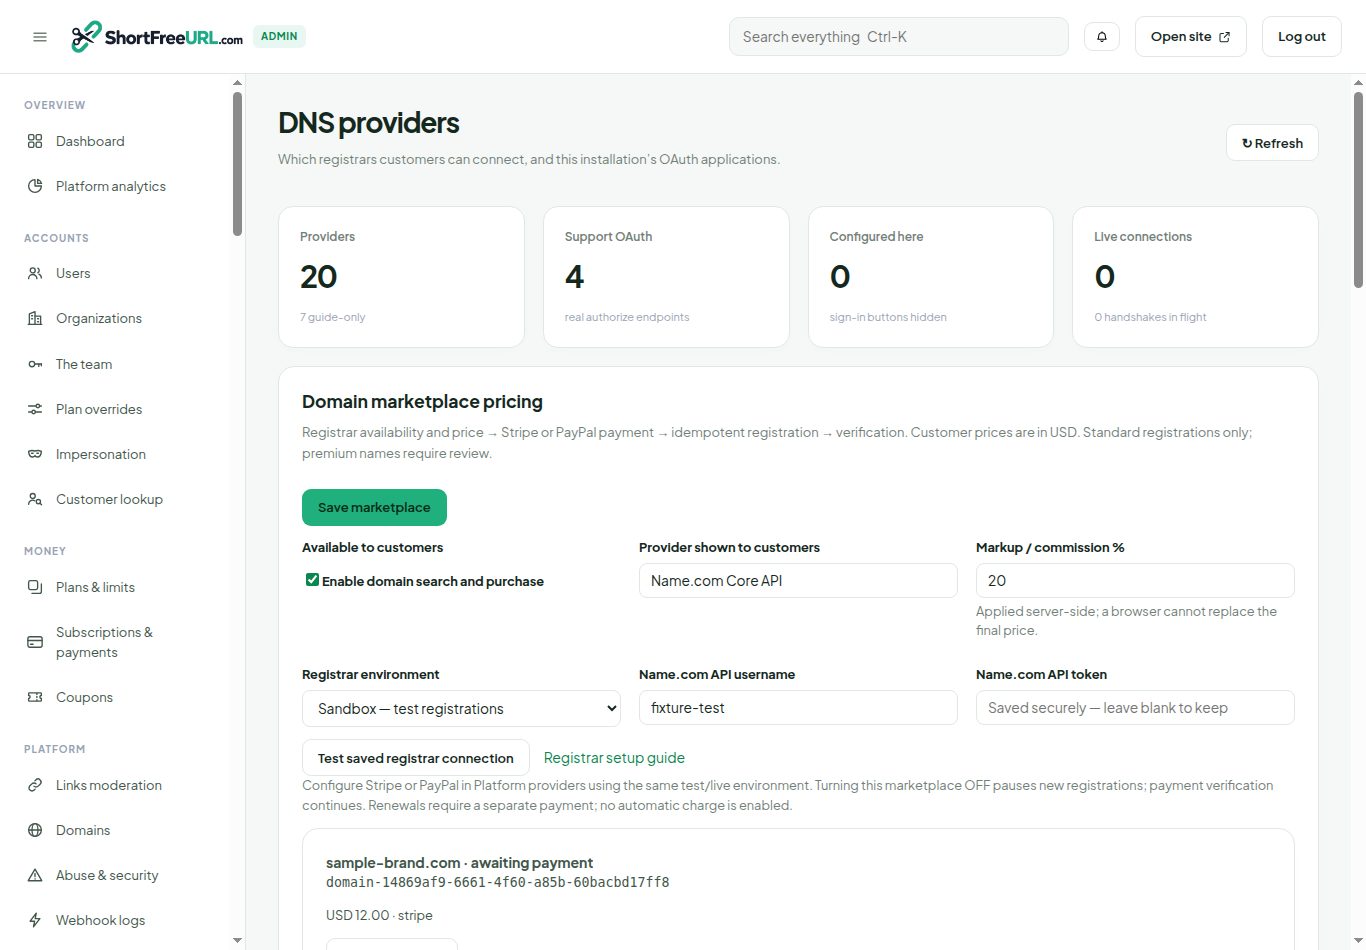
2. Search current registrar availability
Open Add Domain → Buy a domain. Search a brand or full domain name. Availability and prices come from Name.com; local database absence is never treated as proof of availability. Standard one-year registrations are supported. Premium names and registry-specific requirements may need support. Quotes expire after ten minutes. Prices are in USD and include the displayed operator margin.
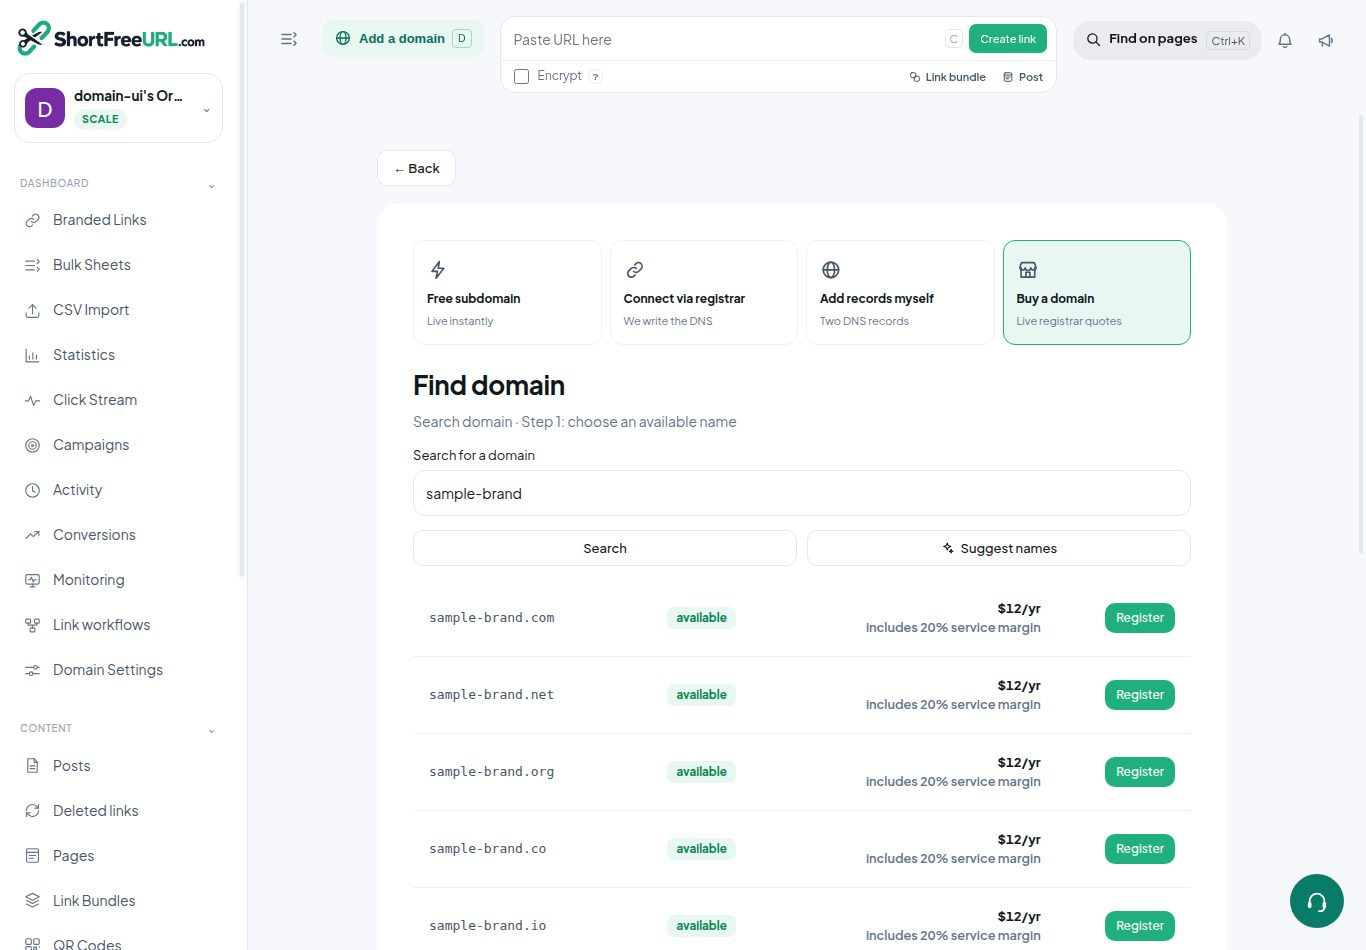
3. Supply accurate registration contacts
Select Register and fill in the contact form. Use a two-letter country code and an international phone number beginning with +. Review the contact-sharing consent and registrar agreement. The registrar may email you to verify the registrant contact.
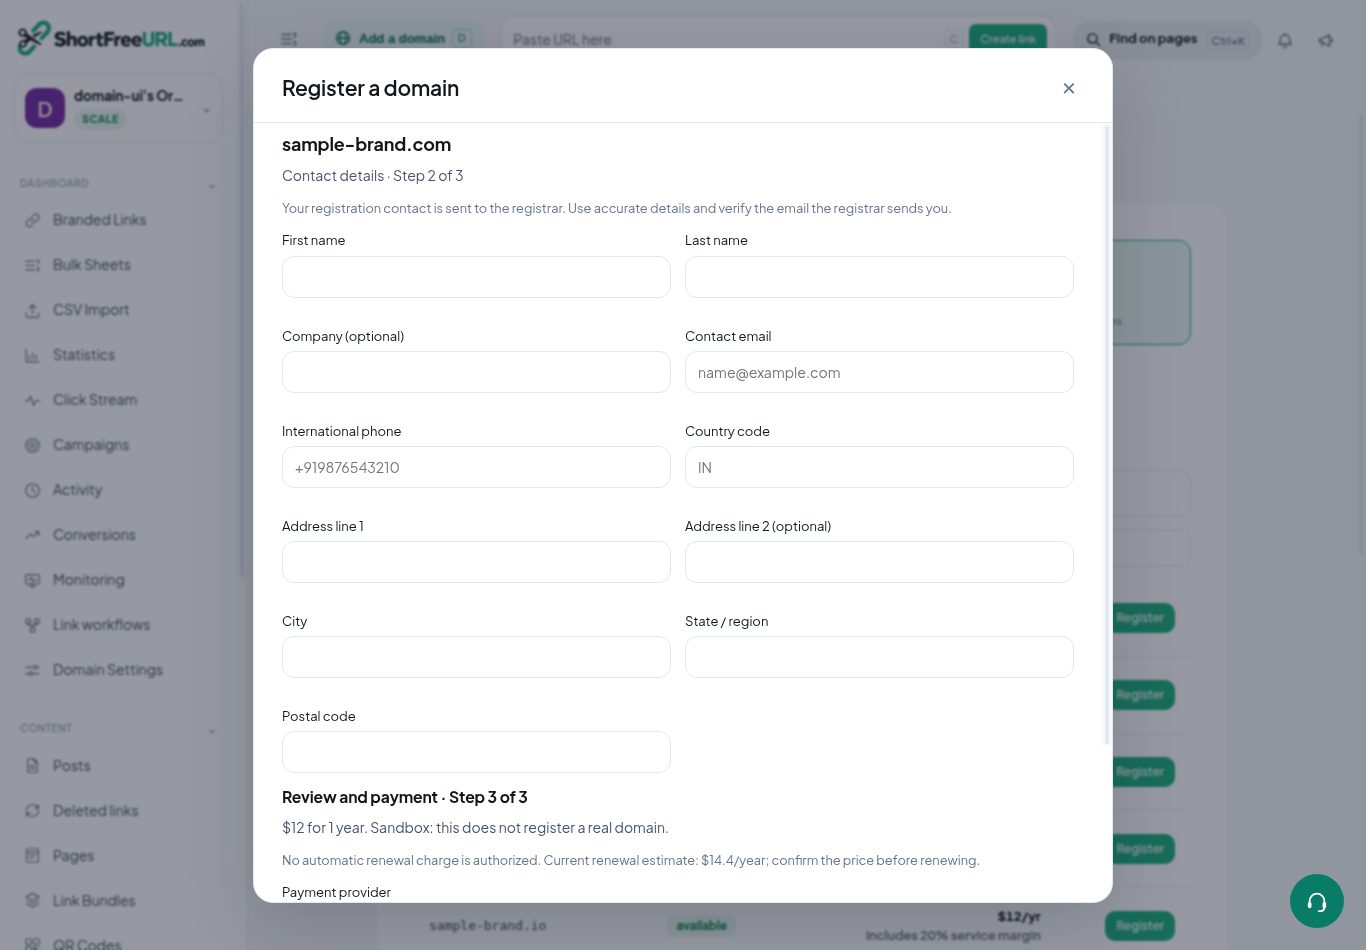
4. Pay through the configured provider
Choose Card / Stripe or PayPal. Continue to secure payment opens the provider checkout. Card details are handled by the payment provider. The application rechecks the quote before checkout, then independently retrieves payment status, amount, currency and order references. A browser return URL cannot mark an order paid. Registration does not change your subscription plan.
5. Verify registration and finish DNS
Open Purchased Domains. Use Verify payment / registration to refresh an order; the scheduled Domain order verification job also processes it. A confirmed registrar purchase must pass a separate domain lookup. Live registrations create a domain with DNS pending, and attempt to add the required A and CNAME records without replacing conflicting records. Complete DNS setup selects that domain and opens its configuration. Public DNS and SSL readiness remain separate checks. Sandbox orders are labelled and do not create real domain entries or real revenue.
6. Recover failed or uncertain orders
Administrators see order state, error and Verify / retry order in DNS providers. Requests use a durable lease and the same registrar idempotency key. Confirmed price or availability changes before registration produce Refund verified payment. Refunds remain pending until the payment provider confirms success. An uncertain registrar response requires verification; the system does not assume it failed and refund a potentially registered domain.
Renewals and operator controls
This checkout purchases one year. It does not authorize recurring charges. Contact support before expiry to arrange renewal; no local-only auto-renew switch claims that a registrar renewal has been scheduled. Turning the marketplace OFF stops new registrations while payment verification remains available. Live registration requires a funded registrar account, configured payment credentials and a correct public redirect IP. Never enable live registrar credentials together with test payment credentials.
API example
Create a quote using GET /api/domains/search?q=yourbrand. Then POST /api/domains/checkout as a workspace owner or administrator with quoteId, gateway, consent:true and registrant fields: firstName, lastName, address1, city, state, zip, country, email and phone. Optional fields are companyName and address2. Use the returned checkoutUrl; ignore any client-calculated amount. Read orders using GET /api/purchased-domains and verify one using POST /api/domains/orders/{id}/verify.
Links
The link editor, tab by tab
- Basic: slug, title, destination, tags and folder. AI suggests slugs and tags from the destination.
- Mobile targeting: separate iOS and Android destinations, plus Android package/action/component for intent links.
- Campaign tracking: the five UTM fields with saved templates and a live preview of the final URL.
- Geo-targeting: country, region and city rules. City beats region beats country; unmatched traffic goes to the default.
- Temporary URL: expiry date, click limit and TTL, with a fallback destination.
- Cloaking, Password, QR, A/B testing, HTTP status, Social media, Permissions, Tracking and Bundle round out the set.
- Use "Customize tabs" to hide the tabs you never open and reorder the rest.
The link editor and its tabs
Opening a link puts everything about it in one drawer, split across tabs. Most people use three of them. The rest exist because one workflow somewhere needs them.
The tabs
- Basic link editing — slug, title, destination, tags, folder, query-string merging, plus a read-only details panel showing clicks, human clicks, conversions, creation date, last click, creator, link ID and whether the link is encrypted.
- Mobile targeting — separate iOS and Android destinations, and the Android intent fields.
- Campaign tracking — the five UTM parameters with a live preview of the final URL, and saved campaign templates.
- Geo-targeting — city, region, country and continent rules.
- Temporary URL — expiry date, click limit, TTL and a fallback destination.
- Link cloaking — keep the short URL in the address bar.
- Password protection — a password and a contact address for the gate page.
- QR code — the full QR studio, saved as this link's style.
- A/B testing — up to ten weighted variations, or rotation mode.
- HTTP Status — 301, 302, 307 or 308 for this link.
- Social media — Open Graph, X card and App Links metadata.
- Link permissions — restrict the link to named teammates.
- Tracking — per-link GA4, GTM, Meta Pixel and AdRoll IDs, plus a custom snippet.
- Link bundle — add this link as a button on a bundle page.
New in September 2026 (Starter and above)
- App deep links — phones open YouTube, Instagram, WhatsApp, Spotify, X, Facebook, LinkedIn, Telegram, Amazon or your own app scheme in the app, with the web page as the fallback. Desktop visitors, bots and in-app browsers get the normal redirect.
- Referrer routing — up to 20 rules, first match wins: Instagram, Facebook, X, LinkedIn, YouTube, Google, WhatsApp, TikTok, Reddit, direct traffic or any website, plus an optional default for everyone else.
- Returning visitors — the first visit goes to the normal destination; from visit N (2 to 100) the visitor goes to another page. Remembered with a cookie on your short domain.
- Click alerts — an email, a webhook or both at up to ten click milestones or a daily click count. Each alert is sent once.
- Bots & crawlers — send bots to their own URL, block them, and choose whether their clicks count. Social preview crawlers keep reading your preview tags.
On every plan, pasting a URL fills in the page title and suggests tags and three free slugs; the Basic tab shows the same chips.
Rearranging them
The control at the end of the tab strip opens SHOW TABS: a checkbox and a drag handle per tab. Hide the ones you never open and reorder the rest. Basic link editing cannot be hidden or moved. The layout is saved to your profile, so it follows you to every link on every device, and it is per person — hiding a tab does not hide it from your colleagues.
Pro-gated tabs
Mobile targeting, App deep links, A/B testing, Referrer routing, Returning visitors, Click alerts, Bots & crawlers, Geo-targeting, Temporary URL, Cloaking, Password protection, HTTP Status, Social media, Link permissions and Tracking are paid features — the pricing page shows which plan each one needs. On the free plan the tab still opens and explains itself, but the fields are not saved: the server strips gated fields on write and the save response names the features that were dropped, which the dashboard surfaces as a warning rather than a silent success.
The footer
Open the link, jump to its statistics, or use the overflow menu to copy the short URL, duplicate, archive or delete. Deleting is permanent and frees the slug; archiving hides the link from the table while the redirect keeps working.
Folders, tags and folder defaults
Folders and tags solve different problems. A link lives in exactly one folder and carries any number of tags. Use folders for ownership and defaults, tags for cross-cutting description.
Folders
Folders belong to a domain. Moving a link into a folder is a single field in the editor, or a bulk action from the links table. The useful part is not the grouping — it is the defaults.
A folder can carry:
- a redirect type,
- a QR style,
- a custom tracking snippet,
- all five UTM values,
- an auto-delete period.
Every link created inside the folder picks these up unless the create request sets its own value. That is how you make a team tag its traffic consistently without asking anyone to remember: create the folder, set utm_source and utm_medium on it, and every link made there arrives correctly labelled.
Defaults apply at creation. Changing a folder default later does not rewrite links already inside it — use a bulk UTM update for that.
Tags
Tags are free text with no hierarchy. The tag list is derived from the links themselves, so it doubles as autocomplete and there is no separate place to manage it. A tag with no links stops existing.
Tags are searchable with tag:promo, filterable in statistics, and settable in bulk from the links table. The AI tag suggestion button in the editor proposes tags from the destination page's content, which is a reasonable starting point on an import of a few hundred links with no tags at all.
A workable convention
- One folder per team, campaign or client — whatever matches who owns the link.
- Tags for everything that cuts across folders: channel, quarter, asset type, language.
- Set UTM defaults on the folder, not on each link.
- Put an auto-delete period on folders holding generated or one-time links.
Limits
The free plan includes a small number of folders; each paid plan raises the cap. Deleting a folder does not delete its links — they simply lose the folder assignment, and keep the defaults they were created with.
Finding links and changing many at once
The links table is one domain at a time, newest first, up to 150 rows a page. Sorting is available on created date, updated date, clicks, conversions, title, slug and expiry.
Search syntax
The search box takes plain text — matched against slug, title, destination and tags — and a field syntax. Terms combine with AND:
path:spring
title:"Spring sale"
url:example.com
tag:promo
folder:Marketing
by:priya@acme.com
clicks:>500
created:>2026-01-01
updated:2026-08-14
expires:none
archived:true
cloaking:true
encrypted:true
redirecttype:301
Quotes hold a value with spaces together. Comparison operators >, <, >= and <= work on clicks and on the date fields. expires:none finds links with no expiry set.
Archived links are hidden by default; using archived: anywhere in the query turns that filter off, so archived:true shows only archived links and archived:false shows only live ones.
Bulk actions
Select rows and the bulk bar appears:
- delete — up to 150 at a time,
- archive and unarchive,
- add or remove tags,
- set UTM values across the selection,
- set an expiration date,
- move to a folder,
- update fields such as redirect type and cloaking,
- duplicate to another domain,
- export the selection as CSV.
Duplicate to domain is the tool for moving a campaign onto a new branded domain: the links are recreated on the target domain with their settings intact. It does not move click history, because clicks belong to the original links.
Archiving versus deleting
Archiving hides a link from the table. The redirect keeps working and clicks keep being recorded. Deleting is permanent, stops the redirect immediately, and frees the slug for reuse — which also means a printed QR code encoding that slug will point at whatever is created there next. Archive when in doubt.
Bulk editing as a sheet
For changes that are easier to see than to describe, the Bulk section has an in-browser sheet with the canonical columns, and CSV import and export around it.
Sending visitors to different destinations by location
Geo rules send visitors from a place to a destination made for them: a regional storefront, a language, a country-specific offer. One link, several landing pages.
Rule types and precedence
Four rule types are available: continent, country, state or region, and city. They are evaluated most specific first — city, then region, then country, then continent — regardless of the order you added them. Anything unmatched goes to the main destination, so keep that one useful.
Region and city rules hang off a country, so the picker narrows sensibly: choose the country, then the state, then the city. Region and city values accept free text as well as the listed options, because your analytics tool may name a subdivision differently from the geo database.
Building the rules
Add rules in the Geo-targeting tab. Each rule takes a list of values and one destination URL. A country rule listing several countries is one rule, which is usually clearer than one rule per country.
Rule sets can be saved as a geo template and applied to other links, which is how you keep a dozen campaign links pointing at the same set of regional stores without rebuilding the list each time.
Testing a rule
Open the short link with ?ms_geo=IN, or a fuller ?ms_geo=IN-MH, or ?ms_geo=IN-MH/Pune. The rule is evaluated as if you were there. The preview never counts as a click and never fires webhooks or pixels, so you can test as often as you like without polluting your data.
How reliable is the detection
Country detection is reliable. State detection is good on fixed lines and softer on mobile networks, where the address may belong to a gateway in another state entirely. City detection is softest of all. Design around that: never send someone somewhere they cannot leave. Put a visible region switcher on the destination page.
Interaction with other targeting
A matched geo rule wins over the iOS and Android destinations and over A/B variations — the visitor gets the geo destination, and no variation is assigned. If you need both, build the split into the geo destination page rather than expecting the two features to combine.
Country geo-targeting starts on the Starter plan, and region and city rules on Business; on the free plan geo rules sent to the API are dropped, and the response says so.
A/B testing and link rotation
One short link can serve several destinations. There are two modes, and they answer different questions.
Weighted split testing
Add up to ten variations, each with a destination and a percentage. The main destination receives whatever is left: three variations at 20% each means the main destination gets 40%. The editor shows the running total and warns when the variations exceed 100%.
A visitor is assigned once and kept on the same variation by a cookie for thirty days, so their experience stays consistent across visits. That is what makes the comparison meaningful — a visitor who sees a different page on every click tells you nothing.
Clicks are recorded with the variation they were sent to, and the statistics page shows an A/B variations card breaking clicks down by destination. Combine that with conversion tracking and you can compare variations by conversions rather than by clicks, which is the number that actually matters.
Rotation mode
Rotation ignores visitor identity and cycles through the destinations in order, round-robin. No cookie is set. This is right for rotating offers, rotating affiliate destinations, or distributing traffic across several servers; it is wrong for measuring which page converts better, because the same person gets a different page each time and your two samples are not comparable.
Practical notes
- Variations are per link. Duplicating a link copies them.
- A matched geo rule takes precedence: a visitor who matches a geo rule is never assigned a variation.
- Bots and preview crawlers hit the same logic. If a link is shared somewhere with an aggressive preview fetcher, some of your early traffic is not people. Filter to human clicks before drawing conclusions.
- Changing percentages mid-test does not reassign existing visitors — their cookie still points at the variation they were given.
Reading the result
Wait for enough clicks that a swing of a few dozen would not flip the winner, and prefer human clicks and conversions over total clicks. If two variations are within a few percent of each other after a genuine sample, the honest conclusion is usually that the page is not the constraint.
Expiring links, click limits and TTL
The Temporary URL tab holds four separate mechanisms. They can be combined, and they do different things.
Expire at
An absolute moment after which the link stops working. Stored as an absolute time and displayed in your profile timezone. Right for an offer that ends, an event registration that closes, or a document that should not outlive a deal.
Click limit
The link stops after a given number of clicks. Useful for a limited allocation — the first hundred people through the door.
Be careful here: preview bots from messaging apps and social networks fetch the link before showing a card, and those fetches consume clicks against the limit. Set the robots policy to "Don't follow short links" in Domain settings, and pad the limit, or a link shared into a busy group chat can exhaust itself before a person clicks it.
Delete after (TTL)
Where expiry stops the redirect, TTL deletes the link entirely at the given time. It is the right tool for generated links — one-time invitations, per-order tracking, anything created by an integration in volume — where the link has no value after its moment and you do not want a million dead rows.
Folder defaults can set a TTL automatically for every link created in a folder, which is easier than remembering to set it per link.
Fallback destination
Where expired traffic goes. Without one, visitors get a themed "link expired" page styled with your domain's colours, served with a 410. With one, they are redirected. A fallback is almost always kinder: send people to the current offer, or to the page the expired thing lived on.
What expiry does not do
An expired link is not deleted, and its statistics stay intact — you can still see what it did before it stopped. It can be un-expired by clearing the date, and the same slug keeps working for anyone who saved it. If you need the link genuinely gone, delete it, and remember that the slug becomes available for reuse.
Expiration, click limits, TTL and the fallback destination are on the Growth plan and above. On plans without them they are stripped on save and the response names what was dropped.
Control forwarded URL parameters and anchors
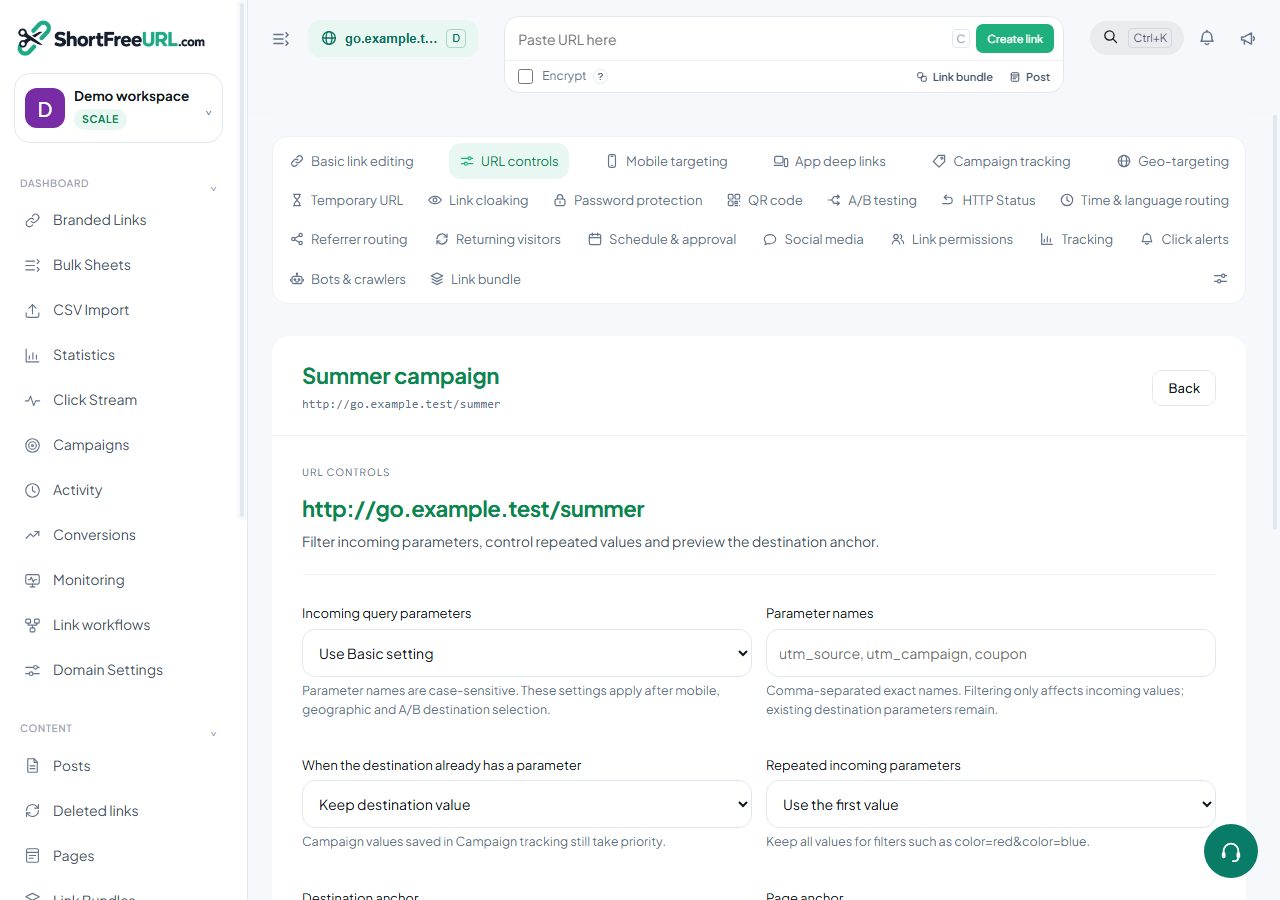
1. Open URL controls
Select a link in Branded Links and choose URL controls.
2. Choose which parameters pass through
Keep the inherited behavior, forward all, forward none, or enter an allowlist/blocklist. Names are case-sensitive. Reserved service parameters are never forwarded by this policy.
3. Resolve repeated values
Choose whether existing destination values or incoming values win. Preserve all repeated values only when the destination expects them.
4. Set an anchor
Keep, replace or remove the fragment. URL controls apply to HTTP(S) destinations; contact and encrypted destinations do not support them.
5. Preview and save
Enter sample query parameters in the offline preview. Previewing does not create a click. Saved campaign UTM values take precedence; real routing can also select a device or geographic destination. Save, reopen the record and make a controlled test visit.
Write and publish Posts in Markdown
A Post is a page published straight to a short link on your domain: write Markdown in Posts → New post, choose Published, and share the link. There is no CMS, static site or hosting to set up, and every visit is counted like any other click — sources, devices, countries and cities.
The editor shows a live preview drawn by the same renderer as the published page. Raw HTML is shown as text and never runs, and links and images only keep web, email, relative and anchor addresses.
Text
# Heading,## Section,### Subsection— or underline a line with===or---.**bold**,*italic*,~~strikethrough~~,==highlight==andinline code.- Two spaces or a backslash at the end of a line force a line break.
Links and images
[text](https://example.com "optional title")and.- Reference-style:
[the docs][docs]with[docs]: https://example.com/docsanywhere in the post. <https://example.com>becomes a link on its own.
Quotes and alerts
A line starting with > is a quote. GitHub-style alerts use a marker on the first line:
> [!NOTE]
> Useful information.
The markers are NOTE, TIP, IMPORTANT, WARNING and CAUTION, each with its own colour.
Lists
- Bullets with
-,*or+; numbers with1.— a list may start at any number. - Indent by two or more spaces to nest a list inside an item.
- Task lists:
- [x] Doneand- [ ] To doshow as ticked and unticked boxes.
Tables
| Left | Center | Right |
|:-----|:------:|------:|
| a    |   b    |     c |
Colons in the separator row set each column's alignment. Use \| for a pipe inside a cell.
Code
Fence code with three backticks and a language name. JavaScript, TypeScript, Python, Bash, JSON, SQL and HTML are highlighted; any other language is shown as plain monospaced text.
Footnotes, definitions and abbreviations
- Footnotes:
a claim[^1]and[^1]: the source; they are numbered in order and listed at the end with a link back. - Definition lists: a term on one line, then
: its definitionon the next. - Abbreviations:
*[HTML]: Hyper Text Markup Languageadds a hover explanation to every HTML in the post.
Formulas
Write LaTeX between $…$ for inline math and $$…$$ (or a ``math block) for a displayed formula. Fractions, roots, sums, integrals and limits with bounds, Greek letters, matrices (pmatrix,bmatrix,vmatrix) and piecewise functions (cases`) are supported, and render as native browser math. A dollar sign followed by a number, like $5, stays a price.
Diagrams
A ```mermaid block draws flowcharts, sequence diagrams, Gantt charts and entity–relationship diagrams on the published page. The Mermaid library is loaded only on posts that contain a diagram, and it runs in its strict mode, which does not allow HTML in labels. The editor preview shows the diagram source.
Publishing
- Slug sets the short link path; leave it empty to derive one from the title.
- Status: Draft is private, Published is live, Scheduled goes live at its date.
- SEO title, SEO description and Hide from search engines control how the page appears in search and when shared.
- A post follows the domain's theme and favicon.
Analytics
Reading your statistics
- Every card respects the current date range and filters. Change the range once and the whole page follows.
- Human clicks exclude known crawlers and preview bots. Compare human-to-human across periods, never human against total.
- Click Stream is the raw log — one row per click, with configurable columns and CSV export.
- Share creates a public, revocable statistics link with a maximum 30-day window.
Reading the statistics dashboard
Statistics exist at three levels: the organisation-wide overview on the home screen, a page per domain, and a page per link. All three obey the same date range and filters.
The four KPI cards
- Short URLs created — links created inside the window, not links that exist.
- Total clicks — every request that reached the redirector, bots included.
- Avg clicks / short URL — total clicks divided by links created.
- Human clicks — clicks with the bot flag clear.
Each card compares against the immediately preceding window of the same length. When the previous window is empty there is no comparison shown, because growing from zero is not a percentage and printing one would read like a trend.
The cards below
Clicks over time, with hour, day, week and month intervals, and gaps filled so a quiet day reads as zero rather than disappearing. Then a set of breakdowns: top links, countries with a world map, states and regions, cities, referrers, social referrers, browsers, operating systems, devices, UTM sources, mediums and campaigns, and languages. A heatmap shows clicks by hour and weekday. Conversion and QR scan cards appear alongside them, and an A/B variations card when a link has variations.
Every breakdown row is clickable: it opens the detail view for that dimension, which is the full list rather than the top handful. The top lists show a small logo or flag in front of each browser, operating system, referrer, social network, country and city, and the countries map spans the full width of the page.
Trends (Starter and above, new in September 2026)
- Previous-period line — a dashed line on the clicks chart for the window just before, bucket for bucket.
- Top links leaderboard — the ten busiest links with their change against the previous period and a small trend line each.
- Traffic sources — clicks split into social, search, email, direct and other websites.
- Unique vs total clicks — unique visitors, clicks per visitor and the share of returning visitors. Clicks on domains that hide visitor IPs are counted separately.
- Best time to post — the busiest hour, day and three-hour stretch in your timezone, once there are at least 20 clicks.
- Print — lays the page out for paper or Save as PDF.
On Free these cards show a lock and an Upgrade button.
Rearranging
The Rearrange control reorders the cards and the order is remembered. Nobody needs the language breakdown above the click chart, and different teams disagree about what comes second.
QR scans
Scans arrive with ?qr=1 on the URL, so they are recorded as scans and reported separately from ordinary clicks. A QR code you generated here always carries the parameter; a code someone else generated from your short URL does not, and its scans count as ordinary clicks.
Exporting and sharing
Download the current view as XLS, respecting the active filters. The Share control publishes a read-only statistics page on a URL you can hand to someone without an account, and shared pages can be revoked from the same place.
Nothing is sampled
Every request is written to the click log. The numbers are counts, not estimates.
The click stream: one row per request
The click stream is the raw log behind every chart — one row per request, newest first, 100 rows a page. When a number on the dashboard looks wrong, this is where you find out why.
What is recorded
Each click carries far more than a timestamp:
- Identity — a click ID, the link and domain, the path, the destination actually served, and the HTTP status returned.
- Classification — human or bot, and the detected bot name.
- Location — country, country name, region, city, postal code, latitude and longitude, timezone, continent, and the source the geo data came from.
- Network — IP (unless the domain hides it), ASN, network name, and whether the address looks like a proxy.
- Client — browser and version, OS and version, device type, user agent, primary language, and viewport when the browser sends the hint.
- Traffic — referrer, referrer host and path, social network, search engine and search term, and the five UTM values.
- Flags — QR scan, A/B variation served.
Choose which of these appear as columns from the column menu; the choice is grouped by category and remembered.
Live tail
Live tail refreshes the top of the stream every five seconds. It is the fastest way to confirm a link works after publishing: post it, watch the row arrive, check the destination column is what you expected.
New in September 2026 (Starter and above)
- Live mode — new clicks are added to the top every few seconds and highlighted; it pauses while the tab is hidden.
- Filter bar — country, device, browser, operating system, traffic source, one link, people or bots, a date range and flagged-only. The filters are kept in the address, so a filtered view can be bookmarked.
- How it was handled — each click shows the rule that chose its destination: default, time & language, referrer, returning visitor, geo, mobile, A/B or a bot rule. Clicks from before 24 September 2026 show "Not recorded".
- Visitor journeys — the same visitor's other clicks across your links within seven days, grouped into sessions. Not available when the domain hides visitor IPs.
- Flags — why a click looks suspicious: bot, fake crawler, proxy or VPN, no browser identification, or blocked.
- Full CSV export — every filtered click, up to 100,000 rows, with traffic source, route and flags columns.
Filters and export
The same filter dialog as the statistics page applies here — date range, human or bot, country, city, browser, device, referrer, UTM values, folder, tag, QR only. Export the filtered stream as CSV, up to 1,000 rows per download.
Inspecting a single click
Each row opens a detail view for that click ID, showing everything recorded, including the click IDs forwarded from ad platforms (gclid, fbclid, ttclid and the rest) and whether a conversion has been attributed to it.
Retention
Each plan keeps click data for a bounded period that grows with the plan; Scale keeps it indefinitely. If you need the raw stream in a warehouse, the daily S3 export writes one newline-delimited JSON file per day into your own bucket, which is the right tool at that volume — webhooks would be millions of individual calls.
Date ranges and filters
Every statistics view — the overview, a domain, a link, the click stream and conversions — shares one filter state. Set it once and it follows you between pages.
Date ranges
The period control offers the usual presets and a custom range. The comparison shown on the KPI cards is always the immediately preceding window of the same length, so a 7-day view compares against the 7 days before it. Changing the interval on the click chart between hour, day, week and month does not change the range, only the bucket size.
The date grouping uses the domain's reporting timezone, set under Domain settings, Statistics. If your audience is in one country and your team is in another, set it to the audience's timezone: a daily chart bucketed in UTC puts a domestic evening peak on the wrong day.
The click mode
Three values, and it is the filter people forget:
- All — every request.
- Humans — bot flag clear.
- Robots — bot traffic only, which is worth looking at occasionally to see what is fetching your links.
Dimension filters
Country, region, city, browser, OS, device, status, path, social network, referrer host, UTM source, medium and campaign, plus folder, tag and QR-only. Multiple values within one dimension are OR; different dimensions are AND. So two countries and one browser means "either country, on that browser".
Filter values are populated from your own data, so the country list contains only countries that have actually clicked. There is also a free-text search that matches path and destination.
Dimension filters are on the Growth plan and above. Date range and the human/bot mode work on every plan, and the dashboard says so rather than hiding the controls.
Filters and exports
The XLS export from the statistics page and the CSV export from the click stream both respect the active filters. That is the intended way to answer a specific question: filter until the view is the question, then export the answer.
A caution about narrow filters
Filtering to a city and a browser and a campaign will usually leave you with a sample too small to mean anything. Filter to one dimension at a time, read the number, then decide whether the next filter is worth adding.
Bots, preview fetches and why two click numbers differ
Total clicks and human clicks are always different, and the gap is not an error. Understanding it prevents the most common misreading of link analytics.
Nothing is discarded
Every request that reaches the redirector is written to the click log, bots included, and classified afterwards. That is deliberate: a filtered-at-write-time log cannot be re-examined when the classifier turns out to be wrong, and a link that looks unexpectedly popular can be explained rather than merely doubted.
Each row carries a human flag and, when a bot was detected, its name. The dashboard reports both totals; the click mode filter switches between them.
Where bot traffic comes from
- Link preview fetchers. Post a link in a messaging app, a social network or a team chat and the platform fetches it to build a card. A link shared into a large group can accumulate dozens of these before a person clicks.
- Security scanners. Corporate mail gateways and endpoint protection follow links in email to check them.
- Crawlers. Search engines and SEO tools, unless the robots policy tells them not to follow.
- Monitoring. Your own uptime checks, if you point one at a short link.
Tuning the filter
Domain settings, Statistics, has a bot filter level:
- Off — count everything as human.
- Standard — known crawlers are flagged.
- Strict — known crawlers plus behavioural signals.
Strict flags more traffic as automated. Neither setting deletes anything; both only change classification.
Prevent scraping
A separate switch. With it on, suspicious automated traffic is served a browser check before the redirect. Preview bots are exempt, because blocking them breaks link cards everywhere. Use it on domains where someone is enumerating slugs, not as a general default — it adds a step for a small share of real visitors.
Your own traffic
The IP exclusion list under Domain settings, Statistics stops clicks from listed addresses being recorded at all. Add your office range and your VPN egress addresses. A team of ten testing a campaign link before launch can otherwise account for a visible share of its first day.
Click limits
Bot fetches consume clicks against a link's click limit. Set the robots policy to "Don't follow short links" and pad the limit.
Connecting clicks to signups and revenue
Clicks tell you a link was interesting. Conversions tell you it worked. The mechanism is a click identifier that travels from the redirect to your destination and back.
How it works
Turn on conversion tracking in Domain settings, Tracking. Every redirect then appends a clid parameter to the destination URL. On your landing page, read clid from the query string on first page view and store it — a cookie, a session, or a hidden form field. When the visitor converts, report it back.
Reporting a conversion
Server-side is the recommended path, because it survives ad blockers and privacy modes:
POST /api/conversions
Content-Type: application/json

{ "clid": "<the stored click id>", "value": 49.99, "source": "checkout", "currency": "USD" }
A pixel is easier to deploy if you cannot change server code:
<img src="https://yourdomain/api/conversions/pixel.gif?clid=CLID&value=49.99" width="1" height="1" alt="">Both look the click up by its ID, record the conversion against the link and domain that produced it, and mark the click as completed. The endpoint needs no authentication — the click ID is the credential, and an unknown one returns 404.
Deduplication
A click is marked completed the first time a conversion is attributed to it, and the pixel will not record a second conversion for the same click ID. Deduplicate on your side too: a refreshed thank-you page should not report twice.
What you get
The Conversions page shows a count, total value, and a table of individual conversions with source, value, time, location and click ID. Conversion counts also appear per link in the links table and in the link editor's details panel, and as a card on the statistics page, so you can sort links by conversions rather than clicks.
What this is and is not
This is last-click attribution at the link level: the conversion is credited to the link that produced the click whose ID you reported. It does not model multi-touch journeys, and it does not know about conversions that started somewhere other than one of your links.
Conversions count against a monthly plan limit. When the limit is reached the endpoint returns 402 rather than silently dropping the event.
Getting the data out: exports, shared pages and S3
There are four ways to move click data out of the dashboard, and they suit very different volumes.
XLS export from statistics
The download button on the statistics page exports the current view — the same aggregates you are looking at, with the active date range and filters applied. Right for a monthly report or a slide.
CSV export from the click stream
The click stream exports raw rows, up to 1,000 per download, again respecting filters. Right for investigating something specific: every click on one link from one country last Tuesday.
The links table has its own CSV export covering the current selection, which is about links rather than clicks — useful as a backup before a bulk change.
Shared statistics pages
The Share control publishes a read-only statistics page on its own URL. Anyone with the link sees the numbers without an account and without access to the dashboard. This is the sane answer to a client or an executive who wants to check numbers themselves. Shares are listed and can be revoked, and revoking takes effect immediately.
Daily S3 export
For warehouse analysis, Domain settings, S3 Export writes one newline-delimited JSON file per day into your own bucket. One row per click, with the same fields the click stream shows:
{"clid":"…","ts":"2026-09-05T10:00:00Z","path":"spring","destination":"https://…","country":"IN","city":"Mumbai","browser":"Chrome","os":"Android","device":"Mobile","human":true,"referrer":"https://…","utm_source":"instagram"}Set the destination bucket in Domain settings and the IAM role ARN in Organization settings, so the export has permission to write. This is the right tool where webhooks would be millions of individual HTTP calls.
Webhooks, for the real-time case
If you need clicks as they happen rather than as a daily file, configure a webhook URL under Domain settings, Tracking. Every click is POSTed as signed JSON. Use it for alerting and automation, not for bulk analysis.
Retention
Click data is kept for a bounded period that grows with the plan, and indefinitely on Scale. If you are on a retention window and need history beyond it, schedule the S3 export or a regular CSV pull before the window closes — expired rows are gone.
QR codes
QR code studio
- Style with themes, custom colours, finder shapes, rounded modules, a centre logo and a caption.
- Download PNG, SVG or PDF. Use SVG or PDF for anything going to print.
- Publish creates a permanent image URL you can embed; Revoke deletes the image and breaks that URL.
- Classic QR codes are not saved automatically — download or publish them.
- Scan traffic carries ?qr=1 so QR scans are reported separately from ordinary clicks.
The QR studio
The same QR studio appears in three places: the QR tab of the link editor, the QR codes page, and Domain settings where it sets the domain default. The controls are identical everywhere.
What you can change
- Theme — eight preset palettes: classic, midnight, coral, forest, bubble, ocean, berry and amber. Picking a theme resets the individual colours to that theme's values.
- Colours — foreground, background and eye colour, set individually once you want to go past a preset.
- Corner style — square, rounded or dot finder patterns.
- Module style — square or dot.
- Corner radius — a slider from 0 to 50.
- Error correction — L, M, Q or H.
- Caption — a short line of text under the code, such as "Scan for the menu".
- Centre logo — an image under 400 KB, which raises error correction to H automatically.
The preview redraws on every change, so you can see immediately when a colour combination has stopped being scannable.
Where a style is stored
A style set in the link editor is saved with that link and used every time you download its code. A style set in Domain settings becomes the default for new codes on that domain. A folder can carry a QR style as a default too. The precedence runs link, then folder, then domain.
Downloads
Four buttons: PNG at 512, PNG at 2048, SVG and PDF. For anything printed, use SVG or PDF — they scale without softening the module edges, which is what makes a marginal code fail at the printer.
Classic codes are not saved automatically
Generating a code in the studio does not create a stored object. Download it, or publish it as a permanent image URL. The QR codes page lists the codes you have published, not every code ever previewed.
Scans are tracked
A code generated here encodes the short URL with ?qr=1, so scans are recorded as scans and reported separately from ordinary clicks. Generate a code elsewhere from the same short URL and its scans are indistinguishable from clicks — which is a good reason to generate here.
AI artwork
The AI artwork option blends generated artwork with a high-error-correction code and verifies the result still scans before showing it. It starts on the Starter plan.
Error correction, logos and contrast
A QR code is readable because a scanner can reconstruct damaged parts of it. How much damage it tolerates is the error-correction level, and every design decision trades against it.
The four levels
- L — around 7% of the code can be lost.
- M — around 15%. The default, and right for most on-screen and print use.
- Q — around 25%.
- H — around 30%. Use this whenever anything sits on top of the code.
Higher correction means more modules for the same data, so the code gets denser. A dense code printed small is harder to scan than a sparse one, which is the trade: correction protects against damage, density fights against small sizes.
Logos
Adding a centre logo raises the level to H automatically, because the logo is destroying part of the code. Keep the logo under about a fifth of the code's width. A logo that covers a third of the area will pass a preview on a bright phone screen held still, and fail on a printed poster in bad light.
Logos are limited to 400 KB and must be an image the browser can read. A simple mark with a solid background works far better than a detailed photograph.
Contrast and colour
Scanners look for dark modules on a light background. The rules that matter:
- Keep the foreground genuinely dark and the background genuinely light. A mid-grey on white is the most common cause of an unreliable code.
- Do not invert — light modules on a dark background fail on many scanners.
- Avoid gradients across the whole code, and never place a code on a photograph.
- Keep the quiet zone. The white margin around the code is part of the code.
Test before you commit
Test with more than one phone, at the real distance, in the real light. A code on a restaurant table is scanned in dim light by a phone held at arm's length; a code in a slide deck is scanned from the back of a room. Both are harder than the preview on your monitor.
If a code is going to print in volume, print a proof first and scan the proof. A design that works on screen and fails on uncoated paper is a common and expensive discovery.
Putting QR codes on printed material
Print is where QR codes earn their place and where mistakes are most expensive, because you cannot edit a poster after it ships. What you can edit is the destination — which is the entire argument for encoding a short link rather than a destination URL.
Use vector formats
Download SVG or PDF for anything that goes to a printer. PNG at 2048 is acceptable for large-format work at a pinch, but a raster code scaled up softens the module edges, and soft edges are exactly what a scanner struggles with.
Sizing
A workable rule of thumb is about one centimetre of code for every twenty-five centimetres of scanning distance. A code read from half a metre wants roughly two centimetres; a code across a room wants a great deal more than people expect. Round up — a code that is slightly too big costs nothing.
Keep the quiet zone: the clear margin around the code is structural, not decorative, and designers remove it more often than any other element.
Tell people what they get
A bare code on a wall is scanned by very few people. A caption — the studio has a caption field — changes the response rate noticeably. "Scan for the menu" is better than "Scan me", which is better than nothing.
Encode a short link, never the destination
Encoding the final URL means the code is permanent and wrong the moment the destination moves. Encoding a short link means you change the destination in the dashboard and every printed copy follows. This is the single most valuable property of a QR code on print.
For the same reason, never delete the link behind a printed code, and never edit its slug. Deleting frees the slug for reuse, so a future link could inherit your poster's traffic. Archive instead of deleting.
Measuring
Codes generated here encode the short URL with ?qr=1, so scans appear separately from clicks in statistics. Give each placement its own link — one for the poster, one for the flyer, one for the table tent — and you can compare placements rather than guessing. Set the UTM values on those links too, so the destination's own analytics can tell them apart.
Before the print run
Scan a proof, from the real distance, on more than one phone.
Generating QR codes in bulk
When a set of links all need codes — a product catalogue, a conference programme, a hundred table tents — generating them one at a time in the studio is the wrong approach.
From the links table
Select links in the table and use the bulk QR action. Every selected link gets a code, generated with the style that applies to it: its own saved style if it has one, otherwise the folder default, otherwise the domain default. The result is a single download containing one file per link, named by slug so you can match files to links without opening them.
Because the style comes from the link, folder and domain defaults, the sensible preparation is to set the style once at the folder or domain level and then select and export. Styling a hundred codes individually is work nobody needs to do.
From the QR codes page
The QR codes page has a bulk export that covers a whole domain or a filtered set, and it lists the codes you have published as permanent image URLs.
Choosing a format for a batch
- SVG for anything going to a designer or a printer.
- PDF when the codes will be placed directly into a print layout.
- PNG 2048 for a batch destined for a web CMS or a slide deck.
- PNG 512 for on-screen use where file size matters.
Codes for links that do not exist yet
If you are producing codes for links you are about to create, create the links first — by CSV import or the bulk sheet — then select and export. The code encodes the short URL, so the link has to exist for the code to be correct.
Naming and tracking
Give the links slugs that mean something before you generate, because the exported filenames come from the slugs. menu-table-01 through menu-table-40 is a batch you can work with; forty random six-character slugs is not.
Each code carries ?qr=1, so scans are separated from ordinary clicks. If you also want the destination's analytics to distinguish them, set the UTM values on the links first — a bulk UTM update across the selection takes one action.
Limits
Very large batches are generated server-side and returned as one download; extremely large sets are better handled in a few passes filtered by folder or tag.
Publishing a QR code as a permanent image URL
Sometimes you do not want a file — you want a URL you can drop into a template, an email, a CMS or a partner's site. That is what publishing a code does.
What you get
Publish from the studio and you receive two things: a permanent image URL, and an embed snippet ready to paste into HTML. The image is served from your instance and stays available until you revoke it. The style, size and format are fixed at publish time.
Where this is worth it
- Email templates. An email client cannot render an SVG reliably and cannot generate a code. A published PNG URL works everywhere.
- A CMS with no file management. Paste the URL into an image field.
- Documents generated by software. An invoice or a ticket template can reference the URL rather than embedding bytes.
- Partner sites. Give a partner a URL rather than a file that will be resized, recompressed and eventually lost.
Managing published codes
The QR codes page lists everything you have published, with the link it belongs to and when it was created. Revoking one stops the image URL serving. That is a real consequence: anything embedding it shows a broken image, including emails already sent. Revoke deliberately.
The relationship with the link
A published code encodes the short URL, so the destination is still editable — changing where the link points changes where every copy of that image leads. What you cannot change is the code itself: republishing with a different style produces a new URL.
For the same reason, do not delete the underlying link while a published code is in circulation, and do not change its slug. Archiving the link keeps the redirect working while removing it from the table.
Scans
Published codes encode the short URL with the QR marker, so their scans are recorded as scans rather than as ordinary clicks and appear in the QR card on the statistics page.
Alternatives
If the image only needs to exist once — a poster, a slide — download it instead. A published URL is a small piece of infrastructure you now have to remember exists; use it when something else is going to fetch the image repeatedly.
How QR scans are counted
A QR scan is a click. It goes through the same redirect pipeline, gets the same geo and device detection, and lands in the same click log. One flag separates it.
The marker
Codes generated in the studio encode the short URL with ?qr=1. The redirector sets the QR flag on the click when it sees that parameter, or when utm_medium=qr is present. Everything else — country, city, device, referrer, destination served — is recorded exactly as for a typed or clicked link.
Where scans appear
- A QR scans card on the statistics page, showing the count for the current range and filters.
- A QR only filter that restricts every other card to scan traffic, so you can see which countries, devices and links scans came from.
- The qr_scan column in the click stream and in the S3 export.
What scan data actually tells you
Device and OS breakdowns are the useful part: they tell you the split between iOS and Android on physical placements, which is worth knowing before you build an app-install campaign. Referrer is almost always empty, because a camera app is not a web page. Location is often more accurate than for ordinary clicks, since the person is physically near the code — though it is still an IP lookup, not a GPS reading, and a mobile network can place someone in a different city entirely.
Getting per-placement numbers
The flag tells you a scan happened, not which poster it happened on. For that, give each placement its own link. Ten links pointing at the same destination, one per location, and the top-links breakdown becomes a placement report. Set UTM values on each so the destination's own analytics can distinguish them too.
Codes you did not generate here
If someone generated a code from your short URL with an external tool, it encodes the plain URL with no marker, and its scans are recorded as ordinary clicks. There is no way to recover the distinction afterwards. Generate codes in the studio and this problem does not arise.
Bots
Codes are occasionally fetched by crawlers and scanners after the URL leaks onto the web. The human flag still applies, so filter to human clicks before reporting scan numbers to anyone.
API
API keys and rate limits
- Secret keys have full access. Public keys can only create links and are safe in a browser.
- Scope a key to a single domain or team to limit its blast radius.
- The limit is 50 requests per second per key. Use bulk endpoints for large jobs.
- A 429 response includes Retry-After. Respect it rather than retrying immediately.
Billing
Plans, billing and invoices
- Free includes 1,000 links, 5 custom domains, 1 free subdomain, 3 folders and 50,000 tracked clicks a month.
- Paid plans start at $4 per month, or ₹332 in India, and every tier can be bought without a sales call.
- Indian customers are billed in INR through Easebuzz with UPI, netbanking, cards and wallets, and receive GST invoices.
- If a payment fails, links keep redirecting — only Pro-gated features are disabled until billing is fixed.
What is on each plan
There are five plans: Free, Starter, Growth, Business and Scale. Free is a working product rather than a trial — the difference between plans is targeting, control and scale, not whether links work.
What Free includes
Creating and editing links with custom slugs, changing destinations at any time, tags, folders, archiving, duplicating, the UTM builder, the classic QR studio, markdown posts, main page and 404 redirects, free SSL on every domain, the statistics dashboard, the click stream (the time, link, country and IP of each click), the hour-by-weekday heatmap, link compare, the needs-attention list, shared statistics pages, the REST API, the browser extension and MCP.
What each paid plan adds
- Starter — mobile targeting for iOS and Android; A/B testing and link rotation; link bundles (link-in-bio); CSV import and Bulk Sheets; saved UTM presets; CSV and XLS exports; visitor statistics (new vs returning, how clicks arrive, clicks by weekday, click velocity and when clicks arrive); full click details in the click stream (where it came from, device, campaign, result, region, city, continent and timezone); the Campaigns roll-up; conversion tracking; browser and OS version breakdowns; Google Ads, GA4 and Meta tracking; Zapier, Make, Slack, Segment and WordPress, with multiple accounts per provider; click webhooks; country geo-targeting, AI QR artwork, referrer hiding, hide visitor IP, prevent scraping, robots policy control, deleted-link recovery, and removal of the "Powered by" badge on visitor-facing pages.
- Growth — expiry by date, click limit and TTL; cloaking; password protection; the 301/302/307/308 choice; Open Graph and social metadata; campaign templates; per-link tracking pixels; signed redirects; destination restrictions; advanced dimension filters; precise click location (postcode, coordinates and network operator); teams and roles; the AI assistant.
- Business — region and city geo-targeting, mobile deep links, encrypted links, per-link permissions, custom SSL upload and priority support.
- Scale — SAML single sign-on, multiple teams, daily S3 click export and unlimited retention.
Each plan includes everything in the plans before it.
The limits that matter
Every plan has caps on team members, total links, custom domains, free subdomains, API-created links, tracked clicks per month, conversions per month, folders, uploaded storage, the AI budget, and how long click data is retained. Each step up raises them.
Current values are shown on the pricing page and in Billing, and they are set per instance rather than hard-coded, so check there rather than trusting a number in a document.
Where a limit bites
Reaching the link limit means creates fail with a message naming the limit. Reaching the monthly conversion limit means the conversions endpoint returns 402. Reaching the retention window means old clicks age out. Nothing is deleted because you crossed a limit — links and clicks you already have stay.
Upgrading, currency and payment methods
Upgrading takes effect immediately on payment. There is no provisioning step and no waiting for a sales conversation.
Currency
Indian customers are billed in INR and everyone else in USD. The currency is resolved from your organization's billing country first, then the location of the request, then the browser's language settings. Set the billing country in Organization settings if the automatic choice is wrong — it affects both the currency and the tax treatment on the invoice.
Prices for both currencies are shown on the pricing page, monthly and yearly.
Paying
Checkout is handled by the payment gateway. INR payments support UPI, netbanking, cards and wallets; USD payments are by card. You are returned to the dashboard when the payment completes, and the plan is active by the time you land.
Only owners and admins can start a checkout. A user or readonly member sees the upgrade prompt but cannot complete it, which is deliberate — billing is not a role you want to be implicit.
What changes on upgrade
Every feature of the new plan unlocks at once across the organization, for every domain and every member. The "Powered by ShortFreeURL" badge is removed from visitor-facing pages on all your domains automatically. Plan limits are lifted.
Settings you tried to save while on Free are not restored retroactively. Gated fields are stripped at write time, so a geo rule you attempted to save on the free plan was never stored. Re-enter them after upgrading. The save response names the dropped features at the time, which is why it is worth reading.
Monthly or yearly
Yearly is billed once for twelve months at a lower effective rate. Monthly renews each month. Both can be changed at renewal.
Coupons
A coupon code is applied at checkout, and the discounted total is shown before you pay. A coupon that covers the whole amount activates the plan immediately without a gateway round trip. Coupons can be limited to a plan, a currency, a number of total uses and a number of uses per organization, so a code that worked for a colleague may legitimately not work for you.
Receipts
An invoice is issued on every successful payment and is available under Billing.
Invoices, GST and billing details
Every successful payment produces a numbered invoice, available immediately under Billing.
Invoice numbering and contents
Invoices are numbered sequentially in the form MS-<year>-<sequence>. Each shows the amount before tax, the tax, the total, the currency, your billing name and address, and your tax registration number when one is recorded.
GST
INR invoices include GST at the applicable rate; the stored amount is split into base and tax so the invoice shows both rather than a single figure. USD invoices carry no GST.
If you are registered, add your GST number in Organization settings before you pay. The number is copied onto the invoice at the moment it is issued, so adding it afterwards does not retroactively change an invoice that has already been produced.
Billing details
Billing name, billing address, billing country and GST number are set in Organization settings and are used on every subsequent invoice. Keep them current: an invoice with the wrong entity name is a problem for whoever has to file it, and reissuing is more work than editing a field.
The billing country also decides your currency, so changing it changes what you are charged in.
The GST report
There is a GST report endpoint for instance operators who need a periodic summary across invoices. It is an operator tool rather than something a customer needs, but it is worth knowing it exists if you run your own instance.
Payment history
Billing shows every payment attempt with its transaction ID, amount, currency, status and method, alongside the invoices. A payment that shows as pending was started and never completed — usually an abandoned gateway page. It does not mean money left your account. If a payment shows as successful but the plan did not change, contact support with the transaction ID; the gateway response is verified against a signature and a mismatch is recorded rather than silently accepted.
Who can see this
Billing is restricted to owners and admins. Members with the user or readonly role do not see payment history or invoices, which is usually what you want when the organization contains contractors or clients.
Coupons, annual billing and price changes
Two things reduce what you pay: choosing yearly instead of monthly, and applying a coupon. They stack.
Checking a coupon before paying
The checkout screen validates a code before charging anything and shows the original price, the discount and the final amount. Validation covers several rules, and the specific failure is reported:
- Coupon not found — the code does not exist or has been deactivated.
- Coupon expired — past its expiry date.
- Coupon fully redeemed — the total number of uses has been reached.
- Does not apply to this plan — the coupon is restricted to a different plan.
- For a different currency — the coupon is denominated in the other currency. This one surprises people: a code shared by a colleague in another country may not be usable by you.
- Already used — your organization has used it as many times as it allows.
Coupons discount either a percentage or a fixed amount. A fixed-amount coupon never takes the total below zero.
A coupon that covers the full amount
If the discount brings the total to zero, the plan activates immediately without a gateway round trip, and a zero-value payment and invoice are recorded so the history stays complete.
Annual billing
Yearly billing charges once for twelve months and sets the period end twelve months out. Monthly sets it one month out. Whether yearly is offered at all is an instance setting, so if you do not see the option it has been turned off rather than hidden from you.
Switching between monthly and yearly happens at renewal rather than mid-period.
Price changes
Prices are stored per plan and per currency on the instance. A change applies to new payments; a subscription already paid for runs to the end of its period at the price you paid. The pricing page always shows current values in your currency, which is the number to trust.
Trials
A plan can carry a trial period, shown on the pricing page when one is configured. During a trial the plan's features are available; at the end, the account falls back to Free unless a payment has been made — links keep working, gated settings stop being applied.
Cancelling, resuming and what happens to your data
Cancelling is a single action under Billing, available to owners and admins. It does not delete anything.
What cancelling does
The subscription is marked to end at the end of the period you have already paid for. Pro features keep working until then. At the period end the organization falls back to the Free plan.
Resuming
Resuming before the period ends clears the cancellation and the subscription continues as normal, with no new charge and no gap. After the period has ended, resuming is simply a new checkout.
What happens at the fallback
Nothing is deleted. Links keep redirecting, QR codes keep scanning, statistics stay where they are, and the API keeps working. What stops is the Pro behaviour:
- Gated settings are no longer applied on write. Geo rules, expiry, cloaking, passwords, social metadata, per-link tracking and link permissions are stripped from new saves, and the response says so. Values already stored on existing links remain in the database, but you cannot edit them into a link while on Free.
- Advanced statistics filters stop being available; date range and the human/bot mode continue to work.
- Retention returns to the free window, so click data older than that window ages out.
- The "Powered by" badge returns to visitor-facing pages.
- Plan limits apply again. Being over a limit does not delete anything — you simply cannot create more until you are under it.
Before you cancel
Export what you would miss. The statistics export, the click stream CSV and the links CSV all take one action each, and the retention window is the thing most likely to cost you something you cannot get back.
If you use the daily S3 export, make sure the current day has been written before the plan changes.
Deleting an account entirely
Cancelling and deleting are different. Account deletion is a separate action under profile settings and removes your data. There is also a data export that produces everything held about your account, which is worth running first.
Downgrading without cancelling
If the goal is only to spend less, yearly billing is cheaper per month than monthly, and coupons apply to both.
Usage, quotas and what happens when you hit one
Limits are enforced at the moment of the action rather than by a background job, so you always find out at the point where you can do something about it.
The limits
- Team members — how many people can be in the organization.
- Branded links — total links, counted for the lifetime of the account rather than per month.
- Custom domains and free subdomains — separately counted.
- Automation / API links — links created through the API, counted separately from the total.
- Tracked clicks per month and conversions per month — reset monthly.
- Folders, storage, and an AI budget in cents per month.
- API rate limit in requests per second, per key.
- Data retention in days.
Current values for your plan are shown in Billing and on the pricing page. They are configured per instance, so do not hard-code them in an integration.
What happens at each
Creating a link over the link limit fails with a message naming the limit rather than a generic error, so an integration can report it usefully. Creating one over the API link limit fails the same way, even if you are under the total link limit.
The conversions endpoint returns 402 with an upgrade flag when the monthly conversion allowance is exhausted. Clicks over the monthly tracked-click limit still redirect — redirects are never the thing that breaks — but reporting on the excess is not guaranteed.
Exceeding the API rate limit returns 429. AI features stop when the monthly AI budget is spent and resume the following month.
Retention
Click rows older than the retention window age out. Retention is the limit that costs you something irreversible, because a link you could not create is a minor annoyance and a month of click history you no longer have is gone. If you are on a bounded window and the history matters, schedule an export.
Watching usage
Billing shows current usage against each limit for the period. Check it before a campaign rather than during one: discovering the monthly click allowance on the morning of a launch is an avoidable kind of bad day.
Reducing usage
Delete or auto-delete generated links you no longer need, exclude your own office IPs from click recording, and set the robots policy so preview bots do not consume click limits.
Troubleshooting
Common problems and fixes
- Cloaking shows a blank page: the destination sends X-Frame-Options or a frame-ancestors policy. Turn cloaking off for that link.
- A click-limited link ran out early: preview bots consumed clicks. Set the robots policy to "Don't follow short links".
- The social preview is wrong: the platform cached it. Re-scrape with the platform debugger or add a harmless query parameter.
- Region rules are not firing: city and region data is less reliable than country, especially on mobile networks. Always set a default.
- An encrypted link stopped working: the fragment after # is the key. Without it the link cannot be recovered.
A domain will not go active
A domain stays pending until both DNS records resolve to the expected values. The settings panel shows what it can currently see next to what it expects, which usually identifies the problem immediately.
Read the state first
- Pending — nothing resolves here yet. The panel lists the A records it found. If that list is empty, the record has not been created or has not propagated. If it lists a different address, the record points somewhere else.
- Extra records — the A record is right but
wwwis not pointing here. Links work; thewwwform does not. - Active — both records resolve.
Press Refresh DNS check after any change rather than waiting for a background job.
The usual causes
- The record is in the wrong zone. Adding
goinside thego.example.comzone createsgo.go.example.com. Check the fully qualified name your provider shows after saving. - Propagation. Most providers publish within fifteen minutes, but a long TTL on a previous record can hold the old answer for hours. Query an authoritative nameserver directly to see the truth.
- A proxying CDN. An orange-cloud style proxy in front of the A record can prevent certificate issuance. Set the record to DNS-only until the domain is active.
- A conflicting record. DNS does not allow a CNAME alongside other records at the same name. Remove the old CNAME.
- A CAA record. A restrictive CAA record on the parent domain blocks issuance. Add the issuer used here or remove the restriction.
- The apex problem. If your website already lives at the apex, do not repoint the apex A record — use a subdomain.
SSL after activation
Certificates are issued automatically once the records resolve, which takes a few minutes. If you uploaded a custom certificate, automatic renewal is stopped while it is in place — an expired custom certificate presents as a browser warning rather than a DNS problem.
When DNS is right and it still fails
Check that the domain is not already connected to another organization, and that it is not still attached at a previous provider intercepting the request. If you connected a registrar account, use Push to rewrite the records — a hand-edit may have replaced them.
A cloaked link shows a blank page
Cloaking keeps your short URL in the address bar while the destination loads inside a frame. It fails when the destination refuses to be framed, which many large sites do.
Why it happens
Sites send X-Frame-Options or a Content-Security-Policy with frame-ancestors precisely to prevent this. YouTube, Google, Facebook, PayPal and most banks refuse. The browser blocks the frame and the visitor sees nothing. There is no way around it from this side, and there should not be — the header is the site telling you not to.
Check before you share
The cloaking tab has a button that fetches the destination's headers and tells you whether framing is refused. Use it before publishing anything cloaked. The same check is available as a standalone HTTP header tool.
The other common cause
Mixed content. An http:// destination will not load inside an https:// short link — the browser blocks it silently. If the destination supports HTTPS, use it. If it does not, cloaking is not available to you.
What to do instead
- Turn cloaking off. A normal redirect works everywhere. The short URL is visible in the address bar for a moment and then the destination is; most audiences neither notice nor care.
- Use social metadata instead. If the goal was a branded preview when the link is shared, set Open Graph and X card values on the link. That controls the card without framing anything.
- Use a bundle or a post. If you want a page on your own domain, build one: a link bundle or a markdown post lives on your short domain and links onwards.
Other things cloaking breaks
- Deep links and app-opening behaviour do not work through a frame.
- Some destinations break their own layout inside a frame even when they permit it.
- Analytics on the destination may attribute the visit differently.
- Password managers and payment flows frequently refuse to operate in a frame.
Always open a cloaked link in a fresh browser — not the tab you built it in — before sharing it. A cached session hides most of these failures.
A link preview shows the wrong image or title
Preview cards are produced by the platform that renders them, from tags it fetched and then cached. Almost every complaint here is one of three things.
The platform cached an old version
Platforms cache aggressively and for a long time. After changing the social metadata on a link:
- Re-scrape the URL with the platform's own debugging tool, which is the only reliable way to force a refresh.
- Or add a harmless query parameter —
?a=b— producing a URL the cache has never seen. The redirect still works and the card is built fresh.
Nothing was set on the link
If a link has no Open Graph, X card or App Links values, the crawler is redirected and reads the destination's tags. That is often fine and sometimes not — if you want your own title and image, set them on the link in the Social media tab. A preview crawler is only intercepted and served your tags when the link actually has some.
Use the autofill button to pull the destination page's existing title, description and image and then edit from there.
The password or expiry page is what the crawler saw
Previews do not work on password-protected links: the crawler sees the password page, which is correct. The same applies to an expired link — the crawler gets the expired page. Neither is a bug.
Getting the image right
- Use an absolute HTTPS URL. Relative paths and
http://images are dropped by most platforms. - 1200 by 630 is the safe size for a large card.
- Set
og:image:width,og:image:heightandog:image:typefor scrapers that will not guess. - Set
og:image:alt— it is read aloud by screen readers. - Very large images are skipped by some platforms.
Checking what is actually served
The built-in Open Graph checker, meta tags checker and X card validator fetch a URL and show the tags found, which is faster than guessing. Check the short URL, not the destination — the short URL is what people share.
The card is right in one app and wrong in another
Different platforms read different tags. Set both the Open Graph and the X card values rather than assuming one covers the other.
Click numbers look too high, too low or missing
Nothing is sampled and nothing is dropped, so a number that looks wrong usually has a specific and findable cause. Start in the click stream, not in the charts.
Too high
- Preview bots. Every messaging app and social network fetches a link to build a card. A link posted to a large group can collect dozens of fetches before a person clicks. Switch the click mode to Humans; the gap is the answer.
- Security scanners. Mail gateways follow links in email to check them, sometimes several times per recipient.
- Your own team. Everyone testing the campaign link before launch. Add your office and VPN addresses to the IP exclusion list under Domain settings, Statistics.
- Monitoring. An uptime check pointed at a short link clicks it on a schedule forever.
Too low, or missing entirely
- The wrong domain is selected. Statistics are per domain. The switcher at the top decides what you are looking at.
- A filter is still applied. Filters persist between pages. Check the date range and the filter dialog.
- You are looking at a geo preview. Requests with
?ms_geo=are previews and are deliberately excluded from statistics, webhooks and pixels. - The IP exclusion list. Clicks from excluded addresses are never recorded. If you added a range that covers real visitors, they are invisible.
- Retention. On a bounded retention window, clicks older than the window have aged out.
- A different link. Duplicating a link produces a new link with its own counter. Two links to the same destination split the count.
Verifying end to end
Open the click stream, turn on live tail, and click the link yourself from a device that is not on an excluded network. The row should appear within seconds, showing the destination actually served, the status, and the human flag. If it appears, logging works and the problem is in how you were reading the numbers. If it does not, check the domain, the excluded IPs and whether you used a geo preview parameter.
Two numbers that are supposed to differ
Total clicks and human clicks are always different. Clicks and conversions are counted by different mechanisms and are never expected to match.
A geo rule is not firing
Geo rules are evaluated most specific first — city, then region, then country, then continent — and anything unmatched falls through to the main destination. Most reported failures are one of the following.
Test the rule properly
Open the short link with ?ms_geo=IN, ?ms_geo=IN-MH, or ?ms_geo=IN-MH/Pune. The rule is evaluated as if you were there. The preview does not count as a click and does not fire webhooks or pixels, so test freely.
If the preview sends you to the right place but real visitors do not arrive there, the rule is correct and the problem is detection.
A more specific rule is winning
A city rule that matches is used even if you expected the country rule to apply. Review all the rules on the link, not just the one you last edited. Precedence is by type, not by the order in the list.
The value does not match what is detected
City and region names come from the geo database and may not match how you typed them. City and region fields accept free text precisely so you can enter the spelling your data actually uses — check the click stream for how the location is recorded for real traffic to that link and use that spelling.
Country rules use two-letter codes and are the most reliable of the four.
Detection is genuinely wrong
Country detection is reliable. Region detection is good on fixed lines and much softer on mobile networks, where the address may belong to a gateway in another state. City detection is softest of all. VPNs, corporate proxies and satellite connections place people anywhere.
This is not a defect you can configure away. Design for it: never send someone somewhere they cannot leave, and put a visible region switcher on the destination page.
Another feature is taking precedence
A matched geo rule overrides the iOS and Android destinations and disables A/B assignment for that visitor. Conversely, if a geo rule does not match, mobile targeting and A/B testing apply as normal. If you expected a variation and got the geo destination, the rule matched.
The plan
Country geo-targeting starts on Starter, and region and city rules on Business. On plans without them geo rules sent to the API are stripped on save, and the response names the dropped feature. A rule you believe you saved may never have been stored.
Imports and API calls that fail
Bulk work fails per row rather than all at once, and the API tells you which rule was broken. Both give you enough to fix the input without guessing.
Imports
Always preview first. The preview shows the detected headers, the field each maps to, the row count and the first twenty rows, and lets you correct the mapping before anything is written. Most import problems are a header that was not recognised and silently ignored.
After a run, the job list shows created, updated, deleted and failed counts, and the failed rows can be downloaded as a CSV with the error attached to each. Fix those rows and re-import only them.
Common per-row failures:
- Slug already used on this domain. Two rows with the same slug, or a slug that already exists.
- That slug is reserved. Either globally, or on the domain's own reserved list.
- Destination URL is not valid. Usually a missing scheme or a stray space.
- Blocked destination. The host is on the abuse blocklist, or the domain restricts destinations to an allowed list.
- Unknown link id. In a sheet apply, an
Idthat does not belong to this organization.
Imports are capped at 10,000 rows per file. Split larger files.
The sheet
The sheet has three behaviours and they are decided by two columns: a row with an Id updates, a row without one and with a destination creates, and a row with 1 in Delete deletes. Deleting the Id column contents and re-uploading therefore creates duplicates rather than updating. Leave that column alone.
API failures
- 400 — the payload is wrong; the message names the field or rule.
- 401 — the key is missing, revoked or expired.
- 403 — your role cannot do this.
- 404 — not found, or a link restricted to other people.
- 409 — the slug is taken, or the destination already has a link on a domain that does not allow duplicates. The response includes the existing link.
- 429 — rate limited; back off.
Silent partial success
A 200 does not mean everything applied. Gated fields are stripped on plans that lack the feature, and the response carries upgradeRequired naming them. Bulk responses carry per-row errors. Check both.
Integrations
API keys, scopes and where to use each kind
Everything the dashboard does is available over the REST API, authenticated with a key created under Integrations, API.
Two kinds of key
- Secret keys have full access to the organization. Keep them server-side: in an environment variable, a secrets manager, a CI secret. Never in a browser bundle, a mobile app, or a repository.
- Public keys can only create links. They are meant to be shipped where a user can see them — a browser extension, a mobile app, a bookmarklet. The worst a leaked public key can do is create links.
Scope
A key is scoped to all domains or to a single domain. Scoping to one domain is the right default for anything embedded in a product: a key that can only create links on go.example.com cannot touch your other domains.
Expiry
A key can be given an expiry date. The key list shows a status of active, expiring (within seven days) or expired, so a rotation that is about to break something is visible before it breaks. Rotating on a schedule is a good habit; rotating without an expiry date set means nobody notices the old key is still valid.
Using a key
Pass it in the Authorization header:
curl -X POST https://your-instance/api/links \
  -H "Authorization: YOUR_SECRET_KEY" \
  -H "Content-Type: application/json" \
  -d '{"originalURL":"https://example.com/page","path":"spring","tags":["promo"]}'
Rate limits
Requests are limited per key, at a rate shown on the API tab. Exceeding it returns 429; back off and retry rather than hammering. For bulk work, use the bulk endpoints rather than a loop of single creates — they are designed for it and count more efficiently against your limits.
Revocation and audit
Revoking a key takes effect immediately and anything using it stops working. Key creation and revocation are recorded in the audit log with the user and IP, which is what you want when the question is who added the integration that has been creating links all week.
The key is shown once, at creation. If it is lost, revoke it and create another.
Receiving clicks as webhooks
A webhook turns every click into an HTTP request to your own service, delivered after the visitor has already been redirected, so nothing you do slows the redirect down.
Setting it up
Domain settings, Tracking, has a webhook URL and a secret. Save the URL and use Send a test event to confirm your endpoint accepts it. The delivery log below shows recent attempts with timestamp, event, status and the beginning of the response body, which is usually enough to diagnose a failure without adding logging on your side.
The payload
A JSON body describing the click: the click ID, link ID, short URL, path, domain, destination, country, city, region, referrer, browser, OS, device, human flag, detected bot name, QR flag, UTM values, timestamp, and any ad-platform click identifiers that were on the incoming URL.
Verifying the signature
Each delivery carries an X-ShortFreeURL-Signature header computed with your webhook secret. Verify it before trusting the body — the endpoint is on the public internet and anyone can POST to it. Compare using a constant-time comparison, not string equality.
Designing the receiver
- Respond fast. Acknowledge with a 2xx and do the work asynchronously. A slow endpoint fills the delivery log with timeouts.
- Be idempotent. Deduplicate on the click ID.
- Expect bots. The human flag is in the payload; filter on it rather than treating every event as a person.
- Expect volume. A busy campaign generates a lot of events. If you only need aggregates, the daily S3 export is a better tool.
What webhooks are good for
Alerting when a specific link is clicked, pushing clicks into a CRM against a known contact, triggering a workflow in an automation tool, or mirroring clicks into your own store in real time.
What they are not good for
Bulk analysis. Millions of individual HTTP calls to build a dataset you could have read as one file a day is a poor trade — use the S3 export for that.
Failures
A failed delivery is recorded in the log with its status and response. Check there first when events stop arriving: an expired certificate or a 403 from a firewall is far more common than a missing event.
Forwarding clicks to ad platforms server-side
A browser pixel is blocked by ad blockers, by some browsers by default, and by anyone who declines cookies — commonly a third or more of real traffic. Sending the event from the server instead means the platform sees the click whatever the browser does. That is why the platforms built these APIs.
Supported destinations
Configured per domain under Domain settings, Tracking:
- Google Analytics 4 via the Measurement Protocol — measurement ID, API secret, and an optional event name.
- Meta (Facebook and Instagram) Conversions API — pixel ID, access token, event name, and an optional test event code.
- TikTok Events API — pixel ID and access token.
- LinkedIn Conversions API — conversion ID and token.
- X (Twitter) — pixel and token.
- Reddit Conversions API — pixel and token.
- Snapchat Conversions API — pixel and token.
- Pinterest Conversions API — ad account ID and token.
- Google Ads offline click conversions — conversion ID and label.
- Segment — a write key, sending a "Short Link Clicked" event.
- A custom webhook — any URL, with an optional authorization header.
How the match works
Ad platforms match a server event to their own click using the identifier they appended to the URL when the ad was clicked: gclid, fbclid, ttclid, twclid, ScCid, rdt_cid, li_fat_id, msclkid, epik, igshid. Those parameters are read off the incoming request and passed through. If your ad links do not carry them, attribution will not work — do not strip them upstream.
Identifiers that platforms want hashed are hashed with SHA-256, lower-cased and trimmed, before sending. The click ID is used as the event ID, which is what lets a platform deduplicate the server event against a browser pixel that also fired.
Reliability
Every destination is optional and independent. They run after the response has been sent, so one failing never delays a redirect and never blocks another. Each call has a timeout, and the outcome of every attempt is recorded in the delivery log with its status.
A compliance note
In the EU and UK, dropping a tracking pixel needs consent, and a redirect gives you no opportunity to ask. Take advice before enabling retargeting on links seen by European visitors.
Slack, Zapier and Make
Three integrations cover most of the "shorten this without opening the dashboard" and "do something when a link is clicked" requests.
Slack
Add a slash command in your Slack app pointing at the Slack command endpoint shown on the Slack tab, then paste your Slack workspace ID and choose the domain links should be created on.
/shorten https://example.com/very/long/url spring promoThe first argument is the destination, the optional second is the slug, the optional third is a tag. The command replies in the channel with the short URL, so everyone present gets it. Errors — a taken slug, a blocked destination, a plan limit — come back privately to the person who ran the command rather than to the channel.
A workspace that has not been connected gets a message saying so instead of a cryptic failure.
Zapier and Make
Both authenticate with an API key and expose the same discovery document.
Triggers:
- New link created
- New click
- New conversion
Actions:
- Create link
- Update link
- Delete link
- Get link statistics
That is enough for the common automations: shorten a URL from a spreadsheet row, create a link when a campaign is approved, post to a channel when a specific link is clicked, add a row to a sheet on conversion.
Choosing between a Zap and a webhook
A trigger in Zapier or Make polls; a webhook is pushed the moment the click happens. If latency matters — an alert, a live dashboard — use a webhook. If you are gluing two SaaS tools together and a delay of minutes is fine, the automation platform is far less work.
Rate limits apply
Automation platforms retry aggressively, and a badly configured polling trigger can consume a surprising share of your API rate limit. Use the narrowest filter the trigger allows, and prefer a webhook where a poll would run every minute to find nothing.
Keys
Give each integration its own key, scoped to one domain where possible, so revoking one does not break the others.
Using ShortFreeURL from an AI assistant over MCP
An MCP server is exposed so an AI assistant can create and inspect links directly, rather than you copying URLs between windows.
Connecting
Point your assistant at the MCP endpoint shown on the MCP tab under Integrations, and authenticate with an API key. Transport is HTTP with JSON-RPC. A GET on the endpoint returns the server name, version and tool list, which is a quick way to check the connection before wiring up a client.
The tools
- create_link — creates a branded short link. Takes
originalURLand optionallypath,domain,titleandtags. Without a domain it uses your favourite domain. - search_links — searches by slug, title, destination or tag, using the same query syntax as the dashboard search box, ordered by clicks.
- link_analytics — click analytics for one link, given its path and an optional period.
- domain_analytics — the same for a whole domain.
Each tool returns both a readable summary and structured content, so an assistant can either quote the numbers or work with the objects.
What this is good for
Drafting a campaign and creating its links in the same conversation. Asking which links from last month underperformed. Checking whether a slug is already taken before printing something. Bulk-creating links from a list you are already discussing.
Permissions and safety
The MCP server acts with the permissions of the API key you gave it. A key scoped to one domain limits an assistant to that domain, which is a sensible precaution: an assistant creating links on your main branded domain because it misread an instruction is a real failure mode, and scope is the cheapest defence.
Use a secret key for a server-side assistant and rotate it on the same schedule as your other keys. Every link created through MCP is recorded with its source, so you can tell automation-created links from dashboard-created ones in the links table.
Limits
Links created through the API count against the API link limit on the free plan, separately from the total link limit. A rejected call returns the reason, so an assistant can report the limit rather than retrying forever.
The WordPress plugin, browser extension and links as code
Three integrations for people who create links somewhere other than the dashboard.
Browser extension
Available for Chrome, Firefox and Edge. It shortens the page you are on in one click, lets you edit the slug and pick a domain, and copies the result — without leaving the tab.
The extension authenticates with a public API key scoped to one domain. That is deliberate: a public key can create links but cannot read your data, so a key sitting in a browser extension on a laptop is not a route into your account. Create the key under Integrations, API, choose "public", scope it to the domain the extension should use, and paste it into the extension's settings.
WordPress plugin
Three things:
- A branded short link is created automatically when a post publishes, and stored as post meta so your theme can render it.
- A
[shortfreeurl url="…"]shortcode shortens any URL inside your content. - A settings page where you paste an API key and choose the domain and folder new links land in.
Point it at a folder with UTM defaults and every post's link arrives correctly tagged without an editor doing anything.
Links as code with GitHub Actions
For teams who would rather review link changes than click them. Keep link definitions in a YAML file in your repository, review changes in pull requests, and sync on merge:
# shortfreeurl.yaml
links:
  - slug: docs
    url: https://example.com/documentation
    tags: [docs]
The workflow authenticates with a secret API key held as a repository secret and applies the file. This suits documentation links, redirects owned by engineering, and anything where the change history matters more than the convenience of an editor.
Apps
There is an iOS share-sheet app, an installable Android PWA with offline link history, and the dashboard itself can be installed as a desktop app from your browser's menu.
Which to use
If links are created by marketers, use the extension and the WordPress plugin. If they are created by software, use the API. If they are owned by engineering and should be reviewed, use the repository workflow.
Advertising, email drafts and no-code connections
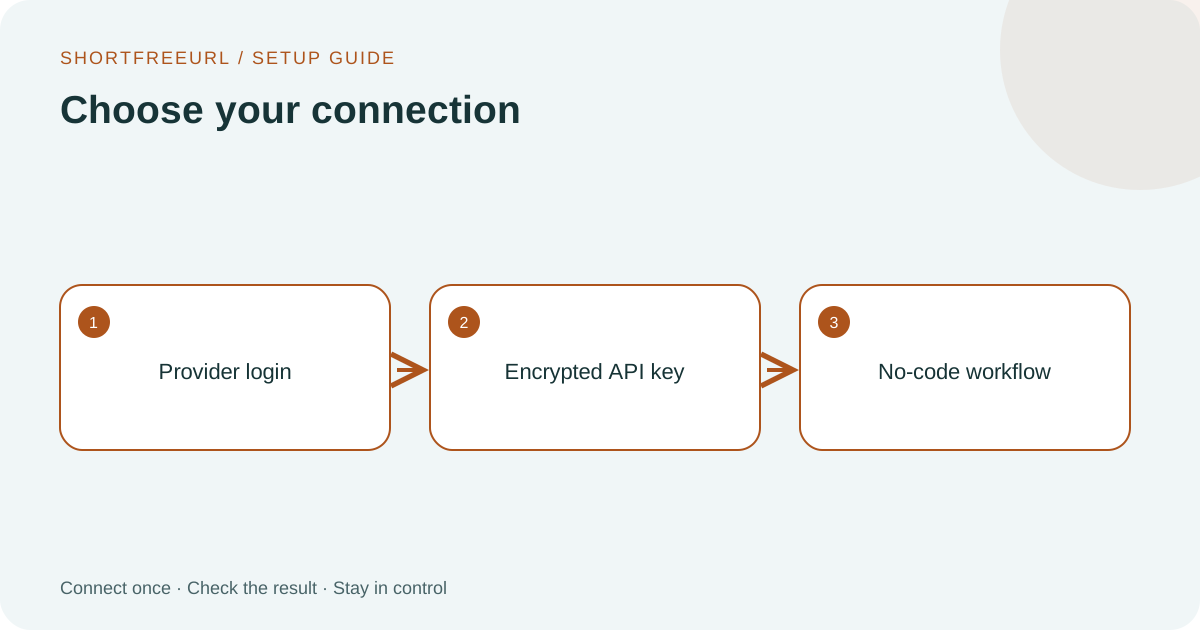
ShortFreeURL offers Google login for Google Ads, API credentials for supported advertising and email services, and incoming-webhook connections for automation builders. Choose the path that matches your account and the action you need.
Advertising
Connect Google Ads, TikTok, Snapchat, X, LinkedIn, Pinterest or Reddit from Integrations & API. Meta remains available in the existing integrations catalogue. Keep ad delivery Off until the destination and click/view event are correct. A click on a short link is not a completed purchase.
Email marketing
Mailchimp, Brevo, MailerLite and SendGrid Marketing create drafts from existing short links. Configure the sender and audience, then choose Create email draft. Optional automatic draft creation responds to new links. Review and send from the email provider.
No-code workflows
Pipedream, Activepieces, Zoho Flow, Albato, Tray.io, Latenode and Power Automate accept an activated incoming webhook URL. Map the delivered short URL into the workflow action. A successful trigger response does not prove the subsequent workflow completed.
Control and visibility
Edit setup retains existing secrets when the secret field is blank. Disconnect removes the local connection; previously created campaigns remain in the provider. Delivery results are available to workspace administrators and in the admin Integration control screen.
Setup guides
Set up Amazon AWS email, DNS and short-link hosting
What this setup connects
Open Admin → Amazon AWS setup. The checklist brings together four separate AWS services: EC2 for your public redirect server, Route 53 for optional DNS hosting, SES for outgoing email, and WorkMail for the support inbox. S3 can hold private backups. Paying for or signing in to AWS does not automatically configure these services. Use the secure admin forms; do not put access keys, mailbox passwords or account passwords in chat or tickets.
1. Host the redirect service and automatic SSL
Create an EC2 instance and assign a stable Elastic IP. Run this application and the Caddy HTTPS proxy on that instance. Permit public TCP ports 80 and 443 in the instance security group. Keep the application port and Caddy admin API private. Point your chosen CNAME target, such as edge.yourbrand.com, to the Elastic IP. In Admin → Domain hosting & SSL, enter that real public IPv4, the CNAME target and a certificate-contact email; download and deploy the generated Caddyfile. Persistent Caddy storage is required for certificate renewal. The app checks DNS and a trusted HTTPS certificate separately and does not mark an unverified domain live. This admin screen guides deployment; it does not provision an EC2 instance.
2. Decide where DNS will live
AWS hosting does not require Route 53. If your domain uses Namecheap DNS, keep the nameservers there and edit its DNS records at Namecheap. To use Route 53, create a public hosted zone, copy all website, MX, TXT, verification and other existing records, then change the domain nameservers at the registrar to the four NS values in Route 53. Check the site and email before removing the old zone. A private hosted zone cannot serve public short links.
3. Connect Route 53 from admin
In AWS IAM, create a dedicated identity with access only to the zones you will use. It needs route53:ListHostedZones to connect, route53:ListResourceRecordSets to inspect records and route53:ChangeResourceRecordSets to add short-link CNAME records. Enter its access key ID and secret key in Admin → Amazon AWS setup → Route 53. The app verifies the key by listing zones and stores the secret encrypted. Choose a public, delegated zone and a free prefix such as go. The app checks for conflicts, then creates go.yourbrand.com and *.go.yourbrand.com CNAMEs pointing to the configured short-link target. It does not overwrite a different existing record. The domain remains pending until public DNS and HTTPS checks pass. Then choose Offer to customers to enable claims such as brand.go.yourbrand.com. Route 53 IAM permissions.
4. Connect Amazon SES for outbound mail
In the SES region you will use, verify your sender domain or address and publish the DKIM records SES gives you. Request production access if the account is still in the sandbox. Create a dedicated IAM key for SES sending and enter its key ID, secret, region and verified From address in Admin → Amazon AWS setup → SES. Use Send test email to admin to verify actual delivery. The app uses the SES API; SES SMTP credentials are different and are not used in this form. SES does not provide an IMAP inbox. SES identities · Production access.
5. Connect Amazon WorkMail for support replies
Create a WorkMail organization and mailbox. Add and verify its email domain, then publish the exact MX, TXT and CNAME records WorkMail shows in the authoritative DNS zone; preserve unrelated records. Open Admin → Amazon AWS setup → WorkMail. Enter the mailbox address, its AWS region and mailbox password; this is not an IAM secret key. The form configures region-specific IMAP port 993 and SMTP port 465. It tests IMAP before enabling inbox sync. Open Admin → Mailbox to check incoming messages, outbound SMTP and AI reply settings. WorkMail IMAP/SMTP endpoints documented by AWS are us-east-1, us-west-2 and eu-west-1; choose the region where your mailbox exists. See the WorkMail IMAP/SMTP guide. If WorkMail is not yet set up, leave mailbox settings blank; SES can still send transactional mail.
6. Connect S3 backups
Open Admin → Platform services → Storage & backups and connect a private S3 bucket. Test a backup upload and confirm retention, encryption and recovery in AWS. DNS, email and S3 use separate permissions so a leaked sending key cannot edit DNS or read backups.
7. Verify every layer
Check EC2 health and Caddy logs, public A/CNAME resolution, each selected domain’s DNS and SSL status, an HTTPS test short link, the SES admin test email, WorkMail inbox sync and one support reply, plus an S3 backup and restore drill. DNS delegation can take time; certificates are issued only after the hostname reaches the public proxy. Never reuse example IP addresses or delete unrelated DNS records.
Connect TikTok Ads
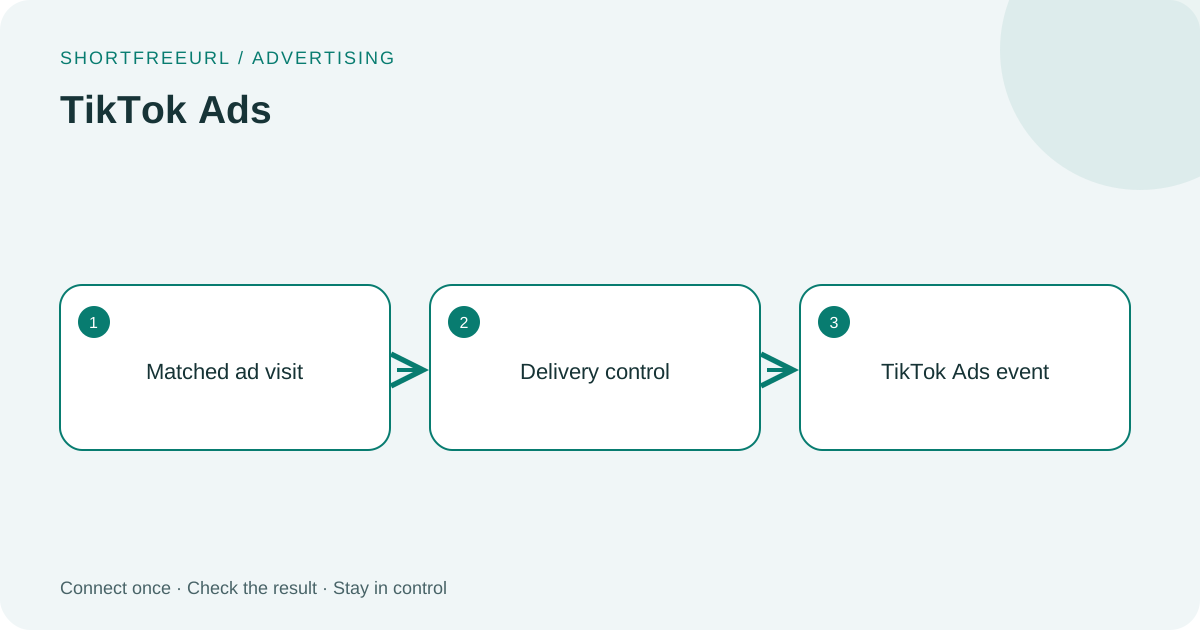
Connect once to track matching TikTok Ads ad clicks across your short domains.
What this connection does
Reports short-link visits, not purchases. Only matching ad clicks are forwarded when enabled. GPC/Do Not Track requests and detected bots are skipped. Configure the conversion as a click/view event in your ads account. Credentials stay encrypted; results appear in Deliveries.
Before you start
Use a workspace Owner or Admin account. Prepare access to your provider account. Google login requires the site administrator’s OAuth application to be configured first; API-key connections need the key from your own provider account.
Setup
- Open Integrations & API and find TikTok Ads. Choose Connect and paste TikTok pixel ID, Events API access token. These credentials require the relevant provider account access.
- Keep Automatic ad-click tracking Off while setting up. Use a click/view event in your advertising account. This connector reports short-link visits.
- Optionally restrict the connection to one domain ID in this workspace; otherwise it covers workspace domains.
- Enter the Test event code from TikTok Events Manager and choose Check connection. Only the validation request uses the test code.
- Set Automatic ad-click tracking to On when ready. Only visits containing this platform’s click identifier are forwarded. Check Deliveries and the advertising platform’s own event diagnostics.
Data and verification
Out: matched ad click identifier, event ID, timestamp and short URL. Some platforms also receive visitor IP and browser user agent.
In: API acceptance or failure, recorded in Deliveries.
GPC and Do Not Track requests, detected bots and unmatched ad visits are skipped by the connector.
Troubleshooting
A connected badge means credentials have been saved. Run the available connection check and inspect Deliveries for the provider response. For a 401/403, check key permissions and account ownership. For quota or rate limits, check the provider dashboard before retrying. Never paste a secret into a public support message.
Can I change credentials or disconnect?
Owners and workspace admins can use Edit setup for API credentials, Configure for destinations, and Disconnect to remove the stored connection. Blank secret fields preserve the saved key. Disconnecting does not delete previously created campaigns in the provider.
Does an accepted event mean a sale?
No. This connector reports a click/view, not a purchase. Platform attribution can be delayed or rejected. Confirm sales in your checkout and advertising reports.
Next steps
Open this integration · Browse integrations · Official provider documentation
Manage integrations and help customers from admin
1. Find every integration
Dashboard → Integrations & API → All integrations shows the same directory as the public Integrations page. Search or choose a category. Open connection leads to the correct provider card; Open setup leads to an SDK, plugin or workflow. Planned entries explain availability and are not represented as working connections.
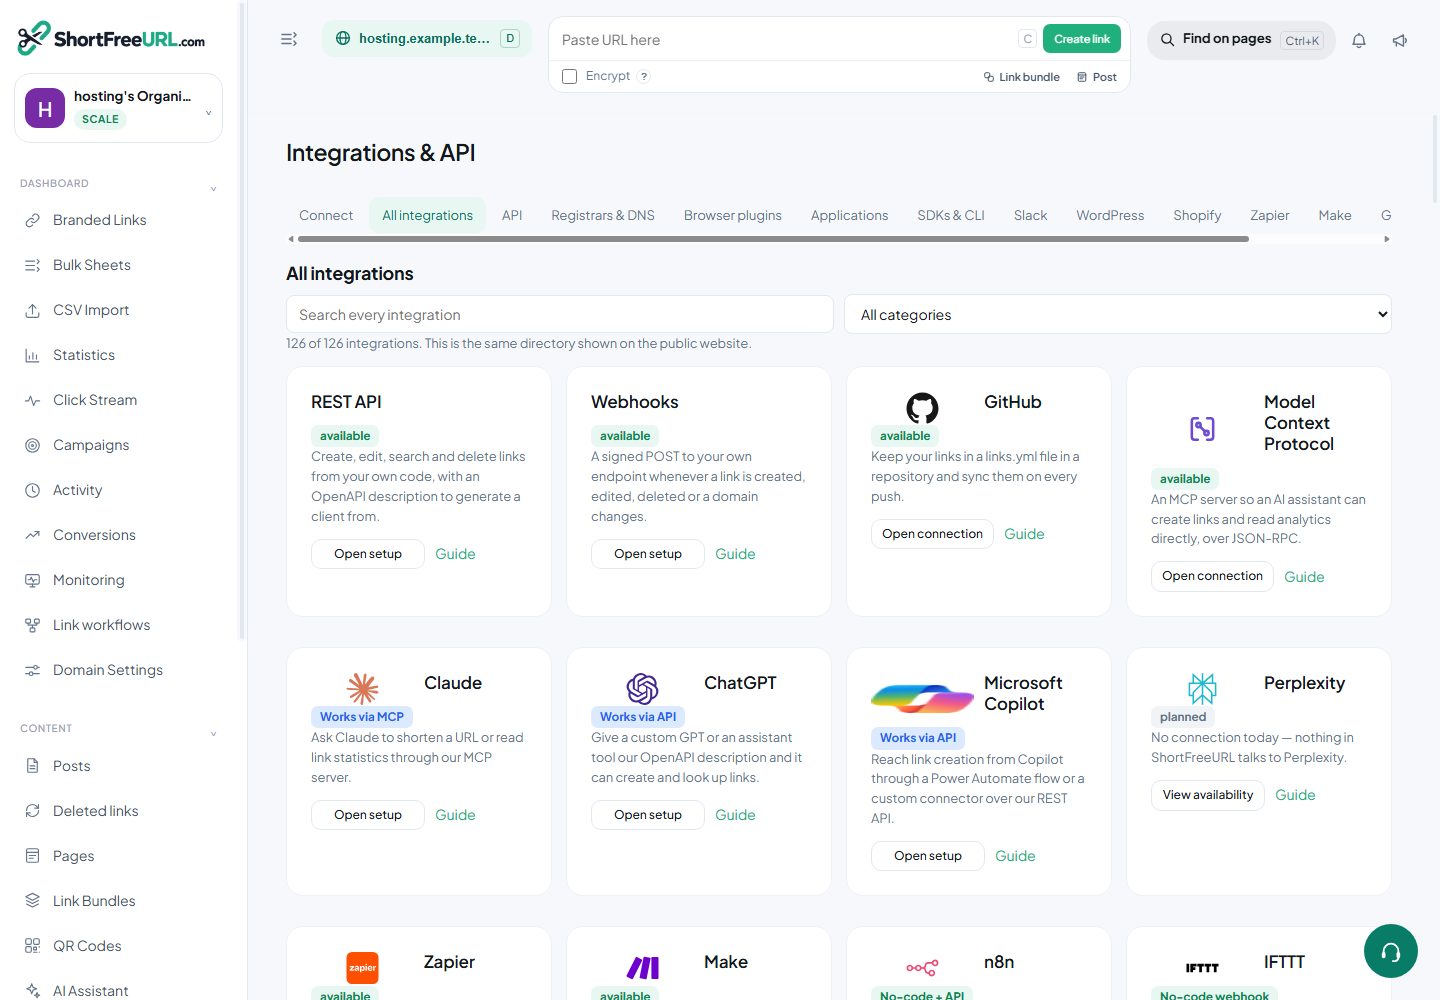
2. Choose direct login or API access
For OAuth providers, the operator registers an app and saves its client ID, secret and callback configuration once in Admin → Integrations. Customers then use the provider’s own login and consent page. Their passwords are never entered into ShortFreeURL. Providers may require approval or a paid API entitlement.
Direct imports support Coda documents, Smartsheet sheets, Wrike tasks, Jotform forms, Calendly scheduling URLs, Trello boards, ClickUp tasks, Todoist tasks and Typeform forms. Enter a provider token with read access. Saving checks the account before storing the connection. Open Import links, select items and a short domain, then create branded links. Previews expire after ten minutes and do not change source permissions.
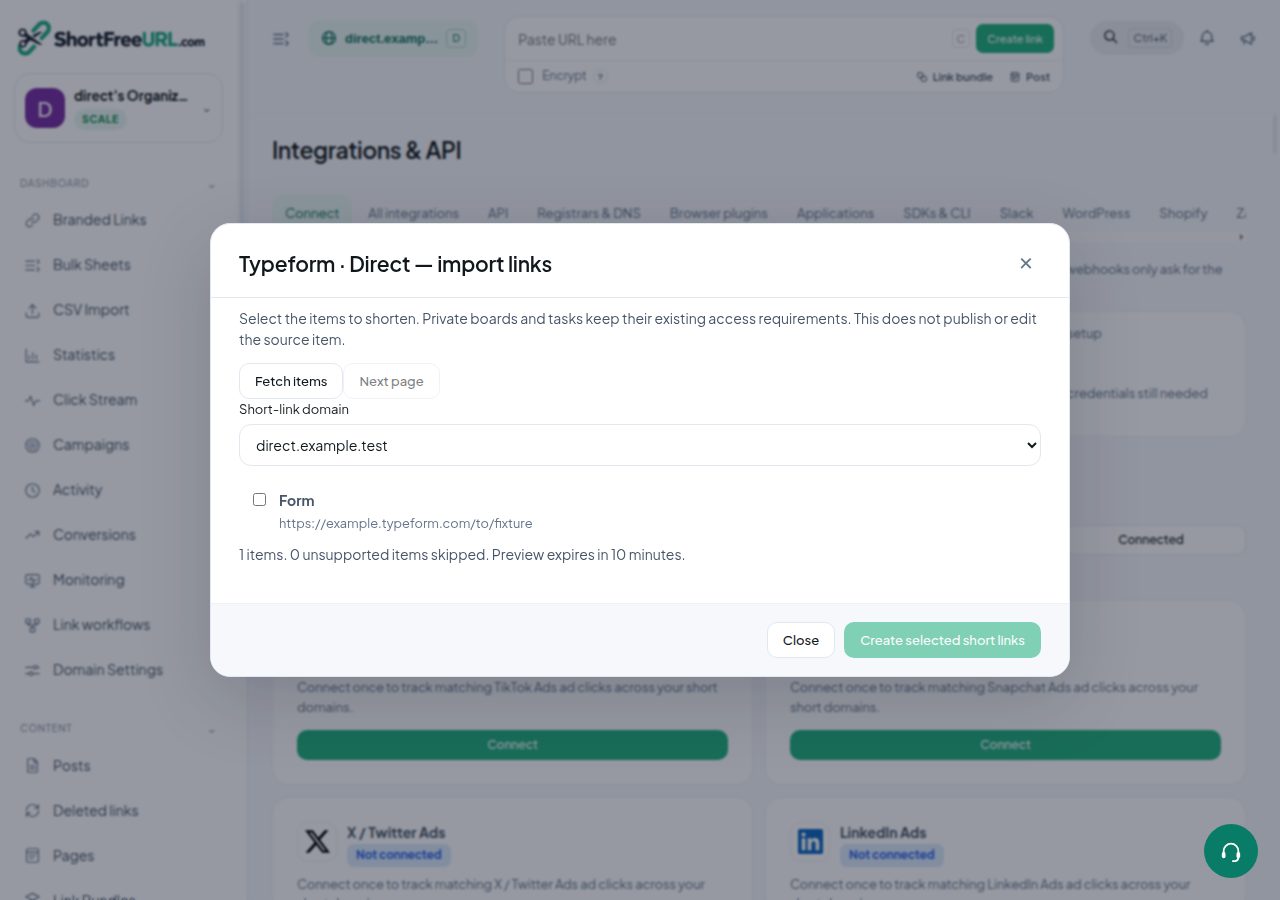
Some providers support a generated webhook or an HTTP workflow rather than direct account access. Their cards keep that distinction. A provider token does not automatically implement every action exposed by that provider.
3. Keep multiple accounts
Use Add another account to preserve the current connection and add a second account. Choose the account before importing, checking deliveries, changing settings or disconnecting. Each saved account consumes one connection allowance; plan checks also run on subsequent requests.
4. Pause an integration
In Admin → Integrations → Customer integration availability, search for a provider and choose Pause. This stops new connections and further protected provider requests. Customers can still disconnect, and existing short links remain. Enable resumes access subject to the customer’s current plan and account limits. Both actions enter the audit log.
5. Diagnose a customer account
Connected accounts shows the customer workspace, account, provider, state and creation date. Diagnose shows current plan access, stored credential field names without values, the saved error and the latest delivery statuses. Revoke removes only the selected connection. Use the admin customer lookup, support tickets and plan overrides when a customer needs help.
6. Match pricing and permissions
Plans & limits controls the Direct API imports feature separately from general automation, advertising and email integrations. Direct imports start on Starter; free automatic SSL is included across plans for verified domains. The same feature matrix feeds public pricing and Dashboard → Subscription. Expired plans, removed memberships, disabled providers and account limits are checked by the server, including during import preview and confirmation.
Connect Snapchat Ads
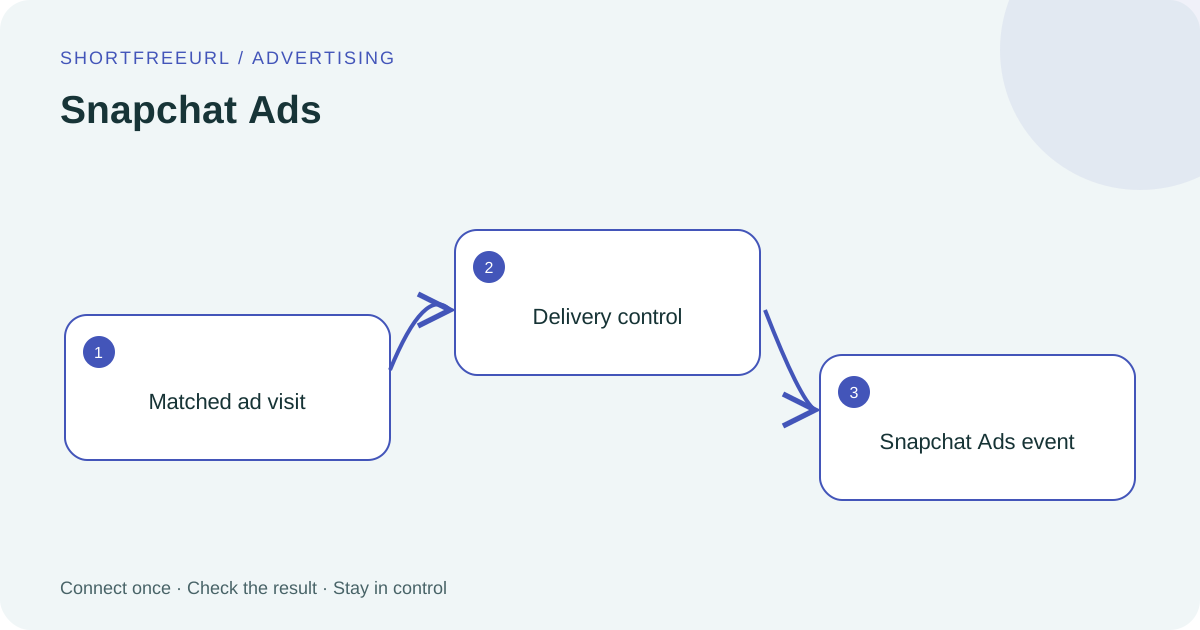
Connect once to track matching Snapchat Ads ad clicks across your short domains.
What this connection does
Reports short-link visits, not purchases. Only matching ad clicks are forwarded when enabled. GPC/Do Not Track requests and detected bots are skipped. Configure the conversion as a click/view event in your ads account. Credentials stay encrypted; results appear in Deliveries.
Before you start
Use a workspace Owner or Admin account. Prepare access to your provider account. Google login requires the site administrator’s OAuth application to be configured first; API-key connections need the key from your own provider account.
Setup
- Open Integrations & API and find Snapchat Ads. Choose Connect and paste Snap pixel ID, Conversions API access token. These credentials require the relevant provider account access.
- Keep Automatic ad-click tracking Off while setting up. Use a click/view event in your advertising account. This connector reports short-link visits.
- Optionally restrict the connection to one domain ID in this workspace; otherwise it covers workspace domains.
- Choose Check connection. Validation or account access success confirms setup access, not final attribution.
- Set Automatic ad-click tracking to On when ready. Only visits containing this platform’s click identifier are forwarded. Check Deliveries and the advertising platform’s own event diagnostics.
Data and verification
Out: matched ad click identifier, event ID, timestamp and short URL. Some platforms also receive visitor IP and browser user agent.
In: API acceptance or failure, recorded in Deliveries.
GPC and Do Not Track requests, detected bots and unmatched ad visits are skipped by the connector.
Troubleshooting
A connected badge means credentials have been saved. Run the available connection check and inspect Deliveries for the provider response. For a 401/403, check key permissions and account ownership. For quota or rate limits, check the provider dashboard before retrying. Never paste a secret into a public support message.
Can I change credentials or disconnect?
Owners and workspace admins can use Edit setup for API credentials, Configure for destinations, and Disconnect to remove the stored connection. Blank secret fields preserve the saved key. Disconnecting does not delete previously created campaigns in the provider.
Does an accepted event mean a sale?
No. This connector reports a click/view, not a purchase. Platform attribution can be delayed or rejected. Confirm sales in your checkout and advertising reports.
Next steps
Open this integration · Browse integrations · Official provider documentation
Connect X / Twitter Ads
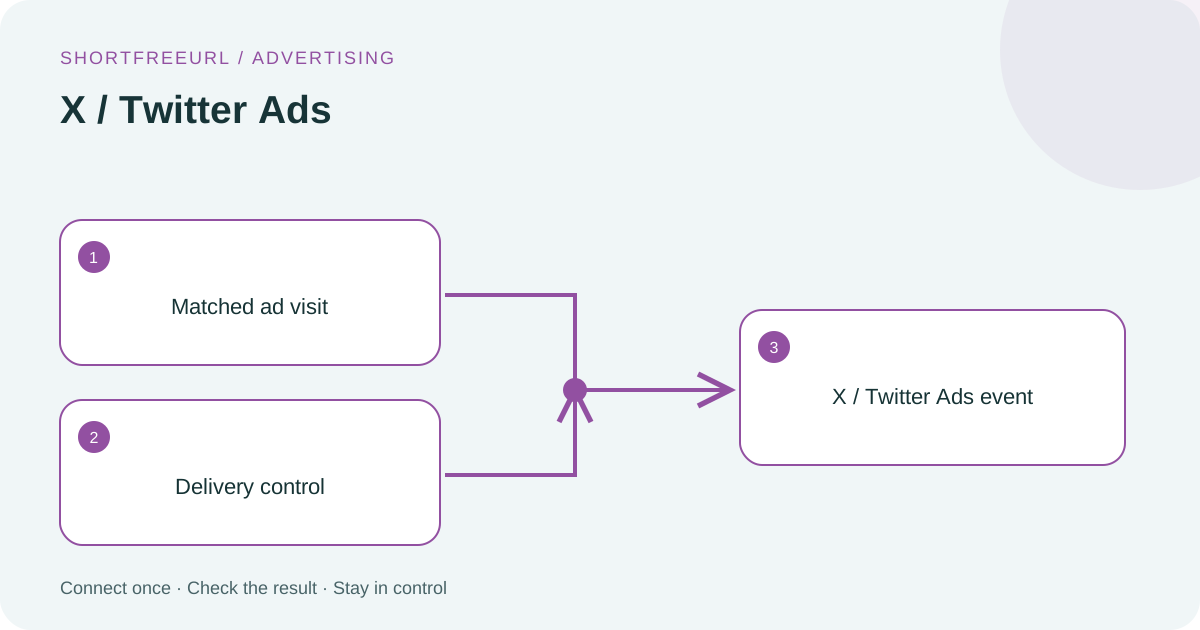
Connect once to track matching X / Twitter Ads ad clicks across your short domains.
What this connection does
Reports short-link visits, not purchases. Only matching ad clicks are forwarded when enabled. GPC/Do Not Track requests and detected bots are skipped. Configure the conversion as a click/view event in your ads account. Credentials stay encrypted; results appear in Deliveries.
Before you start
Use a workspace Owner or Admin account. Prepare access to your provider account. Google login requires the site administrator’s OAuth application to be configured first; API-key connections need the key from your own provider account.
Setup
- Open Integrations & API and find X / Twitter Ads. Choose Connect and paste X pixel ID, Click/view conversion event ID, Ads API consumer key, Ads API consumer secret, User access token, User access token secret. These credentials require the relevant provider account access.
- Keep Automatic ad-click tracking Off while setting up. Use a click/view event in your advertising account. This connector reports short-link visits.
- Optionally restrict the connection to one domain ID in this workspace; otherwise it covers workspace domains.
- Choose Check connection. Validation or account access success confirms setup access, not final attribution.
- Set Automatic ad-click tracking to On when ready. Only visits containing this platform’s click identifier are forwarded. Check Deliveries and the advertising platform’s own event diagnostics.
Data and verification
Out: matched ad click identifier, event ID, timestamp and short URL. Some platforms also receive visitor IP and browser user agent.
In: API acceptance or failure, recorded in Deliveries.
GPC and Do Not Track requests, detected bots and unmatched ad visits are skipped by the connector.
Troubleshooting
A connected badge means credentials have been saved. Run the available connection check and inspect Deliveries for the provider response. For a 401/403, check key permissions and account ownership. For quota or rate limits, check the provider dashboard before retrying. Never paste a secret into a public support message.
Can I change credentials or disconnect?
Owners and workspace admins can use Edit setup for API credentials, Configure for destinations, and Disconnect to remove the stored connection. Blank secret fields preserve the saved key. Disconnecting does not delete previously created campaigns in the provider.
Does an accepted event mean a sale?
No. This connector reports a click/view, not a purchase. Platform attribution can be delayed or rejected. Confirm sales in your checkout and advertising reports.
Next steps
Open this integration · Browse integrations · Official provider documentation
Connect LinkedIn Ads
Connect once to track matching LinkedIn Ads ad clicks across your short domains.
What this connection does
Reports short-link visits, not purchases. Only matching ad clicks are forwarded when enabled. GPC/Do Not Track requests and detected bots are skipped. Configure the conversion as a click/view event in your ads account. Credentials stay encrypted; results appear in Deliveries.
Before you start
Use a workspace Owner or Admin account. Prepare access to your provider account. Google login requires the site administrator’s OAuth application to be configured first; API-key connections need the key from your own provider account.
Setup
- Open Integrations & API and find LinkedIn Ads. Choose Connect and paste Click/view conversion rule ID, Conversions API access token. These credentials require the relevant provider account access.
- Keep Automatic ad-click tracking Off while setting up. Use a click/view event in your advertising account. This connector reports short-link visits.
- Optionally restrict the connection to one domain ID in this workspace; otherwise it covers workspace domains.
- Choose Check connection. Validation or account access success confirms setup access, not final attribution.
- Set Automatic ad-click tracking to On when ready. Only visits containing this platform’s click identifier are forwarded. Check Deliveries and the advertising platform’s own event diagnostics.
Data and verification
Out: matched ad click identifier, event ID, timestamp and short URL. Some platforms also receive visitor IP and browser user agent.
In: API acceptance or failure, recorded in Deliveries.
GPC and Do Not Track requests, detected bots and unmatched ad visits are skipped by the connector.
Troubleshooting
A connected badge means credentials have been saved. Run the available connection check and inspect Deliveries for the provider response. For a 401/403, check key permissions and account ownership. For quota or rate limits, check the provider dashboard before retrying. Never paste a secret into a public support message.
Can I change credentials or disconnect?
Owners and workspace admins can use Edit setup for API credentials, Configure for destinations, and Disconnect to remove the stored connection. Blank secret fields preserve the saved key. Disconnecting does not delete previously created campaigns in the provider.
Does an accepted event mean a sale?
No. This connector reports a click/view, not a purchase. Platform attribution can be delayed or rejected. Confirm sales in your checkout and advertising reports.
Next steps
Open this integration · Browse integrations · Official provider documentation
Connect Pinterest Ads
Connect once to track matching Pinterest Ads ad clicks across your short domains.
What this connection does
Reports short-link visits, not purchases. Only matching ad clicks are forwarded when enabled. GPC/Do Not Track requests and detected bots are skipped. Configure the conversion as a click/view event in your ads account. Credentials stay encrypted; results appear in Deliveries.
Before you start
Use a workspace Owner or Admin account. Prepare access to your provider account. Google login requires the site administrator’s OAuth application to be configured first; API-key connections need the key from your own provider account.
Setup
- Open Integrations & API and find Pinterest Ads. Choose Connect and paste Pinterest ad account ID, Conversions API token. These credentials require the relevant provider account access.
- Keep Automatic ad-click tracking Off while setting up. Use a click/view event in your advertising account. This connector reports short-link visits.
- Optionally restrict the connection to one domain ID in this workspace; otherwise it covers workspace domains.
- Choose Check connection. Validation or account access success confirms setup access, not final attribution.
- Set Automatic ad-click tracking to On when ready. Only visits containing this platform’s click identifier are forwarded. Check Deliveries and the advertising platform’s own event diagnostics.
Data and verification
Out: matched ad click identifier, event ID, timestamp and short URL. Some platforms also receive visitor IP and browser user agent.
In: API acceptance or failure, recorded in Deliveries.
GPC and Do Not Track requests, detected bots and unmatched ad visits are skipped by the connector.
Troubleshooting
A connected badge means credentials have been saved. Run the available connection check and inspect Deliveries for the provider response. For a 401/403, check key permissions and account ownership. For quota or rate limits, check the provider dashboard before retrying. Never paste a secret into a public support message.
Can I change credentials or disconnect?
Owners and workspace admins can use Edit setup for API credentials, Configure for destinations, and Disconnect to remove the stored connection. Blank secret fields preserve the saved key. Disconnecting does not delete previously created campaigns in the provider.
Does an accepted event mean a sale?
No. This connector reports a click/view, not a purchase. Platform attribution can be delayed or rejected. Confirm sales in your checkout and advertising reports.
Next steps
Open this integration · Browse integrations · Official provider documentation
Connect Reddit Ads
Connect once to track matching Reddit Ads ad clicks across your short domains.
What this connection does
Reports short-link visits, not purchases. Only matching ad clicks are forwarded when enabled. GPC/Do Not Track requests and detected bots are skipped. Configure the conversion as a click/view event in your ads account. Credentials stay encrypted; results appear in Deliveries.
Before you start
Use a workspace Owner or Admin account. Prepare access to your provider account. Google login requires the site administrator’s OAuth application to be configured first; API-key connections need the key from your own provider account.
Setup
- Open Integrations & API and find Reddit Ads. Choose Connect and paste Reddit pixel ID, Conversions API access token. These credentials require the relevant provider account access.
- Keep Automatic ad-click tracking Off while setting up. Use a click/view event in your advertising account. This connector reports short-link visits.
- Optionally restrict the connection to one domain ID in this workspace; otherwise it covers workspace domains.
- Reddit has no connection-test button here. After enabling, inspect a real matching ad visit in Deliveries and Reddit Events Manager.
- Set Automatic ad-click tracking to On when ready. Only visits containing this platform’s click identifier are forwarded. Check Deliveries and the advertising platform’s own event diagnostics.
Data and verification
Out: matched ad click identifier, event ID, timestamp and short URL. Some platforms also receive visitor IP and browser user agent.
In: API acceptance or failure, recorded in Deliveries.
GPC and Do Not Track requests, detected bots and unmatched ad visits are skipped by the connector.
Troubleshooting
A connected badge means credentials have been saved. Run the available connection check and inspect Deliveries for the provider response. For a 401/403, check key permissions and account ownership. For quota or rate limits, check the provider dashboard before retrying. Never paste a secret into a public support message.
Can I change credentials or disconnect?
Owners and workspace admins can use Edit setup for API credentials, Configure for destinations, and Disconnect to remove the stored connection. Blank secret fields preserve the saved key. Disconnecting does not delete previously created campaigns in the provider.
Does an accepted event mean a sale?
No. This connector reports a click/view, not a purchase. Platform attribution can be delayed or rejected. Confirm sales in your checkout and advertising reports.
Next steps
Open this integration · Browse integrations · Official provider documentation
Connect Google Ads
Sign in with Google and send attributed click events through Data Manager.
What this connection does
After login, configure your Ads customer and a click/view conversion action. Enable the Data Manager API for the operator’s Cloud project. Only matching gclid/gbraid/wbraid clicks are sent when enabled. This does not create campaigns or count visits as purchases.
Before you start
Use a workspace Owner or Admin account. Prepare access to your provider account. Google login requires the site administrator’s OAuth application to be configured first; API-key connections need the key from your own provider account.
Setup
- Open Integrations & API and find Google Ads. Choose Connect with Google. The administrator first configures the Google Ads OAuth application and enables Data Manager API.
- Keep Automatic ad-click tracking Off while setting up. Choose Configure and enter numeric customer and click/view conversion action IDs. Include a manager ID only when required.
- Optionally restrict the connection to one domain ID in this workspace; otherwise it covers workspace domains.
- Choose Validate setup. Validation or account access success confirms setup access, not final attribution.
- Set Automatic ad-click tracking to On when ready. Only visits containing this platform’s click identifier are forwarded. Check Deliveries and the advertising platform’s own event diagnostics.
Data and verification
Out: matched ad click identifier, event ID, timestamp and short URL. Some platforms also receive visitor IP and browser user agent.
In: API acceptance or failure, recorded in Deliveries.
GPC and Do Not Track requests, detected bots and unmatched ad visits are skipped by the connector.
Troubleshooting
A connected badge means credentials have been saved. Run the available connection check and inspect Deliveries for the provider response. For a 401/403, check key permissions and account ownership. For quota or rate limits, check the provider dashboard before retrying. Never paste a secret into a public support message.
Can I change credentials or disconnect?
Owners and workspace admins can use Edit setup for API credentials, Configure for destinations, and Disconnect to remove the stored connection. Blank secret fields preserve the saved key. Disconnecting does not delete previously created campaigns in the provider.
Does an accepted event mean a sale?
No. This connector reports a click/view, not a purchase. Platform attribution can be delayed or rejected. Confirm sales in your checkout and advertising reports.
Next steps
Open this integration · Browse integrations · Official provider documentation
Connect Mailchimp
Create newsletter drafts containing your branded short links.
What this connection does
Connect your API key, choose a list and verified sender, then create a draft from any workspace link. Automatic draft creation is optional. Review and send from your email provider; this connector never sends or schedules a campaign.
Before you start
Use a workspace Owner or Admin account. Prepare access to your provider account. Google login requires the site administrator’s OAuth application to be configured first; API-key connections need the key from your own provider account.
Setup
- Open Integrations & API in your workspace, find Mailchimp and choose Connect. Mailchimp Marketing API key; the key ends with your data centre, for example -us21.
- Paste your API key. Choose Check connection to read the account’s available lists. A saved key alone is not proof that it is valid.
- Choose Configure. Select an audience, list or group and enter the verified sender details. SendGrid uses its sender ID and unsubscribe group ID. Mailchimp requires an audience.
- Choose Create email draft, search your active workspace links and select one. The result shows the provider draft ID. Review the contents and recipients inside Mailchimp before sending.
- For automatic drafts, set Create draft when a short link is created to On in Configure. Turn it Off to stop future automatic drafts. Sending remains a separate action in your email provider.
Data and verification
Out: selected short URL, link title, sender details and chosen list ID.
In: list names and IDs, provider draft ID and delivery outcome.
This connector does not import subscriber addresses or send campaigns.
Troubleshooting
A connected badge means credentials have been saved. Run the available connection check and inspect Deliveries for the provider response. For a 401/403, check key permissions and account ownership. For quota or rate limits, check the provider dashboard before retrying. Never paste a secret into a public support message.
Can I change credentials or disconnect?
Owners and workspace admins can use Edit setup for API credentials, Configure for destinations, and Disconnect to remove the stored connection. Blank secret fields preserve the saved key. Disconnecting does not delete previously created campaigns in the provider.
What if a draft creation fails?
A needs_review or uncertain result is retained. Check the provider account before attempting another campaign. Repeating the same link and connection shows the existing operation instead of creating another draft.
Next steps
Open this integration · Browse integrations · Official provider documentation
Connect Brevo
Create newsletter drafts containing your branded short links.
What this connection does
Connect your API key, choose a list and verified sender, then create a draft from any workspace link. Automatic draft creation is optional. Review and send from your email provider; this connector never sends or schedules a campaign.
Before you start
Use a workspace Owner or Admin account. Prepare access to your provider account. Google login requires the site administrator’s OAuth application to be configured first; API-key connections need the key from your own provider account.
Setup
- Open Integrations & API in your workspace, find Brevo and choose Connect. Brevo → SMTP & API → API keys. Use a Marketing API key.
- Paste your API key. Choose Check connection to read the account’s available lists. A saved key alone is not proof that it is valid.
- Choose Configure. Select an audience, list or group and enter the verified sender details. SendGrid uses its sender ID and unsubscribe group ID. Mailchimp requires an audience.
- Choose Create email draft, search your active workspace links and select one. The result shows the provider draft ID. Review the contents and recipients inside Brevo before sending.
- For automatic drafts, set Create draft when a short link is created to On in Configure. Turn it Off to stop future automatic drafts. Sending remains a separate action in your email provider.
Data and verification
Out: selected short URL, link title, sender details and chosen list ID.
In: list names and IDs, provider draft ID and delivery outcome.
This connector does not import subscriber addresses or send campaigns.
Troubleshooting
A connected badge means credentials have been saved. Run the available connection check and inspect Deliveries for the provider response. For a 401/403, check key permissions and account ownership. For quota or rate limits, check the provider dashboard before retrying. Never paste a secret into a public support message.
Can I change credentials or disconnect?
Owners and workspace admins can use Edit setup for API credentials, Configure for destinations, and Disconnect to remove the stored connection. Blank secret fields preserve the saved key. Disconnecting does not delete previously created campaigns in the provider.
What if a draft creation fails?
A needs_review or uncertain result is retained. Check the provider account before attempting another campaign. Repeating the same link and connection shows the existing operation instead of creating another draft.
Next steps
Open this integration · Browse integrations · Official provider documentation
Connect MailerLite
Create newsletter drafts containing your branded short links.
What this connection does
Connect your API key, choose a list and verified sender, then create a draft from any workspace link. Automatic draft creation is optional. Review and send from your email provider; this connector never sends or schedules a campaign.
Before you start
Use a workspace Owner or Admin account. Prepare access to your provider account. Google login requires the site administrator’s OAuth application to be configured first; API-key connections need the key from your own provider account.
Setup
- Open Integrations & API in your workspace, find MailerLite and choose Connect. MailerLite → Integrations → Developer API → Generate token.
- Paste your API key. Choose Check connection to read the account’s available lists. A saved key alone is not proof that it is valid.
- Choose Configure. Select an audience, list or group and enter the verified sender details. SendGrid uses its sender ID and unsubscribe group ID. Mailchimp requires an audience.
- Choose Create email draft, search your active workspace links and select one. The result shows the provider draft ID. Review the contents and recipients inside MailerLite before sending.
- For automatic drafts, set Create draft when a short link is created to On in Configure. Turn it Off to stop future automatic drafts. Sending remains a separate action in your email provider.
Data and verification
Out: selected short URL, link title, sender details and chosen list ID.
In: list names and IDs, provider draft ID and delivery outcome.
This connector does not import subscriber addresses or send campaigns.
Troubleshooting
A connected badge means credentials have been saved. Run the available connection check and inspect Deliveries for the provider response. For a 401/403, check key permissions and account ownership. For quota or rate limits, check the provider dashboard before retrying. Never paste a secret into a public support message.
Can I change credentials or disconnect?
Owners and workspace admins can use Edit setup for API credentials, Configure for destinations, and Disconnect to remove the stored connection. Blank secret fields preserve the saved key. Disconnecting does not delete previously created campaigns in the provider.
What if a draft creation fails?
A needs_review or uncertain result is retained. Check the provider account before attempting another campaign. Repeating the same link and connection shows the existing operation instead of creating another draft.
Next steps
Open this integration · Browse integrations · Official provider documentation
Connect SendGrid Marketing
Create newsletter drafts containing your branded short links.
What this connection does
Connect your API key, choose a list and verified sender, then create a draft from any workspace link. Automatic draft creation is optional. Review and send from your email provider; this connector never sends or schedules a campaign.
Before you start
Use a workspace Owner or Admin account. Prepare access to your provider account. Google login requires the site administrator’s OAuth application to be configured first; API-key connections need the key from your own provider account.
Setup
- Open Integrations & API in your workspace, find SendGrid Marketing and choose Connect. Create a key with Marketing Campaigns and sender read access.
- Paste your API key. Choose Check connection to read the account’s available lists. A saved key alone is not proof that it is valid.
- Choose Configure. Select an audience, list or group and enter the verified sender details. SendGrid uses its sender ID and unsubscribe group ID. Mailchimp requires an audience.
- Choose Create email draft, search your active workspace links and select one. The result shows the provider draft ID. Review the contents and recipients inside SendGrid Marketing before sending.
- For automatic drafts, set Create draft when a short link is created to On in Configure. Turn it Off to stop future automatic drafts. Sending remains a separate action in your email provider.
Data and verification
Out: selected short URL, link title, sender details and chosen list ID.
In: list names and IDs, provider draft ID and delivery outcome.
This connector does not import subscriber addresses or send campaigns.
Troubleshooting
A connected badge means credentials have been saved. Run the available connection check and inspect Deliveries for the provider response. For a 401/403, check key permissions and account ownership. For quota or rate limits, check the provider dashboard before retrying. Never paste a secret into a public support message.
Can I change credentials or disconnect?
Owners and workspace admins can use Edit setup for API credentials, Configure for destinations, and Disconnect to remove the stored connection. Blank secret fields preserve the saved key. Disconnecting does not delete previously created campaigns in the provider.
What if a draft creation fails?
A needs_review or uncertain result is retained. Check the provider account before attempting another campaign. Repeating the same link and connection shows the existing operation instead of creating another draft.
Next steps
Open this integration · Browse integrations · Official provider documentation
Connect Pipedream
Connect an incoming workflow URL to use short-link events in Pipedream.
What this connection does
The dashboard sends subscribed events to your activated workflow. Choose the following action inside Pipedream, such as creating a CRM record or a newsletter draft.
This is an incoming-webhook connection; it does not automatically grant access to every application in the workflow. Authenticate those applications in Pipedream.
Before you start
Use a workspace Owner or Admin account. Prepare access to your provider account. Google login requires the site administrator’s OAuth application to be configured first; API-key connections need the key from your own provider account.
Setup
- In Pipedream, create an incoming HTTP/webhook trigger. Enable external requests using the authentication supported by your workflow plan.
- Copy the public HTTPS production trigger URL, then open this integration in ShortFreeURL. Paste the URL and give the workflow a name.
- Save and copy the signing secret shown once. Your receiver can verify the ShortFreeURL signature before accepting events.
- Use Events to select which events to deliver. Send test intentionally starts your workflow; keep downstream actions in test or draft mode.
- Inspect Deliveries and the workflow execution log. Map the shortURL field from the link payload into your next action.
Data and verification
Out: selected link/domain events and the account context included in that event.
In: the receiving workflow’s HTTP response. An accepted trigger does not prove its later actions succeeded.
Troubleshooting
A connected badge means credentials have been saved. Run the available connection check and inspect Deliveries for the provider response. For a 401/403, check key permissions and account ownership. For quota or rate limits, check the provider dashboard before retrying. Never paste a secret into a public support message.
Do I need to write integration code?
No code is needed to paste the trigger URL and map fields in the workflow builder. The provider may require a paid plan for webhook triggers or particular actions.
Next steps
Connect Activepieces
Connect an incoming workflow URL to use short-link events in Activepieces.
What this connection does
The dashboard sends subscribed events to your activated workflow. Choose the following action inside Activepieces, such as creating a CRM record or a newsletter draft.
This is an incoming-webhook connection; it does not automatically grant access to every application in the workflow. Authenticate those applications in Activepieces.
Before you start
Use a workspace Owner or Admin account. Prepare access to your provider account. Google login requires the site administrator’s OAuth application to be configured first; API-key connections need the key from your own provider account.
Setup
- In Activepieces, create an incoming HTTP/webhook trigger. Enable external requests using the authentication supported by your workflow plan.
- Copy the public HTTPS production trigger URL, then open this integration in ShortFreeURL. Paste the URL and give the workflow a name.
- Save and copy the signing secret shown once. Your receiver can verify the ShortFreeURL signature before accepting events.
- Use Events to select which events to deliver. Send test intentionally starts your workflow; keep downstream actions in test or draft mode.
- Inspect Deliveries and the workflow execution log. Map the shortURL field from the link payload into your next action.
Data and verification
Out: selected link/domain events and the account context included in that event.
In: the receiving workflow’s HTTP response. An accepted trigger does not prove its later actions succeeded.
Troubleshooting
A connected badge means credentials have been saved. Run the available connection check and inspect Deliveries for the provider response. For a 401/403, check key permissions and account ownership. For quota or rate limits, check the provider dashboard before retrying. Never paste a secret into a public support message.
Do I need to write integration code?
No code is needed to paste the trigger URL and map fields in the workflow builder. The provider may require a paid plan for webhook triggers or particular actions.
Next steps
Connect Zoho Flow
Connect an incoming workflow URL to use short-link events in Zoho Flow.
What this connection does
The dashboard sends subscribed events to your activated workflow. Choose the following action inside Zoho Flow, such as creating a CRM record or a newsletter draft.
This is an incoming-webhook connection; it does not automatically grant access to every application in the workflow. Authenticate those applications in Zoho Flow.
Before you start
Use a workspace Owner or Admin account. Prepare access to your provider account. Google login requires the site administrator’s OAuth application to be configured first; API-key connections need the key from your own provider account.
Setup
- In Zoho Flow, create an incoming HTTP/webhook trigger. Enable external requests using the authentication supported by your workflow plan.
- Copy the public HTTPS production trigger URL, then open this integration in ShortFreeURL. Paste the URL and give the workflow a name.
- Save and copy the signing secret shown once. Your receiver can verify the ShortFreeURL signature before accepting events.
- Use Events to select which events to deliver. Send test intentionally starts your workflow; keep downstream actions in test or draft mode.
- Inspect Deliveries and the workflow execution log. Map the shortURL field from the link payload into your next action.
Data and verification
Out: selected link/domain events and the account context included in that event.
In: the receiving workflow’s HTTP response. An accepted trigger does not prove its later actions succeeded.
Troubleshooting
A connected badge means credentials have been saved. Run the available connection check and inspect Deliveries for the provider response. For a 401/403, check key permissions and account ownership. For quota or rate limits, check the provider dashboard before retrying. Never paste a secret into a public support message.
Do I need to write integration code?
No code is needed to paste the trigger URL and map fields in the workflow builder. The provider may require a paid plan for webhook triggers or particular actions.
Next steps
Connect Albato
Connect an incoming workflow URL to use short-link events in Albato.
What this connection does
The dashboard sends subscribed events to your activated workflow. Choose the following action inside Albato, such as creating a CRM record or a newsletter draft.
This is an incoming-webhook connection; it does not automatically grant access to every application in the workflow. Authenticate those applications in Albato.
Before you start
Use a workspace Owner or Admin account. Prepare access to your provider account. Google login requires the site administrator’s OAuth application to be configured first; API-key connections need the key from your own provider account.
Setup
- In Albato, create an incoming HTTP/webhook trigger. Enable external requests using the authentication supported by your workflow plan.
- Copy the public HTTPS production trigger URL, then open this integration in ShortFreeURL. Paste the URL and give the workflow a name.
- Save and copy the signing secret shown once. Your receiver can verify the ShortFreeURL signature before accepting events.
- Use Events to select which events to deliver. Send test intentionally starts your workflow; keep downstream actions in test or draft mode.
- Inspect Deliveries and the workflow execution log. Map the shortURL field from the link payload into your next action.
Data and verification
Out: selected link/domain events and the account context included in that event.
In: the receiving workflow’s HTTP response. An accepted trigger does not prove its later actions succeeded.
Troubleshooting
A connected badge means credentials have been saved. Run the available connection check and inspect Deliveries for the provider response. For a 401/403, check key permissions and account ownership. For quota or rate limits, check the provider dashboard before retrying. Never paste a secret into a public support message.
Do I need to write integration code?
No code is needed to paste the trigger URL and map fields in the workflow builder. The provider may require a paid plan for webhook triggers or particular actions.
Next steps
Connect Tray.io
Connect an incoming workflow URL to use short-link events in Tray.io.
What this connection does
The dashboard sends subscribed events to your activated workflow. Choose the following action inside Tray.io, such as creating a CRM record or a newsletter draft.
This is an incoming-webhook connection; it does not automatically grant access to every application in the workflow. Authenticate those applications in Tray.io.
Before you start
Use a workspace Owner or Admin account. Prepare access to your provider account. Google login requires the site administrator’s OAuth application to be configured first; API-key connections need the key from your own provider account.
Setup
- In Tray.io, create an incoming HTTP/webhook trigger. Enable external requests using the authentication supported by your workflow plan.
- Copy the public HTTPS production trigger URL, then open this integration in ShortFreeURL. Paste the URL and give the workflow a name.
- Save and copy the signing secret shown once. Your receiver can verify the ShortFreeURL signature before accepting events.
- Use Events to select which events to deliver. Send test intentionally starts your workflow; keep downstream actions in test or draft mode.
- Inspect Deliveries and the workflow execution log. Map the shortURL field from the link payload into your next action.
Data and verification
Out: selected link/domain events and the account context included in that event.
In: the receiving workflow’s HTTP response. An accepted trigger does not prove its later actions succeeded.
Troubleshooting
A connected badge means credentials have been saved. Run the available connection check and inspect Deliveries for the provider response. For a 401/403, check key permissions and account ownership. For quota or rate limits, check the provider dashboard before retrying. Never paste a secret into a public support message.
Do I need to write integration code?
No code is needed to paste the trigger URL and map fields in the workflow builder. The provider may require a paid plan for webhook triggers or particular actions.
Next steps
Connect Latenode
Connect an incoming workflow URL to use short-link events in Latenode.
What this connection does
The dashboard sends subscribed events to your activated workflow. Choose the following action inside Latenode, such as creating a CRM record or a newsletter draft.
This is an incoming-webhook connection; it does not automatically grant access to every application in the workflow. Authenticate those applications in Latenode.
Before you start
Use a workspace Owner or Admin account. Prepare access to your provider account. Google login requires the site administrator’s OAuth application to be configured first; API-key connections need the key from your own provider account.
Setup
- In Latenode, create an incoming HTTP/webhook trigger. Enable external requests using the authentication supported by your workflow plan.
- Copy the public HTTPS production trigger URL, then open this integration in ShortFreeURL. Paste the URL and give the workflow a name.
- Save and copy the signing secret shown once. Your receiver can verify the ShortFreeURL signature before accepting events.
- Use Events to select which events to deliver. Send test intentionally starts your workflow; keep downstream actions in test or draft mode.
- Inspect Deliveries and the workflow execution log. Map the shortURL field from the link payload into your next action.
Data and verification
Out: selected link/domain events and the account context included in that event.
In: the receiving workflow’s HTTP response. An accepted trigger does not prove its later actions succeeded.
Troubleshooting
A connected badge means credentials have been saved. Run the available connection check and inspect Deliveries for the provider response. For a 401/403, check key permissions and account ownership. For quota or rate limits, check the provider dashboard before retrying. Never paste a secret into a public support message.
Do I need to write integration code?
No code is needed to paste the trigger URL and map fields in the workflow builder. The provider may require a paid plan for webhook triggers or particular actions.
Next steps
Connect Microsoft Power Automate
Connect an incoming workflow URL to use short-link events in Microsoft Power Automate.
What this connection does
The dashboard sends subscribed events to your activated workflow. Choose the following action inside Microsoft Power Automate, such as creating a CRM record or a newsletter draft.
This is an incoming-webhook connection; it does not automatically grant access to every application in the workflow. Authenticate those applications in Microsoft Power Automate.
Before you start
Use a workspace Owner or Admin account. Prepare access to your provider account. Google login requires the site administrator’s OAuth application to be configured first; API-key connections need the key from your own provider account.
Setup
- In Microsoft Power Automate, create an incoming HTTP/webhook trigger. Enable external requests using the authentication supported by your workflow plan.
- Copy the public HTTPS production trigger URL, then open this integration in ShortFreeURL. Paste the URL and give the workflow a name.
- Save and copy the signing secret shown once. Your receiver can verify the ShortFreeURL signature before accepting events.
- Use Events to select which events to deliver. Send test intentionally starts your workflow; keep downstream actions in test or draft mode.
- Inspect Deliveries and the workflow execution log. Map the shortURL field from the link payload into your next action.
Data and verification
Out: selected link/domain events and the account context included in that event.
In: the receiving workflow’s HTTP response. An accepted trigger does not prove its later actions succeeded.
Troubleshooting
A connected badge means credentials have been saved. Run the available connection check and inspect Deliveries for the provider response. For a 401/403, check key permissions and account ownership. For quota or rate limits, check the provider dashboard before retrying. Never paste a secret into a public support message.
Do I need to write integration code?
No code is needed to paste the trigger URL and map fields in the workflow builder. The provider may require a paid plan for webhook triggers or particular actions.
Next steps
Connect Trello
Full illustrated workflow guide
Follow the Make, Zapier or n8n walkthrough with numbered illustrations. Includes key setup, URL mapping, a test run and troubleshooting.
Direct connection is now available
You can connect Trello with a provider token and import selected URLs without an automation service. Follow the direct account guide.
Optional automation workflow
Share a card URL with a branded link through Make, Zapier or n8n.
Connection type
Guided HTTP workflow
This is a guided HTTP workflow. Sign in to the source service in Make, Zapier or n8n; the ShortFreeURL key connects the HTTP action.
Before you connect
Sign in as a workspace owner or admin. Review Subscription for feature availability and remaining connections. Prepare the provider account and the permissions needed for this workflow.
Step-by-step setup
- Open your automation service (Make, Zapier or n8n), select Trello and sign in to that account there. Provider access and automation-service fees are separate.
- Select the event or record containing the public URL you want to shorten. Share a card URL with a branded link. Never change private-file access permissions automatically.
- Choose Set up workflow in ShortFreeURL. Copy the create-only key once; it is restricted to creating links in this workspace.
- In an HTTP request action set POST, use the displayed Links endpoint and put the key in the Authorization header. Select JSON and map your public URL to originalURL. Add tags or UTM fields if needed.
- Run the workflow once and use the returned shortURL in a later action. Creating a link consumes your normal link/API quota.
- Check the generated link in Branded Links. Disconnecting revokes the key; expired plans and disabled features are checked again on each request.
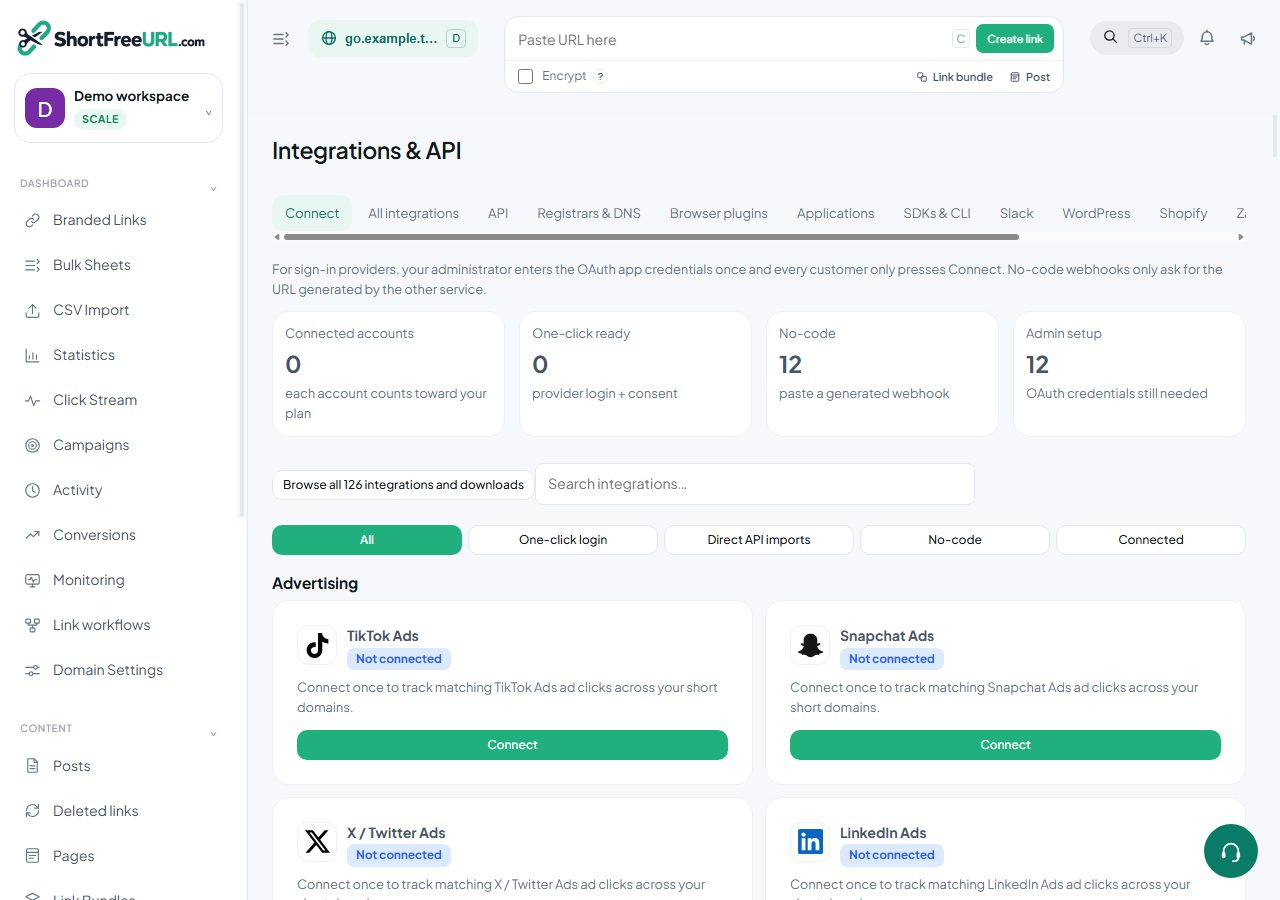
Verify and troubleshoot
Check the saved connection, run its available test, and inspect Deliveries. A saved key is not proof that an external workflow completed. For HTTP workflows, run one public URL through the source application and confirm the returned shortURL appears in Branded Links.
401/403: review credentials and provider permissions. 402: review your plan. 429: reduce frequency and respect Retry-After. Do not retry a successful creation without checking for an existing link.
Disconnect
Choose Disconnect and confirm. The local connection and generated key are removed. Work already created in the external service stays there. Expired plans and disabled integration features stop future protected requests.
Resources
Connect ClickUp
Full illustrated workflow guide
Follow the Make, Zapier or n8n walkthrough with numbered illustrations. Includes key setup, URL mapping, a test run and troubleshooting.
Direct connection is now available
You can connect ClickUp with a provider token and import selected URLs without an automation service. Follow the direct account guide.
Optional automation workflow
Shorten task and document URLs through Make, Zapier or n8n.
Connection type
Guided HTTP workflow
This is a guided HTTP workflow. Sign in to the source service in Make, Zapier or n8n; the ShortFreeURL key connects the HTTP action.
Before you connect
Sign in as a workspace owner or admin. Review Subscription for feature availability and remaining connections. Prepare the provider account and the permissions needed for this workflow.
Step-by-step setup
- Open your automation service (Make, Zapier or n8n), select ClickUp and sign in to that account there. Provider access and automation-service fees are separate.
- Select the event or record containing the public URL you want to shorten. Shorten task and document URLs. Never change private-file access permissions automatically.
- Choose Set up workflow in ShortFreeURL. Copy the create-only key once; it is restricted to creating links in this workspace.
- In an HTTP request action set POST, use the displayed Links endpoint and put the key in the Authorization header. Select JSON and map your public URL to originalURL. Add tags or UTM fields if needed.
- Run the workflow once and use the returned shortURL in a later action. Creating a link consumes your normal link/API quota.
- Check the generated link in Branded Links. Disconnecting revokes the key; expired plans and disabled features are checked again on each request.
Verify and troubleshoot
Check the saved connection, run its available test, and inspect Deliveries. A saved key is not proof that an external workflow completed. For HTTP workflows, run one public URL through the source application and confirm the returned shortURL appears in Branded Links.
401/403: review credentials and provider permissions. 402: review your plan. 429: reduce frequency and respect Retry-After. Do not retry a successful creation without checking for an existing link.
Disconnect
Choose Disconnect and confirm. The local connection and generated key are removed. Work already created in the external service stays there. Expired plans and disabled integration features stop future protected requests.
Resources
Connect monday.com
Full illustrated workflow guide
Follow the Make, Zapier or n8n walkthrough with numbered illustrations. Includes key setup, URL mapping, a test run and troubleshooting.
Publish branded item and form links through Make, Zapier or n8n.
Connection type
Guided HTTP workflow
This is a guided HTTP workflow. Sign in to the source service in Make, Zapier or n8n; the ShortFreeURL key connects the HTTP action.
Before you connect
Sign in as a workspace owner or admin. Review Subscription for feature availability and remaining connections. Prepare the provider account and the permissions needed for this workflow.
Step-by-step setup
- Open your automation service (Make, Zapier or n8n), select monday.com and sign in to that account there. Provider access and automation-service fees are separate.
- Select the event or record containing the public URL you want to shorten. Publish branded item and form links. Never change private-file access permissions automatically.
- Choose Set up workflow in ShortFreeURL. Copy the create-only key once; it is restricted to creating links in this workspace.
- In an HTTP request action set POST, use the displayed Links endpoint and put the key in the Authorization header. Select JSON and map your public URL to originalURL. Add tags or UTM fields if needed.
- Run the workflow once and use the returned shortURL in a later action. Creating a link consumes your normal link/API quota.
- Check the generated link in Branded Links. Disconnecting revokes the key; expired plans and disabled features are checked again on each request.
Verify and troubleshoot
Check the saved connection, run its available test, and inspect Deliveries. A saved key is not proof that an external workflow completed. For HTTP workflows, run one public URL through the source application and confirm the returned shortURL appears in Branded Links.
401/403: review credentials and provider permissions. 402: review your plan. 429: reduce frequency and respect Retry-After. Do not retry a successful creation without checking for an existing link.
Disconnect
Choose Disconnect and confirm. The local connection and generated key are removed. Work already created in the external service stays there. Expired plans and disabled integration features stop future protected requests.
Resources
Connect Todoist
Full illustrated workflow guide
Follow the Make, Zapier or n8n walkthrough with numbered illustrations. Includes key setup, URL mapping, a test run and troubleshooting.
Direct connection is now available
You can connect Todoist with a provider token and import selected URLs without an automation service. Follow the direct account guide.
Optional automation workflow
Attach a short resource URL to a task through Make, Zapier or n8n.
Connection type
Guided HTTP workflow
This is a guided HTTP workflow. Sign in to the source service in Make, Zapier or n8n; the ShortFreeURL key connects the HTTP action.
Before you connect
Sign in as a workspace owner or admin. Review Subscription for feature availability and remaining connections. Prepare the provider account and the permissions needed for this workflow.
Step-by-step setup
- Open your automation service (Make, Zapier or n8n), select Todoist and sign in to that account there. Provider access and automation-service fees are separate.
- Select the event or record containing the public URL you want to shorten. Attach a short resource URL to a task. Never change private-file access permissions automatically.
- Choose Set up workflow in ShortFreeURL. Copy the create-only key once; it is restricted to creating links in this workspace.
- In an HTTP request action set POST, use the displayed Links endpoint and put the key in the Authorization header. Select JSON and map your public URL to originalURL. Add tags or UTM fields if needed.
- Run the workflow once and use the returned shortURL in a later action. Creating a link consumes your normal link/API quota.
- Check the generated link in Branded Links. Disconnecting revokes the key; expired plans and disabled features are checked again on each request.
Verify and troubleshoot
Check the saved connection, run its available test, and inspect Deliveries. A saved key is not proof that an external workflow completed. For HTTP workflows, run one public URL through the source application and confirm the returned shortURL appears in Branded Links.
401/403: review credentials and provider permissions. 402: review your plan. 429: reduce frequency and respect Retry-After. Do not retry a successful creation without checking for an existing link.
Disconnect
Choose Disconnect and confirm. The local connection and generated key are removed. Work already created in the external service stays there. Expired plans and disabled integration features stop future protected requests.
Resources
Connect Basecamp
Full illustrated workflow guide
Follow the Make, Zapier or n8n walkthrough with numbered illustrations. Includes key setup, URL mapping, a test run and troubleshooting.
Share project resources with short links through Make, Zapier or n8n.
Connection type
Guided HTTP workflow
This is a guided HTTP workflow. Sign in to the source service in Make, Zapier or n8n; the ShortFreeURL key connects the HTTP action.
Before you connect
Sign in as a workspace owner or admin. Review Subscription for feature availability and remaining connections. Prepare the provider account and the permissions needed for this workflow.
Step-by-step setup
- Open your automation service (Make, Zapier or n8n), select Basecamp and sign in to that account there. Provider access and automation-service fees are separate.
- Select the event or record containing the public URL you want to shorten. Share project resources with short links. Never change private-file access permissions automatically.
- Choose Set up workflow in ShortFreeURL. Copy the create-only key once; it is restricted to creating links in this workspace.
- In an HTTP request action set POST, use the displayed Links endpoint and put the key in the Authorization header. Select JSON and map your public URL to originalURL. Add tags or UTM fields if needed.
- Run the workflow once and use the returned shortURL in a later action. Creating a link consumes your normal link/API quota.
- Check the generated link in Branded Links. Disconnecting revokes the key; expired plans and disabled features are checked again on each request.
Verify and troubleshoot
Check the saved connection, run its available test, and inspect Deliveries. A saved key is not proof that an external workflow completed. For HTTP workflows, run one public URL through the source application and confirm the returned shortURL appears in Branded Links.
401/403: review credentials and provider permissions. 402: review your plan. 429: reduce frequency and respect Retry-After. Do not retry a successful creation without checking for an existing link.
Disconnect
Choose Disconnect and confirm. The local connection and generated key are removed. Work already created in the external service stays there. Expired plans and disabled integration features stop future protected requests.
Resources
Connect Wrike
Full illustrated workflow guide
Follow the Make, Zapier or n8n walkthrough with numbered illustrations. Includes key setup, URL mapping, a test run and troubleshooting.
Direct connection is now available
You can connect Wrike with a provider token and import selected URLs without an automation service. Follow the direct account guide.
Optional automation workflow
Tag links for project communications through Make, Zapier or n8n.
Connection type
Guided HTTP workflow
This is a guided HTTP workflow. Sign in to the source service in Make, Zapier or n8n; the ShortFreeURL key connects the HTTP action.
Before you connect
Sign in as a workspace owner or admin. Review Subscription for feature availability and remaining connections. Prepare the provider account and the permissions needed for this workflow.
Step-by-step setup
- Open your automation service (Make, Zapier or n8n), select Wrike and sign in to that account there. Provider access and automation-service fees are separate.
- Select the event or record containing the public URL you want to shorten. Tag links for project communications. Never change private-file access permissions automatically.
- Choose Set up workflow in ShortFreeURL. Copy the create-only key once; it is restricted to creating links in this workspace.
- In an HTTP request action set POST, use the displayed Links endpoint and put the key in the Authorization header. Select JSON and map your public URL to originalURL. Add tags or UTM fields if needed.
- Run the workflow once and use the returned shortURL in a later action. Creating a link consumes your normal link/API quota.
- Check the generated link in Branded Links. Disconnecting revokes the key; expired plans and disabled features are checked again on each request.
Verify and troubleshoot
Check the saved connection, run its available test, and inspect Deliveries. A saved key is not proof that an external workflow completed. For HTTP workflows, run one public URL through the source application and confirm the returned shortURL appears in Branded Links.
401/403: review credentials and provider permissions. 402: review your plan. 429: reduce frequency and respect Retry-After. Do not retry a successful creation without checking for an existing link.
Disconnect
Choose Disconnect and confirm. The local connection and generated key are removed. Work already created in the external service stays there. Expired plans and disabled integration features stop future protected requests.
Resources
Connect Smartsheet
Full illustrated workflow guide
Follow the Make, Zapier or n8n walkthrough with numbered illustrations. Includes key setup, URL mapping, a test run and troubleshooting.
Direct connection is now available
You can connect Smartsheet with a provider token and import selected URLs without an automation service. Follow the direct account guide.
Optional automation workflow
Save a short URL in a sheet row through Make, Zapier or n8n.
Connection type
Guided HTTP workflow
This is a guided HTTP workflow. Sign in to the source service in Make, Zapier or n8n; the ShortFreeURL key connects the HTTP action.
Before you connect
Sign in as a workspace owner or admin. Review Subscription for feature availability and remaining connections. Prepare the provider account and the permissions needed for this workflow.
Step-by-step setup
- Open your automation service (Make, Zapier or n8n), select Smartsheet and sign in to that account there. Provider access and automation-service fees are separate.
- Select the event or record containing the public URL you want to shorten. Save a short URL in a sheet row. Never change private-file access permissions automatically.
- Choose Set up workflow in ShortFreeURL. Copy the create-only key once; it is restricted to creating links in this workspace.
- In an HTTP request action set POST, use the displayed Links endpoint and put the key in the Authorization header. Select JSON and map your public URL to originalURL. Add tags or UTM fields if needed.
- Run the workflow once and use the returned shortURL in a later action. Creating a link consumes your normal link/API quota.
- Check the generated link in Branded Links. Disconnecting revokes the key; expired plans and disabled features are checked again on each request.
Verify and troubleshoot
Check the saved connection, run its available test, and inspect Deliveries. A saved key is not proof that an external workflow completed. For HTTP workflows, run one public URL through the source application and confirm the returned shortURL appears in Branded Links.
401/403: review credentials and provider permissions. 402: review your plan. 429: reduce frequency and respect Retry-After. Do not retry a successful creation without checking for an existing link.
Disconnect
Choose Disconnect and confirm. The local connection and generated key are removed. Work already created in the external service stays there. Expired plans and disabled integration features stop future protected requests.
Resources
Connect Coda
Full illustrated workflow guide
Follow the Make, Zapier or n8n walkthrough with numbered illustrations. Includes key setup, URL mapping, a test run and troubleshooting.
Direct connection is now available
You can connect Coda with a provider token and import selected URLs without an automation service. Follow the direct account guide.
Optional automation workflow
Store campaign short links in a table through Make, Zapier or n8n.
Connection type
Guided HTTP workflow
This is a guided HTTP workflow. Sign in to the source service in Make, Zapier or n8n; the ShortFreeURL key connects the HTTP action.
Before you connect
Sign in as a workspace owner or admin. Review Subscription for feature availability and remaining connections. Prepare the provider account and the permissions needed for this workflow.
Step-by-step setup
- Open your automation service (Make, Zapier or n8n), select Coda and sign in to that account there. Provider access and automation-service fees are separate.
- Select the event or record containing the public URL you want to shorten. Store campaign short links in a table. Never change private-file access permissions automatically.
- Choose Set up workflow in ShortFreeURL. Copy the create-only key once; it is restricted to creating links in this workspace.
- In an HTTP request action set POST, use the displayed Links endpoint and put the key in the Authorization header. Select JSON and map your public URL to originalURL. Add tags or UTM fields if needed.
- Run the workflow once and use the returned shortURL in a later action. Creating a link consumes your normal link/API quota.
- Check the generated link in Branded Links. Disconnecting revokes the key; expired plans and disabled features are checked again on each request.
Verify and troubleshoot
Check the saved connection, run its available test, and inspect Deliveries. A saved key is not proof that an external workflow completed. For HTTP workflows, run one public URL through the source application and confirm the returned shortURL appears in Branded Links.
401/403: review credentials and provider permissions. 402: review your plan. 429: reduce frequency and respect Retry-After. Do not retry a successful creation without checking for an existing link.
Disconnect
Choose Disconnect and confirm. The local connection and generated key are removed. Work already created in the external service stays there. Expired plans and disabled integration features stop future protected requests.
Resources
Connect Google Drive
Full illustrated workflow guide
Follow the Make, Zapier or n8n walkthrough with numbered illustrations. Includes key setup, URL mapping, a test run and troubleshooting.
Shorten a publicly shared document link through Make, Zapier or n8n.
Connection type
Guided HTTP workflow
This is a guided HTTP workflow. Sign in to the source service in Make, Zapier or n8n; the ShortFreeURL key connects the HTTP action.
Before you connect
Sign in as a workspace owner or admin. Review Subscription for feature availability and remaining connections. Prepare the provider account and the permissions needed for this workflow.
Step-by-step setup
- Open your automation service (Make, Zapier or n8n), select Google Drive and sign in to that account there. Provider access and automation-service fees are separate.
- Select the event or record containing the public URL you want to shorten. Shorten a publicly shared document link. Never change private-file access permissions automatically.
- Choose Set up workflow in ShortFreeURL. Copy the create-only key once; it is restricted to creating links in this workspace.
- In an HTTP request action set POST, use the displayed Links endpoint and put the key in the Authorization header. Select JSON and map your public URL to originalURL. Add tags or UTM fields if needed.
- Run the workflow once and use the returned shortURL in a later action. Creating a link consumes your normal link/API quota.
- Check the generated link in Branded Links. Disconnecting revokes the key; expired plans and disabled features are checked again on each request.
Verify and troubleshoot
Check the saved connection, run its available test, and inspect Deliveries. A saved key is not proof that an external workflow completed. For HTTP workflows, run one public URL through the source application and confirm the returned shortURL appears in Branded Links.
401/403: review credentials and provider permissions. 402: review your plan. 429: reduce frequency and respect Retry-After. Do not retry a successful creation without checking for an existing link.
Disconnect
Choose Disconnect and confirm. The local connection and generated key are removed. Work already created in the external service stays there. Expired plans and disabled integration features stop future protected requests.
Resources
Connect Google Calendar
Full illustrated workflow guide
Follow the Make, Zapier or n8n walkthrough with numbered illustrations. Includes key setup, URL mapping, a test run and troubleshooting.
Share event or booking URLs through Make, Zapier or n8n.
Connection type
Guided HTTP workflow
This is a guided HTTP workflow. Sign in to the source service in Make, Zapier or n8n; the ShortFreeURL key connects the HTTP action.
Before you connect
Sign in as a workspace owner or admin. Review Subscription for feature availability and remaining connections. Prepare the provider account and the permissions needed for this workflow.
Step-by-step setup
- Open your automation service (Make, Zapier or n8n), select Google Calendar and sign in to that account there. Provider access and automation-service fees are separate.
- Select the event or record containing the public URL you want to shorten. Share event or booking URLs. Never change private-file access permissions automatically.
- Choose Set up workflow in ShortFreeURL. Copy the create-only key once; it is restricted to creating links in this workspace.
- In an HTTP request action set POST, use the displayed Links endpoint and put the key in the Authorization header. Select JSON and map your public URL to originalURL. Add tags or UTM fields if needed.
- Run the workflow once and use the returned shortURL in a later action. Creating a link consumes your normal link/API quota.
- Check the generated link in Branded Links. Disconnecting revokes the key; expired plans and disabled features are checked again on each request.
Verify and troubleshoot
Check the saved connection, run its available test, and inspect Deliveries. A saved key is not proof that an external workflow completed. For HTTP workflows, run one public URL through the source application and confirm the returned shortURL appears in Branded Links.
401/403: review credentials and provider permissions. 402: review your plan. 429: reduce frequency and respect Retry-After. Do not retry a successful creation without checking for an existing link.
Disconnect
Choose Disconnect and confirm. The local connection and generated key are removed. Work already created in the external service stays there. Expired plans and disabled integration features stop future protected requests.
Resources
Connect Gmail
Full illustrated workflow guide
Follow the Make, Zapier or n8n walkthrough with numbered illustrations. Includes key setup, URL mapping, a test run and troubleshooting.
Insert a short link into an email draft through Make, Zapier or n8n.
Connection type
Guided HTTP workflow
This is a guided HTTP workflow. Sign in to the source service in Make, Zapier or n8n; the ShortFreeURL key connects the HTTP action.
Before you connect
Sign in as a workspace owner or admin. Review Subscription for feature availability and remaining connections. Prepare the provider account and the permissions needed for this workflow.
Step-by-step setup
- Open your automation service (Make, Zapier or n8n), select Gmail and sign in to that account there. Provider access and automation-service fees are separate.
- Select the event or record containing the public URL you want to shorten. Insert a short link into an email draft. Never change private-file access permissions automatically.
- Choose Set up workflow in ShortFreeURL. Copy the create-only key once; it is restricted to creating links in this workspace.
- In an HTTP request action set POST, use the displayed Links endpoint and put the key in the Authorization header. Select JSON and map your public URL to originalURL. Add tags or UTM fields if needed.
- Run the workflow once and use the returned shortURL in a later action. Creating a link consumes your normal link/API quota.
- Check the generated link in Branded Links. Disconnecting revokes the key; expired plans and disabled features are checked again on each request.
Verify and troubleshoot
Check the saved connection, run its available test, and inspect Deliveries. A saved key is not proof that an external workflow completed. For HTTP workflows, run one public URL through the source application and confirm the returned shortURL appears in Branded Links.
401/403: review credentials and provider permissions. 402: review your plan. 429: reduce frequency and respect Retry-After. Do not retry a successful creation without checking for an existing link.
Disconnect
Choose Disconnect and confirm. The local connection and generated key are removed. Work already created in the external service stays there. Expired plans and disabled integration features stop future protected requests.
Resources
Connect Microsoft Outlook
Full illustrated workflow guide
Follow the Make, Zapier or n8n walkthrough with numbered illustrations. Includes key setup, URL mapping, a test run and troubleshooting.
Add a campaign link to an email draft through Make, Zapier or n8n.
Connection type
Guided HTTP workflow
This is a guided HTTP workflow. Sign in to the source service in Make, Zapier or n8n; the ShortFreeURL key connects the HTTP action.
Before you connect
Sign in as a workspace owner or admin. Review Subscription for feature availability and remaining connections. Prepare the provider account and the permissions needed for this workflow.
Step-by-step setup
- Open your automation service (Make, Zapier or n8n), select Microsoft Outlook and sign in to that account there. Provider access and automation-service fees are separate.
- Select the event or record containing the public URL you want to shorten. Add a campaign link to an email draft. Never change private-file access permissions automatically.
- Choose Set up workflow in ShortFreeURL. Copy the create-only key once; it is restricted to creating links in this workspace.
- In an HTTP request action set POST, use the displayed Links endpoint and put the key in the Authorization header. Select JSON and map your public URL to originalURL. Add tags or UTM fields if needed.
- Run the workflow once and use the returned shortURL in a later action. Creating a link consumes your normal link/API quota.
- Check the generated link in Branded Links. Disconnecting revokes the key; expired plans and disabled features are checked again on each request.
Verify and troubleshoot
Check the saved connection, run its available test, and inspect Deliveries. A saved key is not proof that an external workflow completed. For HTTP workflows, run one public URL through the source application and confirm the returned shortURL appears in Branded Links.
401/403: review credentials and provider permissions. 402: review your plan. 429: reduce frequency and respect Retry-After. Do not retry a successful creation without checking for an existing link.
Disconnect
Choose Disconnect and confirm. The local connection and generated key are removed. Work already created in the external service stays there. Expired plans and disabled integration features stop future protected requests.
Resources
Connect Microsoft OneDrive
Full illustrated workflow guide
Follow the Make, Zapier or n8n walkthrough with numbered illustrations. Includes key setup, URL mapping, a test run and troubleshooting.
Shorten a shared file URL through Make, Zapier or n8n.
Connection type
Guided HTTP workflow
This is a guided HTTP workflow. Sign in to the source service in Make, Zapier or n8n; the ShortFreeURL key connects the HTTP action.
Before you connect
Sign in as a workspace owner or admin. Review Subscription for feature availability and remaining connections. Prepare the provider account and the permissions needed for this workflow.
Step-by-step setup
- Open your automation service (Make, Zapier or n8n), select Microsoft OneDrive and sign in to that account there. Provider access and automation-service fees are separate.
- Select the event or record containing the public URL you want to shorten. Shorten a shared file URL. Never change private-file access permissions automatically.
- Choose Set up workflow in ShortFreeURL. Copy the create-only key once; it is restricted to creating links in this workspace.
- In an HTTP request action set POST, use the displayed Links endpoint and put the key in the Authorization header. Select JSON and map your public URL to originalURL. Add tags or UTM fields if needed.
- Run the workflow once and use the returned shortURL in a later action. Creating a link consumes your normal link/API quota.
- Check the generated link in Branded Links. Disconnecting revokes the key; expired plans and disabled features are checked again on each request.
Verify and troubleshoot
Check the saved connection, run its available test, and inspect Deliveries. A saved key is not proof that an external workflow completed. For HTTP workflows, run one public URL through the source application and confirm the returned shortURL appears in Branded Links.
401/403: review credentials and provider permissions. 402: review your plan. 429: reduce frequency and respect Retry-After. Do not retry a successful creation without checking for an existing link.
Disconnect
Choose Disconnect and confirm. The local connection and generated key are removed. Work already created in the external service stays there. Expired plans and disabled integration features stop future protected requests.
Resources
Connect Microsoft Excel
Full illustrated workflow guide
Follow the Make, Zapier or n8n walkthrough with numbered illustrations. Includes key setup, URL mapping, a test run and troubleshooting.
Create branded URLs from spreadsheet rows through Make, Zapier or n8n.
Connection type
Guided HTTP workflow
This is a guided HTTP workflow. Sign in to the source service in Make, Zapier or n8n; the ShortFreeURL key connects the HTTP action.
Before you connect
Sign in as a workspace owner or admin. Review Subscription for feature availability and remaining connections. Prepare the provider account and the permissions needed for this workflow.
Step-by-step setup
- Open your automation service (Make, Zapier or n8n), select Microsoft Excel and sign in to that account there. Provider access and automation-service fees are separate.
- Select the event or record containing the public URL you want to shorten. Create branded URLs from spreadsheet rows. Never change private-file access permissions automatically.
- Choose Set up workflow in ShortFreeURL. Copy the create-only key once; it is restricted to creating links in this workspace.
- In an HTTP request action set POST, use the displayed Links endpoint and put the key in the Authorization header. Select JSON and map your public URL to originalURL. Add tags or UTM fields if needed.
- Run the workflow once and use the returned shortURL in a later action. Creating a link consumes your normal link/API quota.
- Check the generated link in Branded Links. Disconnecting revokes the key; expired plans and disabled features are checked again on each request.
Verify and troubleshoot
Check the saved connection, run its available test, and inspect Deliveries. A saved key is not proof that an external workflow completed. For HTTP workflows, run one public URL through the source application and confirm the returned shortURL appears in Branded Links.
401/403: review credentials and provider permissions. 402: review your plan. 429: reduce frequency and respect Retry-After. Do not retry a successful creation without checking for an existing link.
Disconnect
Choose Disconnect and confirm. The local connection and generated key are removed. Work already created in the external service stays there. Expired plans and disabled integration features stop future protected requests.
Resources
Connect Salesforce
Full illustrated workflow guide
Follow the Make, Zapier or n8n walkthrough with numbered illustrations. Includes key setup, URL mapping, a test run and troubleshooting.
Save a proposal link to a CRM record through Make, Zapier or n8n.
Connection type
Guided HTTP workflow
This is a guided HTTP workflow. Sign in to the source service in Make, Zapier or n8n; the ShortFreeURL key connects the HTTP action.
Before you connect
Sign in as a workspace owner or admin. Review Subscription for feature availability and remaining connections. Prepare the provider account and the permissions needed for this workflow.
Step-by-step setup
- Open your automation service (Make, Zapier or n8n), select Salesforce and sign in to that account there. Provider access and automation-service fees are separate.
- Select the event or record containing the public URL you want to shorten. Save a proposal link to a CRM record. Never change private-file access permissions automatically.
- Choose Set up workflow in ShortFreeURL. Copy the create-only key once; it is restricted to creating links in this workspace.
- In an HTTP request action set POST, use the displayed Links endpoint and put the key in the Authorization header. Select JSON and map your public URL to originalURL. Add tags or UTM fields if needed.
- Run the workflow once and use the returned shortURL in a later action. Creating a link consumes your normal link/API quota.
- Check the generated link in Branded Links. Disconnecting revokes the key; expired plans and disabled features are checked again on each request.
Verify and troubleshoot
Check the saved connection, run its available test, and inspect Deliveries. A saved key is not proof that an external workflow completed. For HTTP workflows, run one public URL through the source application and confirm the returned shortURL appears in Branded Links.
401/403: review credentials and provider permissions. 402: review your plan. 429: reduce frequency and respect Retry-After. Do not retry a successful creation without checking for an existing link.
Disconnect
Choose Disconnect and confirm. The local connection and generated key are removed. Work already created in the external service stays there. Expired plans and disabled integration features stop future protected requests.
Resources
Connect Zoho CRM
Full illustrated workflow guide
Follow the Make, Zapier or n8n walkthrough with numbered illustrations. Includes key setup, URL mapping, a test run and troubleshooting.
Track links shared with prospects through Make, Zapier or n8n.
Connection type
Guided HTTP workflow
This is a guided HTTP workflow. Sign in to the source service in Make, Zapier or n8n; the ShortFreeURL key connects the HTTP action.
Before you connect
Sign in as a workspace owner or admin. Review Subscription for feature availability and remaining connections. Prepare the provider account and the permissions needed for this workflow.
Step-by-step setup
- Open your automation service (Make, Zapier or n8n), select Zoho CRM and sign in to that account there. Provider access and automation-service fees are separate.
- Select the event or record containing the public URL you want to shorten. Track links shared with prospects. Never change private-file access permissions automatically.
- Choose Set up workflow in ShortFreeURL. Copy the create-only key once; it is restricted to creating links in this workspace.
- In an HTTP request action set POST, use the displayed Links endpoint and put the key in the Authorization header. Select JSON and map your public URL to originalURL. Add tags or UTM fields if needed.
- Run the workflow once and use the returned shortURL in a later action. Creating a link consumes your normal link/API quota.
- Check the generated link in Branded Links. Disconnecting revokes the key; expired plans and disabled features are checked again on each request.
Verify and troubleshoot
Check the saved connection, run its available test, and inspect Deliveries. A saved key is not proof that an external workflow completed. For HTTP workflows, run one public URL through the source application and confirm the returned shortURL appears in Branded Links.
401/403: review credentials and provider permissions. 402: review your plan. 429: reduce frequency and respect Retry-After. Do not retry a successful creation without checking for an existing link.
Disconnect
Choose Disconnect and confirm. The local connection and generated key are removed. Work already created in the external service stays there. Expired plans and disabled integration features stop future protected requests.
Resources
Connect Pipedrive
Full illustrated workflow guide
Follow the Make, Zapier or n8n walkthrough with numbered illustrations. Includes key setup, URL mapping, a test run and troubleshooting.
Share a deal proposal using a branded URL through Make, Zapier or n8n.
Connection type
Guided HTTP workflow
This is a guided HTTP workflow. Sign in to the source service in Make, Zapier or n8n; the ShortFreeURL key connects the HTTP action.
Before you connect
Sign in as a workspace owner or admin. Review Subscription for feature availability and remaining connections. Prepare the provider account and the permissions needed for this workflow.
Step-by-step setup
- Open your automation service (Make, Zapier or n8n), select Pipedrive and sign in to that account there. Provider access and automation-service fees are separate.
- Select the event or record containing the public URL you want to shorten. Share a deal proposal using a branded URL. Never change private-file access permissions automatically.
- Choose Set up workflow in ShortFreeURL. Copy the create-only key once; it is restricted to creating links in this workspace.
- In an HTTP request action set POST, use the displayed Links endpoint and put the key in the Authorization header. Select JSON and map your public URL to originalURL. Add tags or UTM fields if needed.
- Run the workflow once and use the returned shortURL in a later action. Creating a link consumes your normal link/API quota.
- Check the generated link in Branded Links. Disconnecting revokes the key; expired plans and disabled features are checked again on each request.
Verify and troubleshoot
Check the saved connection, run its available test, and inspect Deliveries. A saved key is not proof that an external workflow completed. For HTTP workflows, run one public URL through the source application and confirm the returned shortURL appears in Branded Links.
401/403: review credentials and provider permissions. 402: review your plan. 429: reduce frequency and respect Retry-After. Do not retry a successful creation without checking for an existing link.
Disconnect
Choose Disconnect and confirm. The local connection and generated key are removed. Work already created in the external service stays there. Expired plans and disabled integration features stop future protected requests.
Resources
Connect Freshdesk
Full illustrated workflow guide
Follow the Make, Zapier or n8n walkthrough with numbered illustrations. Includes key setup, URL mapping, a test run and troubleshooting.
Shorten support article links through Make, Zapier or n8n.
Connection type
Guided HTTP workflow
This is a guided HTTP workflow. Sign in to the source service in Make, Zapier or n8n; the ShortFreeURL key connects the HTTP action.
Before you connect
Sign in as a workspace owner or admin. Review Subscription for feature availability and remaining connections. Prepare the provider account and the permissions needed for this workflow.
Step-by-step setup
- Open your automation service (Make, Zapier or n8n), select Freshdesk and sign in to that account there. Provider access and automation-service fees are separate.
- Select the event or record containing the public URL you want to shorten. Shorten support article links. Never change private-file access permissions automatically.
- Choose Set up workflow in ShortFreeURL. Copy the create-only key once; it is restricted to creating links in this workspace.
- In an HTTP request action set POST, use the displayed Links endpoint and put the key in the Authorization header. Select JSON and map your public URL to originalURL. Add tags or UTM fields if needed.
- Run the workflow once and use the returned shortURL in a later action. Creating a link consumes your normal link/API quota.
- Check the generated link in Branded Links. Disconnecting revokes the key; expired plans and disabled features are checked again on each request.
Verify and troubleshoot
Check the saved connection, run its available test, and inspect Deliveries. A saved key is not proof that an external workflow completed. For HTTP workflows, run one public URL through the source application and confirm the returned shortURL appears in Branded Links.
401/403: review credentials and provider permissions. 402: review your plan. 429: reduce frequency and respect Retry-After. Do not retry a successful creation without checking for an existing link.
Disconnect
Choose Disconnect and confirm. The local connection and generated key are removed. Work already created in the external service stays there. Expired plans and disabled integration features stop future protected requests.
Resources
Connect Zendesk
Full illustrated workflow guide
Follow the Make, Zapier or n8n walkthrough with numbered illustrations. Includes key setup, URL mapping, a test run and troubleshooting.
Insert branded help links into ticket replies through Make, Zapier or n8n.
Connection type
Guided HTTP workflow
This is a guided HTTP workflow. Sign in to the source service in Make, Zapier or n8n; the ShortFreeURL key connects the HTTP action.
Before you connect
Sign in as a workspace owner or admin. Review Subscription for feature availability and remaining connections. Prepare the provider account and the permissions needed for this workflow.
Step-by-step setup
- Open your automation service (Make, Zapier or n8n), select Zendesk and sign in to that account there. Provider access and automation-service fees are separate.
- Select the event or record containing the public URL you want to shorten. Insert branded help links into ticket replies. Never change private-file access permissions automatically.
- Choose Set up workflow in ShortFreeURL. Copy the create-only key once; it is restricted to creating links in this workspace.
- In an HTTP request action set POST, use the displayed Links endpoint and put the key in the Authorization header. Select JSON and map your public URL to originalURL. Add tags or UTM fields if needed.
- Run the workflow once and use the returned shortURL in a later action. Creating a link consumes your normal link/API quota.
- Check the generated link in Branded Links. Disconnecting revokes the key; expired plans and disabled features are checked again on each request.
Verify and troubleshoot
Check the saved connection, run its available test, and inspect Deliveries. A saved key is not proof that an external workflow completed. For HTTP workflows, run one public URL through the source application and confirm the returned shortURL appears in Branded Links.
401/403: review credentials and provider permissions. 402: review your plan. 429: reduce frequency and respect Retry-After. Do not retry a successful creation without checking for an existing link.
Disconnect
Choose Disconnect and confirm. The local connection and generated key are removed. Work already created in the external service stays there. Expired plans and disabled integration features stop future protected requests.
Resources
Connect Intercom
Full illustrated workflow guide
Follow the Make, Zapier or n8n walkthrough with numbered illustrations. Includes key setup, URL mapping, a test run and troubleshooting.
Share onboarding guide links through Make, Zapier or n8n.
Connection type
Guided HTTP workflow
This is a guided HTTP workflow. Sign in to the source service in Make, Zapier or n8n; the ShortFreeURL key connects the HTTP action.
Before you connect
Sign in as a workspace owner or admin. Review Subscription for feature availability and remaining connections. Prepare the provider account and the permissions needed for this workflow.
Step-by-step setup
- Open your automation service (Make, Zapier or n8n), select Intercom and sign in to that account there. Provider access and automation-service fees are separate.
- Select the event or record containing the public URL you want to shorten. Share onboarding guide links. Never change private-file access permissions automatically.
- Choose Set up workflow in ShortFreeURL. Copy the create-only key once; it is restricted to creating links in this workspace.
- In an HTTP request action set POST, use the displayed Links endpoint and put the key in the Authorization header. Select JSON and map your public URL to originalURL. Add tags or UTM fields if needed.
- Run the workflow once and use the returned shortURL in a later action. Creating a link consumes your normal link/API quota.
- Check the generated link in Branded Links. Disconnecting revokes the key; expired plans and disabled features are checked again on each request.
Verify and troubleshoot
Check the saved connection, run its available test, and inspect Deliveries. A saved key is not proof that an external workflow completed. For HTTP workflows, run one public URL through the source application and confirm the returned shortURL appears in Branded Links.
401/403: review credentials and provider permissions. 402: review your plan. 429: reduce frequency and respect Retry-After. Do not retry a successful creation without checking for an existing link.
Disconnect
Choose Disconnect and confirm. The local connection and generated key are removed. Work already created in the external service stays there. Expired plans and disabled integration features stop future protected requests.
Resources
Connect Help Scout
Full illustrated workflow guide
Follow the Make, Zapier or n8n walkthrough with numbered illustrations. Includes key setup, URL mapping, a test run and troubleshooting.
Create short links for support resources through Make, Zapier or n8n.
Connection type
Guided HTTP workflow
This is a guided HTTP workflow. Sign in to the source service in Make, Zapier or n8n; the ShortFreeURL key connects the HTTP action.
Before you connect
Sign in as a workspace owner or admin. Review Subscription for feature availability and remaining connections. Prepare the provider account and the permissions needed for this workflow.
Step-by-step setup
- Open your automation service (Make, Zapier or n8n), select Help Scout and sign in to that account there. Provider access and automation-service fees are separate.
- Select the event or record containing the public URL you want to shorten. Create short links for support resources. Never change private-file access permissions automatically.
- Choose Set up workflow in ShortFreeURL. Copy the create-only key once; it is restricted to creating links in this workspace.
- In an HTTP request action set POST, use the displayed Links endpoint and put the key in the Authorization header. Select JSON and map your public URL to originalURL. Add tags or UTM fields if needed.
- Run the workflow once and use the returned shortURL in a later action. Creating a link consumes your normal link/API quota.
- Check the generated link in Branded Links. Disconnecting revokes the key; expired plans and disabled features are checked again on each request.
Verify and troubleshoot
Check the saved connection, run its available test, and inspect Deliveries. A saved key is not proof that an external workflow completed. For HTTP workflows, run one public URL through the source application and confirm the returned shortURL appears in Branded Links.
401/403: review credentials and provider permissions. 402: review your plan. 429: reduce frequency and respect Retry-After. Do not retry a successful creation without checking for an existing link.
Disconnect
Choose Disconnect and confirm. The local connection and generated key are removed. Work already created in the external service stays there. Expired plans and disabled integration features stop future protected requests.
Resources
Connect Crisp
Full illustrated workflow guide
Follow the Make, Zapier or n8n walkthrough with numbered illustrations. Includes key setup, URL mapping, a test run and troubleshooting.
Send a short product guide in a conversation through Make, Zapier or n8n.
Connection type
Guided HTTP workflow
This is a guided HTTP workflow. Sign in to the source service in Make, Zapier or n8n; the ShortFreeURL key connects the HTTP action.
Before you connect
Sign in as a workspace owner or admin. Review Subscription for feature availability and remaining connections. Prepare the provider account and the permissions needed for this workflow.
Step-by-step setup
- Open your automation service (Make, Zapier or n8n), select Crisp and sign in to that account there. Provider access and automation-service fees are separate.
- Select the event or record containing the public URL you want to shorten. Send a short product guide in a conversation. Never change private-file access permissions automatically.
- Choose Set up workflow in ShortFreeURL. Copy the create-only key once; it is restricted to creating links in this workspace.
- In an HTTP request action set POST, use the displayed Links endpoint and put the key in the Authorization header. Select JSON and map your public URL to originalURL. Add tags or UTM fields if needed.
- Run the workflow once and use the returned shortURL in a later action. Creating a link consumes your normal link/API quota.
- Check the generated link in Branded Links. Disconnecting revokes the key; expired plans and disabled features are checked again on each request.
Verify and troubleshoot
Check the saved connection, run its available test, and inspect Deliveries. A saved key is not proof that an external workflow completed. For HTTP workflows, run one public URL through the source application and confirm the returned shortURL appears in Branded Links.
401/403: review credentials and provider permissions. 402: review your plan. 429: reduce frequency and respect Retry-After. Do not retry a successful creation without checking for an existing link.
Disconnect
Choose Disconnect and confirm. The local connection and generated key are removed. Work already created in the external service stays there. Expired plans and disabled integration features stop future protected requests.
Resources
Connect Klaviyo
Full illustrated workflow guide
Follow the Make, Zapier or n8n walkthrough with numbered illustrations. Includes key setup, URL mapping, a test run and troubleshooting.
Create tagged product links for campaign drafts through Make, Zapier or n8n.
Connection type
Guided HTTP workflow
This is a guided HTTP workflow. Sign in to the source service in Make, Zapier or n8n; the ShortFreeURL key connects the HTTP action.
Before you connect
Sign in as a workspace owner or admin. Review Subscription for feature availability and remaining connections. Prepare the provider account and the permissions needed for this workflow.
Step-by-step setup
- Open your automation service (Make, Zapier or n8n), select Klaviyo and sign in to that account there. Provider access and automation-service fees are separate.
- Select the event or record containing the public URL you want to shorten. Create tagged product links for campaign drafts. Never change private-file access permissions automatically.
- Choose Set up workflow in ShortFreeURL. Copy the create-only key once; it is restricted to creating links in this workspace.
- In an HTTP request action set POST, use the displayed Links endpoint and put the key in the Authorization header. Select JSON and map your public URL to originalURL. Add tags or UTM fields if needed.
- Run the workflow once and use the returned shortURL in a later action. Creating a link consumes your normal link/API quota.
- Check the generated link in Branded Links. Disconnecting revokes the key; expired plans and disabled features are checked again on each request.
Verify and troubleshoot
Check the saved connection, run its available test, and inspect Deliveries. A saved key is not proof that an external workflow completed. For HTTP workflows, run one public URL through the source application and confirm the returned shortURL appears in Branded Links.
401/403: review credentials and provider permissions. 402: review your plan. 429: reduce frequency and respect Retry-After. Do not retry a successful creation without checking for an existing link.
Disconnect
Choose Disconnect and confirm. The local connection and generated key are removed. Work already created in the external service stays there. Expired plans and disabled integration features stop future protected requests.
Resources
Connect ActiveCampaign
Full illustrated workflow guide
Follow the Make, Zapier or n8n walkthrough with numbered illustrations. Includes key setup, URL mapping, a test run and troubleshooting.
Tag campaign links before adding to drafts through Make, Zapier or n8n.
Connection type
Guided HTTP workflow
This is a guided HTTP workflow. Sign in to the source service in Make, Zapier or n8n; the ShortFreeURL key connects the HTTP action.
Before you connect
Sign in as a workspace owner or admin. Review Subscription for feature availability and remaining connections. Prepare the provider account and the permissions needed for this workflow.
Step-by-step setup
- Open your automation service (Make, Zapier or n8n), select ActiveCampaign and sign in to that account there. Provider access and automation-service fees are separate.
- Select the event or record containing the public URL you want to shorten. Tag campaign links before adding to drafts. Never change private-file access permissions automatically.
- Choose Set up workflow in ShortFreeURL. Copy the create-only key once; it is restricted to creating links in this workspace.
- In an HTTP request action set POST, use the displayed Links endpoint and put the key in the Authorization header. Select JSON and map your public URL to originalURL. Add tags or UTM fields if needed.
- Run the workflow once and use the returned shortURL in a later action. Creating a link consumes your normal link/API quota.
- Check the generated link in Branded Links. Disconnecting revokes the key; expired plans and disabled features are checked again on each request.
Verify and troubleshoot
Check the saved connection, run its available test, and inspect Deliveries. A saved key is not proof that an external workflow completed. For HTTP workflows, run one public URL through the source application and confirm the returned shortURL appears in Branded Links.
401/403: review credentials and provider permissions. 402: review your plan. 429: reduce frequency and respect Retry-After. Do not retry a successful creation without checking for an existing link.
Disconnect
Choose Disconnect and confirm. The local connection and generated key are removed. Work already created in the external service stays there. Expired plans and disabled integration features stop future protected requests.
Resources
Connect Kit
Full illustrated workflow guide
Follow the Make, Zapier or n8n walkthrough with numbered illustrations. Includes key setup, URL mapping, a test run and troubleshooting.
Create branded newsletter links through Make, Zapier or n8n.
Connection type
Guided HTTP workflow
This is a guided HTTP workflow. Sign in to the source service in Make, Zapier or n8n; the ShortFreeURL key connects the HTTP action.
Before you connect
Sign in as a workspace owner or admin. Review Subscription for feature availability and remaining connections. Prepare the provider account and the permissions needed for this workflow.
Step-by-step setup
- Open your automation service (Make, Zapier or n8n), select Kit and sign in to that account there. Provider access and automation-service fees are separate.
- Select the event or record containing the public URL you want to shorten. Create branded newsletter links. Never change private-file access permissions automatically.
- Choose Set up workflow in ShortFreeURL. Copy the create-only key once; it is restricted to creating links in this workspace.
- In an HTTP request action set POST, use the displayed Links endpoint and put the key in the Authorization header. Select JSON and map your public URL to originalURL. Add tags or UTM fields if needed.
- Run the workflow once and use the returned shortURL in a later action. Creating a link consumes your normal link/API quota.
- Check the generated link in Branded Links. Disconnecting revokes the key; expired plans and disabled features are checked again on each request.
Verify and troubleshoot
Check the saved connection, run its available test, and inspect Deliveries. A saved key is not proof that an external workflow completed. For HTTP workflows, run one public URL through the source application and confirm the returned shortURL appears in Branded Links.
401/403: review credentials and provider permissions. 402: review your plan. 429: reduce frequency and respect Retry-After. Do not retry a successful creation without checking for an existing link.
Disconnect
Choose Disconnect and confirm. The local connection and generated key are removed. Work already created in the external service stays there. Expired plans and disabled integration features stop future protected requests.
Resources
Connect Constant Contact
Full illustrated workflow guide
Follow the Make, Zapier or n8n walkthrough with numbered illustrations. Includes key setup, URL mapping, a test run and troubleshooting.
Shorten event links for an email campaign through Make, Zapier or n8n.
Connection type
Guided HTTP workflow
This is a guided HTTP workflow. Sign in to the source service in Make, Zapier or n8n; the ShortFreeURL key connects the HTTP action.
Before you connect
Sign in as a workspace owner or admin. Review Subscription for feature availability and remaining connections. Prepare the provider account and the permissions needed for this workflow.
Step-by-step setup
- Open your automation service (Make, Zapier or n8n), select Constant Contact and sign in to that account there. Provider access and automation-service fees are separate.
- Select the event or record containing the public URL you want to shorten. Shorten event links for an email campaign. Never change private-file access permissions automatically.
- Choose Set up workflow in ShortFreeURL. Copy the create-only key once; it is restricted to creating links in this workspace.
- In an HTTP request action set POST, use the displayed Links endpoint and put the key in the Authorization header. Select JSON and map your public URL to originalURL. Add tags or UTM fields if needed.
- Run the workflow once and use the returned shortURL in a later action. Creating a link consumes your normal link/API quota.
- Check the generated link in Branded Links. Disconnecting revokes the key; expired plans and disabled features are checked again on each request.
Verify and troubleshoot
Check the saved connection, run its available test, and inspect Deliveries. A saved key is not proof that an external workflow completed. For HTTP workflows, run one public URL through the source application and confirm the returned shortURL appears in Branded Links.
401/403: review credentials and provider permissions. 402: review your plan. 429: reduce frequency and respect Retry-After. Do not retry a successful creation without checking for an existing link.
Disconnect
Choose Disconnect and confirm. The local connection and generated key are removed. Work already created in the external service stays there. Expired plans and disabled integration features stop future protected requests.
Resources
Connect Campaign Monitor
Full illustrated workflow guide
Follow the Make, Zapier or n8n walkthrough with numbered illustrations. Includes key setup, URL mapping, a test run and troubleshooting.
Use branded links in newsletter drafts through Make, Zapier or n8n.
Connection type
Guided HTTP workflow
This is a guided HTTP workflow. Sign in to the source service in Make, Zapier or n8n; the ShortFreeURL key connects the HTTP action.
Before you connect
Sign in as a workspace owner or admin. Review Subscription for feature availability and remaining connections. Prepare the provider account and the permissions needed for this workflow.
Step-by-step setup
- Open your automation service (Make, Zapier or n8n), select Campaign Monitor and sign in to that account there. Provider access and automation-service fees are separate.
- Select the event or record containing the public URL you want to shorten. Use branded links in newsletter drafts. Never change private-file access permissions automatically.
- Choose Set up workflow in ShortFreeURL. Copy the create-only key once; it is restricted to creating links in this workspace.
- In an HTTP request action set POST, use the displayed Links endpoint and put the key in the Authorization header. Select JSON and map your public URL to originalURL. Add tags or UTM fields if needed.
- Run the workflow once and use the returned shortURL in a later action. Creating a link consumes your normal link/API quota.
- Check the generated link in Branded Links. Disconnecting revokes the key; expired plans and disabled features are checked again on each request.
Verify and troubleshoot
Check the saved connection, run its available test, and inspect Deliveries. A saved key is not proof that an external workflow completed. For HTTP workflows, run one public URL through the source application and confirm the returned shortURL appears in Branded Links.
401/403: review credentials and provider permissions. 402: review your plan. 429: reduce frequency and respect Retry-After. Do not retry a successful creation without checking for an existing link.
Disconnect
Choose Disconnect and confirm. The local connection and generated key are removed. Work already created in the external service stays there. Expired plans and disabled integration features stop future protected requests.
Resources
Connect GetResponse
Full illustrated workflow guide
Follow the Make, Zapier or n8n walkthrough with numbered illustrations. Includes key setup, URL mapping, a test run and troubleshooting.
Create webinar and landing-page short links through Make, Zapier or n8n.
Connection type
Guided HTTP workflow
This is a guided HTTP workflow. Sign in to the source service in Make, Zapier or n8n; the ShortFreeURL key connects the HTTP action.
Before you connect
Sign in as a workspace owner or admin. Review Subscription for feature availability and remaining connections. Prepare the provider account and the permissions needed for this workflow.
Step-by-step setup
- Open your automation service (Make, Zapier or n8n), select GetResponse and sign in to that account there. Provider access and automation-service fees are separate.
- Select the event or record containing the public URL you want to shorten. Create webinar and landing-page short links. Never change private-file access permissions automatically.
- Choose Set up workflow in ShortFreeURL. Copy the create-only key once; it is restricted to creating links in this workspace.
- In an HTTP request action set POST, use the displayed Links endpoint and put the key in the Authorization header. Select JSON and map your public URL to originalURL. Add tags or UTM fields if needed.
- Run the workflow once and use the returned shortURL in a later action. Creating a link consumes your normal link/API quota.
- Check the generated link in Branded Links. Disconnecting revokes the key; expired plans and disabled features are checked again on each request.
Verify and troubleshoot
Check the saved connection, run its available test, and inspect Deliveries. A saved key is not proof that an external workflow completed. For HTTP workflows, run one public URL through the source application and confirm the returned shortURL appears in Branded Links.
401/403: review credentials and provider permissions. 402: review your plan. 429: reduce frequency and respect Retry-After. Do not retry a successful creation without checking for an existing link.
Disconnect
Choose Disconnect and confirm. The local connection and generated key are removed. Work already created in the external service stays there. Expired plans and disabled integration features stop future protected requests.
Resources
Connect AWeber
Full illustrated workflow guide
Follow the Make, Zapier or n8n walkthrough with numbered illustrations. Includes key setup, URL mapping, a test run and troubleshooting.
Prepare branded resource links through Make, Zapier or n8n.
Connection type
Guided HTTP workflow
This is a guided HTTP workflow. Sign in to the source service in Make, Zapier or n8n; the ShortFreeURL key connects the HTTP action.
Before you connect
Sign in as a workspace owner or admin. Review Subscription for feature availability and remaining connections. Prepare the provider account and the permissions needed for this workflow.
Step-by-step setup
- Open your automation service (Make, Zapier or n8n), select AWeber and sign in to that account there. Provider access and automation-service fees are separate.
- Select the event or record containing the public URL you want to shorten. Prepare branded resource links. Never change private-file access permissions automatically.
- Choose Set up workflow in ShortFreeURL. Copy the create-only key once; it is restricted to creating links in this workspace.
- In an HTTP request action set POST, use the displayed Links endpoint and put the key in the Authorization header. Select JSON and map your public URL to originalURL. Add tags or UTM fields if needed.
- Run the workflow once and use the returned shortURL in a later action. Creating a link consumes your normal link/API quota.
- Check the generated link in Branded Links. Disconnecting revokes the key; expired plans and disabled features are checked again on each request.
Verify and troubleshoot
Check the saved connection, run its available test, and inspect Deliveries. A saved key is not proof that an external workflow completed. For HTTP workflows, run one public URL through the source application and confirm the returned shortURL appears in Branded Links.
401/403: review credentials and provider permissions. 402: review your plan. 429: reduce frequency and respect Retry-After. Do not retry a successful creation without checking for an existing link.
Disconnect
Choose Disconnect and confirm. The local connection and generated key are removed. Work already created in the external service stays there. Expired plans and disabled integration features stop future protected requests.
Resources
Connect Omnisend
Full illustrated workflow guide
Follow the Make, Zapier or n8n walkthrough with numbered illustrations. Includes key setup, URL mapping, a test run and troubleshooting.
Prepare tagged ecommerce offer links through Make, Zapier or n8n.
Connection type
Guided HTTP workflow
This is a guided HTTP workflow. Sign in to the source service in Make, Zapier or n8n; the ShortFreeURL key connects the HTTP action.
Before you connect
Sign in as a workspace owner or admin. Review Subscription for feature availability and remaining connections. Prepare the provider account and the permissions needed for this workflow.
Step-by-step setup
- Open your automation service (Make, Zapier or n8n), select Omnisend and sign in to that account there. Provider access and automation-service fees are separate.
- Select the event or record containing the public URL you want to shorten. Prepare tagged ecommerce offer links. Never change private-file access permissions automatically.
- Choose Set up workflow in ShortFreeURL. Copy the create-only key once; it is restricted to creating links in this workspace.
- In an HTTP request action set POST, use the displayed Links endpoint and put the key in the Authorization header. Select JSON and map your public URL to originalURL. Add tags or UTM fields if needed.
- Run the workflow once and use the returned shortURL in a later action. Creating a link consumes your normal link/API quota.
- Check the generated link in Branded Links. Disconnecting revokes the key; expired plans and disabled features are checked again on each request.
Verify and troubleshoot
Check the saved connection, run its available test, and inspect Deliveries. A saved key is not proof that an external workflow completed. For HTTP workflows, run one public URL through the source application and confirm the returned shortURL appears in Branded Links.
401/403: review credentials and provider permissions. 402: review your plan. 429: reduce frequency and respect Retry-After. Do not retry a successful creation without checking for an existing link.
Disconnect
Choose Disconnect and confirm. The local connection and generated key are removed. Work already created in the external service stays there. Expired plans and disabled integration features stop future protected requests.
Resources
Connect Drip
Full illustrated workflow guide
Follow the Make, Zapier or n8n walkthrough with numbered illustrations. Includes key setup, URL mapping, a test run and troubleshooting.
Share a product offer with campaign tags through Make, Zapier or n8n.
Connection type
Guided HTTP workflow
This is a guided HTTP workflow. Sign in to the source service in Make, Zapier or n8n; the ShortFreeURL key connects the HTTP action.
Before you connect
Sign in as a workspace owner or admin. Review Subscription for feature availability and remaining connections. Prepare the provider account and the permissions needed for this workflow.
Step-by-step setup
- Open your automation service (Make, Zapier or n8n), select Drip and sign in to that account there. Provider access and automation-service fees are separate.
- Select the event or record containing the public URL you want to shorten. Share a product offer with campaign tags. Never change private-file access permissions automatically.
- Choose Set up workflow in ShortFreeURL. Copy the create-only key once; it is restricted to creating links in this workspace.
- In an HTTP request action set POST, use the displayed Links endpoint and put the key in the Authorization header. Select JSON and map your public URL to originalURL. Add tags or UTM fields if needed.
- Run the workflow once and use the returned shortURL in a later action. Creating a link consumes your normal link/API quota.
- Check the generated link in Branded Links. Disconnecting revokes the key; expired plans and disabled features are checked again on each request.
Verify and troubleshoot
Check the saved connection, run its available test, and inspect Deliveries. A saved key is not proof that an external workflow completed. For HTTP workflows, run one public URL through the source application and confirm the returned shortURL appears in Branded Links.
401/403: review credentials and provider permissions. 402: review your plan. 429: reduce frequency and respect Retry-After. Do not retry a successful creation without checking for an existing link.
Disconnect
Choose Disconnect and confirm. The local connection and generated key are removed. Work already created in the external service stays there. Expired plans and disabled integration features stop future protected requests.
Resources
Connect SendPulse
Full illustrated workflow guide
Follow the Make, Zapier or n8n walkthrough with numbered illustrations. Includes key setup, URL mapping, a test run and troubleshooting.
Shorten links for campaign messages through Make, Zapier or n8n.
Connection type
Guided HTTP workflow
This is a guided HTTP workflow. Sign in to the source service in Make, Zapier or n8n; the ShortFreeURL key connects the HTTP action.
Before you connect
Sign in as a workspace owner or admin. Review Subscription for feature availability and remaining connections. Prepare the provider account and the permissions needed for this workflow.
Step-by-step setup
- Open your automation service (Make, Zapier or n8n), select SendPulse and sign in to that account there. Provider access and automation-service fees are separate.
- Select the event or record containing the public URL you want to shorten. Shorten links for campaign messages. Never change private-file access permissions automatically.
- Choose Set up workflow in ShortFreeURL. Copy the create-only key once; it is restricted to creating links in this workspace.
- In an HTTP request action set POST, use the displayed Links endpoint and put the key in the Authorization header. Select JSON and map your public URL to originalURL. Add tags or UTM fields if needed.
- Run the workflow once and use the returned shortURL in a later action. Creating a link consumes your normal link/API quota.
- Check the generated link in Branded Links. Disconnecting revokes the key; expired plans and disabled features are checked again on each request.
Verify and troubleshoot
Check the saved connection, run its available test, and inspect Deliveries. A saved key is not proof that an external workflow completed. For HTTP workflows, run one public URL through the source application and confirm the returned shortURL appears in Branded Links.
401/403: review credentials and provider permissions. 402: review your plan. 429: reduce frequency and respect Retry-After. Do not retry a successful creation without checking for an existing link.
Disconnect
Choose Disconnect and confirm. The local connection and generated key are removed. Work already created in the external service stays there. Expired plans and disabled integration features stop future protected requests.
Resources
Connect Mailjet
Full illustrated workflow guide
Follow the Make, Zapier or n8n walkthrough with numbered illustrations. Includes key setup, URL mapping, a test run and troubleshooting.
Prepare campaign URLs for draft emails through Make, Zapier or n8n.
Connection type
Guided HTTP workflow
This is a guided HTTP workflow. Sign in to the source service in Make, Zapier or n8n; the ShortFreeURL key connects the HTTP action.
Before you connect
Sign in as a workspace owner or admin. Review Subscription for feature availability and remaining connections. Prepare the provider account and the permissions needed for this workflow.
Step-by-step setup
- Open your automation service (Make, Zapier or n8n), select Mailjet and sign in to that account there. Provider access and automation-service fees are separate.
- Select the event or record containing the public URL you want to shorten. Prepare campaign URLs for draft emails. Never change private-file access permissions automatically.
- Choose Set up workflow in ShortFreeURL. Copy the create-only key once; it is restricted to creating links in this workspace.
- In an HTTP request action set POST, use the displayed Links endpoint and put the key in the Authorization header. Select JSON and map your public URL to originalURL. Add tags or UTM fields if needed.
- Run the workflow once and use the returned shortURL in a later action. Creating a link consumes your normal link/API quota.
- Check the generated link in Branded Links. Disconnecting revokes the key; expired plans and disabled features are checked again on each request.
Verify and troubleshoot
Check the saved connection, run its available test, and inspect Deliveries. A saved key is not proof that an external workflow completed. For HTTP workflows, run one public URL through the source application and confirm the returned shortURL appears in Branded Links.
401/403: review credentials and provider permissions. 402: review your plan. 429: reduce frequency and respect Retry-After. Do not retry a successful creation without checking for an existing link.
Disconnect
Choose Disconnect and confirm. The local connection and generated key are removed. Work already created in the external service stays there. Expired plans and disabled integration features stop future protected requests.
Resources
Connect Mailgun
Full illustrated workflow guide
Follow the Make, Zapier or n8n walkthrough with numbered illustrations. Includes key setup, URL mapping, a test run and troubleshooting.
Use branded URLs in transactional templates through Make, Zapier or n8n.
Connection type
Guided HTTP workflow
This is a guided HTTP workflow. Sign in to the source service in Make, Zapier or n8n; the ShortFreeURL key connects the HTTP action.
Before you connect
Sign in as a workspace owner or admin. Review Subscription for feature availability and remaining connections. Prepare the provider account and the permissions needed for this workflow.
Step-by-step setup
- Open your automation service (Make, Zapier or n8n), select Mailgun and sign in to that account there. Provider access and automation-service fees are separate.
- Select the event or record containing the public URL you want to shorten. Use branded URLs in transactional templates. Never change private-file access permissions automatically.
- Choose Set up workflow in ShortFreeURL. Copy the create-only key once; it is restricted to creating links in this workspace.
- In an HTTP request action set POST, use the displayed Links endpoint and put the key in the Authorization header. Select JSON and map your public URL to originalURL. Add tags or UTM fields if needed.
- Run the workflow once and use the returned shortURL in a later action. Creating a link consumes your normal link/API quota.
- Check the generated link in Branded Links. Disconnecting revokes the key; expired plans and disabled features are checked again on each request.
Verify and troubleshoot
Check the saved connection, run its available test, and inspect Deliveries. A saved key is not proof that an external workflow completed. For HTTP workflows, run one public URL through the source application and confirm the returned shortURL appears in Branded Links.
401/403: review credentials and provider permissions. 402: review your plan. 429: reduce frequency and respect Retry-After. Do not retry a successful creation without checking for an existing link.
Disconnect
Choose Disconnect and confirm. The local connection and generated key are removed. Work already created in the external service stays there. Expired plans and disabled integration features stop future protected requests.
Resources
Connect Webflow
Full illustrated workflow guide
Follow the Make, Zapier or n8n walkthrough with numbered illustrations. Includes key setup, URL mapping, a test run and troubleshooting.
Shorten a published CMS page URL through Make, Zapier or n8n.
Connection type
Guided HTTP workflow
This is a guided HTTP workflow. Sign in to the source service in Make, Zapier or n8n; the ShortFreeURL key connects the HTTP action.
Before you connect
Sign in as a workspace owner or admin. Review Subscription for feature availability and remaining connections. Prepare the provider account and the permissions needed for this workflow.
Step-by-step setup
- Open your automation service (Make, Zapier or n8n), select Webflow and sign in to that account there. Provider access and automation-service fees are separate.
- Select the event or record containing the public URL you want to shorten. Shorten a published CMS page URL. Never change private-file access permissions automatically.
- Choose Set up workflow in ShortFreeURL. Copy the create-only key once; it is restricted to creating links in this workspace.
- In an HTTP request action set POST, use the displayed Links endpoint and put the key in the Authorization header. Select JSON and map your public URL to originalURL. Add tags or UTM fields if needed.
- Run the workflow once and use the returned shortURL in a later action. Creating a link consumes your normal link/API quota.
- Check the generated link in Branded Links. Disconnecting revokes the key; expired plans and disabled features are checked again on each request.
Verify and troubleshoot
Check the saved connection, run its available test, and inspect Deliveries. A saved key is not proof that an external workflow completed. For HTTP workflows, run one public URL through the source application and confirm the returned shortURL appears in Branded Links.
401/403: review credentials and provider permissions. 402: review your plan. 429: reduce frequency and respect Retry-After. Do not retry a successful creation without checking for an existing link.
Disconnect
Choose Disconnect and confirm. The local connection and generated key are removed. Work already created in the external service stays there. Expired plans and disabled integration features stop future protected requests.
Resources
Connect Wix
Full illustrated workflow guide
Follow the Make, Zapier or n8n walkthrough with numbered illustrations. Includes key setup, URL mapping, a test run and troubleshooting.
Share a published page or product URL through Make, Zapier or n8n.
Connection type
Guided HTTP workflow
This is a guided HTTP workflow. Sign in to the source service in Make, Zapier or n8n; the ShortFreeURL key connects the HTTP action.
Before you connect
Sign in as a workspace owner or admin. Review Subscription for feature availability and remaining connections. Prepare the provider account and the permissions needed for this workflow.
Step-by-step setup
- Open your automation service (Make, Zapier or n8n), select Wix and sign in to that account there. Provider access and automation-service fees are separate.
- Select the event or record containing the public URL you want to shorten. Share a published page or product URL. Never change private-file access permissions automatically.
- Choose Set up workflow in ShortFreeURL. Copy the create-only key once; it is restricted to creating links in this workspace.
- In an HTTP request action set POST, use the displayed Links endpoint and put the key in the Authorization header. Select JSON and map your public URL to originalURL. Add tags or UTM fields if needed.
- Run the workflow once and use the returned shortURL in a later action. Creating a link consumes your normal link/API quota.
- Check the generated link in Branded Links. Disconnecting revokes the key; expired plans and disabled features are checked again on each request.
Verify and troubleshoot
Check the saved connection, run its available test, and inspect Deliveries. A saved key is not proof that an external workflow completed. For HTTP workflows, run one public URL through the source application and confirm the returned shortURL appears in Branded Links.
401/403: review credentials and provider permissions. 402: review your plan. 429: reduce frequency and respect Retry-After. Do not retry a successful creation without checking for an existing link.
Disconnect
Choose Disconnect and confirm. The local connection and generated key are removed. Work already created in the external service stays there. Expired plans and disabled integration features stop future protected requests.
Resources
Connect Squarespace
Full illustrated workflow guide
Follow the Make, Zapier or n8n walkthrough with numbered illustrations. Includes key setup, URL mapping, a test run and troubleshooting.
Create short product and blog links through Make, Zapier or n8n.
Connection type
Guided HTTP workflow
This is a guided HTTP workflow. Sign in to the source service in Make, Zapier or n8n; the ShortFreeURL key connects the HTTP action.
Before you connect
Sign in as a workspace owner or admin. Review Subscription for feature availability and remaining connections. Prepare the provider account and the permissions needed for this workflow.
Step-by-step setup
- Open your automation service (Make, Zapier or n8n), select Squarespace and sign in to that account there. Provider access and automation-service fees are separate.
- Select the event or record containing the public URL you want to shorten. Create short product and blog links. Never change private-file access permissions automatically.
- Choose Set up workflow in ShortFreeURL. Copy the create-only key once; it is restricted to creating links in this workspace.
- In an HTTP request action set POST, use the displayed Links endpoint and put the key in the Authorization header. Select JSON and map your public URL to originalURL. Add tags or UTM fields if needed.
- Run the workflow once and use the returned shortURL in a later action. Creating a link consumes your normal link/API quota.
- Check the generated link in Branded Links. Disconnecting revokes the key; expired plans and disabled features are checked again on each request.
Verify and troubleshoot
Check the saved connection, run its available test, and inspect Deliveries. A saved key is not proof that an external workflow completed. For HTTP workflows, run one public URL through the source application and confirm the returned shortURL appears in Branded Links.
401/403: review credentials and provider permissions. 402: review your plan. 429: reduce frequency and respect Retry-After. Do not retry a successful creation without checking for an existing link.
Disconnect
Choose Disconnect and confirm. The local connection and generated key are removed. Work already created in the external service stays there. Expired plans and disabled integration features stop future protected requests.
Resources
Connect WooCommerce
Full illustrated workflow guide
Follow the Make, Zapier or n8n walkthrough with numbered illustrations. Includes key setup, URL mapping, a test run and troubleshooting.
Create branded product URLs through Make, Zapier or n8n.
Connection type
Guided HTTP workflow
This is a guided HTTP workflow. Sign in to the source service in Make, Zapier or n8n; the ShortFreeURL key connects the HTTP action.
Before you connect
Sign in as a workspace owner or admin. Review Subscription for feature availability and remaining connections. Prepare the provider account and the permissions needed for this workflow.
Step-by-step setup
- Open your automation service (Make, Zapier or n8n), select WooCommerce and sign in to that account there. Provider access and automation-service fees are separate.
- Select the event or record containing the public URL you want to shorten. Create branded product URLs. Never change private-file access permissions automatically.
- Choose Set up workflow in ShortFreeURL. Copy the create-only key once; it is restricted to creating links in this workspace.
- In an HTTP request action set POST, use the displayed Links endpoint and put the key in the Authorization header. Select JSON and map your public URL to originalURL. Add tags or UTM fields if needed.
- Run the workflow once and use the returned shortURL in a later action. Creating a link consumes your normal link/API quota.
- Check the generated link in Branded Links. Disconnecting revokes the key; expired plans and disabled features are checked again on each request.
Verify and troubleshoot
Check the saved connection, run its available test, and inspect Deliveries. A saved key is not proof that an external workflow completed. For HTTP workflows, run one public URL through the source application and confirm the returned shortURL appears in Branded Links.
401/403: review credentials and provider permissions. 402: review your plan. 429: reduce frequency and respect Retry-After. Do not retry a successful creation without checking for an existing link.
Disconnect
Choose Disconnect and confirm. The local connection and generated key are removed. Work already created in the external service stays there. Expired plans and disabled integration features stop future protected requests.
Resources
Connect BigCommerce
Full illustrated workflow guide
Follow the Make, Zapier or n8n walkthrough with numbered illustrations. Includes key setup, URL mapping, a test run and troubleshooting.
Track product launch links through Make, Zapier or n8n.
Connection type
Guided HTTP workflow
This is a guided HTTP workflow. Sign in to the source service in Make, Zapier or n8n; the ShortFreeURL key connects the HTTP action.
Before you connect
Sign in as a workspace owner or admin. Review Subscription for feature availability and remaining connections. Prepare the provider account and the permissions needed for this workflow.
Step-by-step setup
- Open your automation service (Make, Zapier or n8n), select BigCommerce and sign in to that account there. Provider access and automation-service fees are separate.
- Select the event or record containing the public URL you want to shorten. Track product launch links. Never change private-file access permissions automatically.
- Choose Set up workflow in ShortFreeURL. Copy the create-only key once; it is restricted to creating links in this workspace.
- In an HTTP request action set POST, use the displayed Links endpoint and put the key in the Authorization header. Select JSON and map your public URL to originalURL. Add tags or UTM fields if needed.
- Run the workflow once and use the returned shortURL in a later action. Creating a link consumes your normal link/API quota.
- Check the generated link in Branded Links. Disconnecting revokes the key; expired plans and disabled features are checked again on each request.
Verify and troubleshoot
Check the saved connection, run its available test, and inspect Deliveries. A saved key is not proof that an external workflow completed. For HTTP workflows, run one public URL through the source application and confirm the returned shortURL appears in Branded Links.
401/403: review credentials and provider permissions. 402: review your plan. 429: reduce frequency and respect Retry-After. Do not retry a successful creation without checking for an existing link.
Disconnect
Choose Disconnect and confirm. The local connection and generated key are removed. Work already created in the external service stays there. Expired plans and disabled integration features stop future protected requests.
Resources
Connect Ecwid
Full illustrated workflow guide
Follow the Make, Zapier or n8n walkthrough with numbered illustrations. Includes key setup, URL mapping, a test run and troubleshooting.
Shorten a storefront product URL through Make, Zapier or n8n.
Connection type
Guided HTTP workflow
This is a guided HTTP workflow. Sign in to the source service in Make, Zapier or n8n; the ShortFreeURL key connects the HTTP action.
Before you connect
Sign in as a workspace owner or admin. Review Subscription for feature availability and remaining connections. Prepare the provider account and the permissions needed for this workflow.
Step-by-step setup
- Open your automation service (Make, Zapier or n8n), select Ecwid and sign in to that account there. Provider access and automation-service fees are separate.
- Select the event or record containing the public URL you want to shorten. Shorten a storefront product URL. Never change private-file access permissions automatically.
- Choose Set up workflow in ShortFreeURL. Copy the create-only key once; it is restricted to creating links in this workspace.
- In an HTTP request action set POST, use the displayed Links endpoint and put the key in the Authorization header. Select JSON and map your public URL to originalURL. Add tags or UTM fields if needed.
- Run the workflow once and use the returned shortURL in a later action. Creating a link consumes your normal link/API quota.
- Check the generated link in Branded Links. Disconnecting revokes the key; expired plans and disabled features are checked again on each request.
Verify and troubleshoot
Check the saved connection, run its available test, and inspect Deliveries. A saved key is not proof that an external workflow completed. For HTTP workflows, run one public URL through the source application and confirm the returned shortURL appears in Branded Links.
401/403: review credentials and provider permissions. 402: review your plan. 429: reduce frequency and respect Retry-After. Do not retry a successful creation without checking for an existing link.
Disconnect
Choose Disconnect and confirm. The local connection and generated key are removed. Work already created in the external service stays there. Expired plans and disabled integration features stop future protected requests.
Resources
Connect PrestaShop
Full illustrated workflow guide
Follow the Make, Zapier or n8n walkthrough with numbered illustrations. Includes key setup, URL mapping, a test run and troubleshooting.
Share product links in campaigns through Make, Zapier or n8n.
Connection type
Guided HTTP workflow
This is a guided HTTP workflow. Sign in to the source service in Make, Zapier or n8n; the ShortFreeURL key connects the HTTP action.
Before you connect
Sign in as a workspace owner or admin. Review Subscription for feature availability and remaining connections. Prepare the provider account and the permissions needed for this workflow.
Step-by-step setup
- Open your automation service (Make, Zapier or n8n), select PrestaShop and sign in to that account there. Provider access and automation-service fees are separate.
- Select the event or record containing the public URL you want to shorten. Share product links in campaigns. Never change private-file access permissions automatically.
- Choose Set up workflow in ShortFreeURL. Copy the create-only key once; it is restricted to creating links in this workspace.
- In an HTTP request action set POST, use the displayed Links endpoint and put the key in the Authorization header. Select JSON and map your public URL to originalURL. Add tags or UTM fields if needed.
- Run the workflow once and use the returned shortURL in a later action. Creating a link consumes your normal link/API quota.
- Check the generated link in Branded Links. Disconnecting revokes the key; expired plans and disabled features are checked again on each request.
Verify and troubleshoot
Check the saved connection, run its available test, and inspect Deliveries. A saved key is not proof that an external workflow completed. For HTTP workflows, run one public URL through the source application and confirm the returned shortURL appears in Branded Links.
401/403: review credentials and provider permissions. 402: review your plan. 429: reduce frequency and respect Retry-After. Do not retry a successful creation without checking for an existing link.
Disconnect
Choose Disconnect and confirm. The local connection and generated key are removed. Work already created in the external service stays there. Expired plans and disabled integration features stop future protected requests.
Resources
Connect Adobe Commerce
Full illustrated workflow guide
Follow the Make, Zapier or n8n walkthrough with numbered illustrations. Includes key setup, URL mapping, a test run and troubleshooting.
Create branded catalog links through Make, Zapier or n8n.
Connection type
Guided HTTP workflow
This is a guided HTTP workflow. Sign in to the source service in Make, Zapier or n8n; the ShortFreeURL key connects the HTTP action.
Before you connect
Sign in as a workspace owner or admin. Review Subscription for feature availability and remaining connections. Prepare the provider account and the permissions needed for this workflow.
Step-by-step setup
- Open your automation service (Make, Zapier or n8n), select Adobe Commerce and sign in to that account there. Provider access and automation-service fees are separate.
- Select the event or record containing the public URL you want to shorten. Create branded catalog links. Never change private-file access permissions automatically.
- Choose Set up workflow in ShortFreeURL. Copy the create-only key once; it is restricted to creating links in this workspace.
- In an HTTP request action set POST, use the displayed Links endpoint and put the key in the Authorization header. Select JSON and map your public URL to originalURL. Add tags or UTM fields if needed.
- Run the workflow once and use the returned shortURL in a later action. Creating a link consumes your normal link/API quota.
- Check the generated link in Branded Links. Disconnecting revokes the key; expired plans and disabled features are checked again on each request.
Verify and troubleshoot
Check the saved connection, run its available test, and inspect Deliveries. A saved key is not proof that an external workflow completed. For HTTP workflows, run one public URL through the source application and confirm the returned shortURL appears in Branded Links.
401/403: review credentials and provider permissions. 402: review your plan. 429: reduce frequency and respect Retry-After. Do not retry a successful creation without checking for an existing link.
Disconnect
Choose Disconnect and confirm. The local connection and generated key are removed. Work already created in the external service stays there. Expired plans and disabled integration features stop future protected requests.
Resources
Connect Gumroad
Full illustrated workflow guide
Follow the Make, Zapier or n8n walkthrough with numbered illustrations. Includes key setup, URL mapping, a test run and troubleshooting.
Share a digital product with a short link through Make, Zapier or n8n.
Connection type
Guided HTTP workflow
This is a guided HTTP workflow. Sign in to the source service in Make, Zapier or n8n; the ShortFreeURL key connects the HTTP action.
Before you connect
Sign in as a workspace owner or admin. Review Subscription for feature availability and remaining connections. Prepare the provider account and the permissions needed for this workflow.
Step-by-step setup
- Open your automation service (Make, Zapier or n8n), select Gumroad and sign in to that account there. Provider access and automation-service fees are separate.
- Select the event or record containing the public URL you want to shorten. Share a digital product with a short link. Never change private-file access permissions automatically.
- Choose Set up workflow in ShortFreeURL. Copy the create-only key once; it is restricted to creating links in this workspace.
- In an HTTP request action set POST, use the displayed Links endpoint and put the key in the Authorization header. Select JSON and map your public URL to originalURL. Add tags or UTM fields if needed.
- Run the workflow once and use the returned shortURL in a later action. Creating a link consumes your normal link/API quota.
- Check the generated link in Branded Links. Disconnecting revokes the key; expired plans and disabled features are checked again on each request.
Verify and troubleshoot
Check the saved connection, run its available test, and inspect Deliveries. A saved key is not proof that an external workflow completed. For HTTP workflows, run one public URL through the source application and confirm the returned shortURL appears in Branded Links.
401/403: review credentials and provider permissions. 402: review your plan. 429: reduce frequency and respect Retry-After. Do not retry a successful creation without checking for an existing link.
Disconnect
Choose Disconnect and confirm. The local connection and generated key are removed. Work already created in the external service stays there. Expired plans and disabled integration features stop future protected requests.
Resources
Connect Eventbrite
Full illustrated workflow guide
Follow the Make, Zapier or n8n walkthrough with numbered illustrations. Includes key setup, URL mapping, a test run and troubleshooting.
Shorten an event registration URL through Make, Zapier or n8n.
Connection type
Guided HTTP workflow
This is a guided HTTP workflow. Sign in to the source service in Make, Zapier or n8n; the ShortFreeURL key connects the HTTP action.
Before you connect
Sign in as a workspace owner or admin. Review Subscription for feature availability and remaining connections. Prepare the provider account and the permissions needed for this workflow.
Step-by-step setup
- Open your automation service (Make, Zapier or n8n), select Eventbrite and sign in to that account there. Provider access and automation-service fees are separate.
- Select the event or record containing the public URL you want to shorten. Shorten an event registration URL. Never change private-file access permissions automatically.
- Choose Set up workflow in ShortFreeURL. Copy the create-only key once; it is restricted to creating links in this workspace.
- In an HTTP request action set POST, use the displayed Links endpoint and put the key in the Authorization header. Select JSON and map your public URL to originalURL. Add tags or UTM fields if needed.
- Run the workflow once and use the returned shortURL in a later action. Creating a link consumes your normal link/API quota.
- Check the generated link in Branded Links. Disconnecting revokes the key; expired plans and disabled features are checked again on each request.
Verify and troubleshoot
Check the saved connection, run its available test, and inspect Deliveries. A saved key is not proof that an external workflow completed. For HTTP workflows, run one public URL through the source application and confirm the returned shortURL appears in Branded Links.
401/403: review credentials and provider permissions. 402: review your plan. 429: reduce frequency and respect Retry-After. Do not retry a successful creation without checking for an existing link.
Disconnect
Choose Disconnect and confirm. The local connection and generated key are removed. Work already created in the external service stays there. Expired plans and disabled integration features stop future protected requests.
Resources
Connect Calendly
Full illustrated workflow guide
Follow the Make, Zapier or n8n walkthrough with numbered illustrations. Includes key setup, URL mapping, a test run and troubleshooting.
Direct connection is now available
You can connect Calendly with a provider token and import selected URLs without an automation service. Follow the direct account guide.
Optional automation workflow
Share booking links with campaign tags through Make, Zapier or n8n.
Connection type
Guided HTTP workflow
This is a guided HTTP workflow. Sign in to the source service in Make, Zapier or n8n; the ShortFreeURL key connects the HTTP action.
Before you connect
Sign in as a workspace owner or admin. Review Subscription for feature availability and remaining connections. Prepare the provider account and the permissions needed for this workflow.
Step-by-step setup
- Open your automation service (Make, Zapier or n8n), select Calendly and sign in to that account there. Provider access and automation-service fees are separate.
- Select the event or record containing the public URL you want to shorten. Share booking links with campaign tags. Never change private-file access permissions automatically.
- Choose Set up workflow in ShortFreeURL. Copy the create-only key once; it is restricted to creating links in this workspace.
- In an HTTP request action set POST, use the displayed Links endpoint and put the key in the Authorization header. Select JSON and map your public URL to originalURL. Add tags or UTM fields if needed.
- Run the workflow once and use the returned shortURL in a later action. Creating a link consumes your normal link/API quota.
- Check the generated link in Branded Links. Disconnecting revokes the key; expired plans and disabled features are checked again on each request.
Verify and troubleshoot
Check the saved connection, run its available test, and inspect Deliveries. A saved key is not proof that an external workflow completed. For HTTP workflows, run one public URL through the source application and confirm the returned shortURL appears in Branded Links.
401/403: review credentials and provider permissions. 402: review your plan. 429: reduce frequency and respect Retry-After. Do not retry a successful creation without checking for an existing link.
Disconnect
Choose Disconnect and confirm. The local connection and generated key are removed. Work already created in the external service stays there. Expired plans and disabled integration features stop future protected requests.
Resources
Connect Typeform
Full illustrated workflow guide
Follow the Make, Zapier or n8n walkthrough with numbered illustrations. Includes key setup, URL mapping, a test run and troubleshooting.
Direct connection is now available
You can connect Typeform with a provider token and import selected URLs without an automation service. Follow the direct account guide.
Optional automation workflow
Shorten a published form URL through Make, Zapier or n8n.
Connection type
Guided HTTP workflow
This is a guided HTTP workflow. Sign in to the source service in Make, Zapier or n8n; the ShortFreeURL key connects the HTTP action.
Before you connect
Sign in as a workspace owner or admin. Review Subscription for feature availability and remaining connections. Prepare the provider account and the permissions needed for this workflow.
Step-by-step setup
- Open your automation service (Make, Zapier or n8n), select Typeform and sign in to that account there. Provider access and automation-service fees are separate.
- Select the event or record containing the public URL you want to shorten. Shorten a published form URL. Never change private-file access permissions automatically.
- Choose Set up workflow in ShortFreeURL. Copy the create-only key once; it is restricted to creating links in this workspace.
- In an HTTP request action set POST, use the displayed Links endpoint and put the key in the Authorization header. Select JSON and map your public URL to originalURL. Add tags or UTM fields if needed.
- Run the workflow once and use the returned shortURL in a later action. Creating a link consumes your normal link/API quota.
- Check the generated link in Branded Links. Disconnecting revokes the key; expired plans and disabled features are checked again on each request.
Verify and troubleshoot
Check the saved connection, run its available test, and inspect Deliveries. A saved key is not proof that an external workflow completed. For HTTP workflows, run one public URL through the source application and confirm the returned shortURL appears in Branded Links.
401/403: review credentials and provider permissions. 402: review your plan. 429: reduce frequency and respect Retry-After. Do not retry a successful creation without checking for an existing link.
Disconnect
Choose Disconnect and confirm. The local connection and generated key are removed. Work already created in the external service stays there. Expired plans and disabled integration features stop future protected requests.
Resources
Connect Jotform
Full illustrated workflow guide
Follow the Make, Zapier or n8n walkthrough with numbered illustrations. Includes key setup, URL mapping, a test run and troubleshooting.
Direct connection is now available
You can connect Jotform with a provider token and import selected URLs without an automation service. Follow the direct account guide.
Optional automation workflow
Track a shared form link through Make, Zapier or n8n.
Connection type
Guided HTTP workflow
This is a guided HTTP workflow. Sign in to the source service in Make, Zapier or n8n; the ShortFreeURL key connects the HTTP action.
Before you connect
Sign in as a workspace owner or admin. Review Subscription for feature availability and remaining connections. Prepare the provider account and the permissions needed for this workflow.
Step-by-step setup
- Open your automation service (Make, Zapier or n8n), select Jotform and sign in to that account there. Provider access and automation-service fees are separate.
- Select the event or record containing the public URL you want to shorten. Track a shared form link. Never change private-file access permissions automatically.
- Choose Set up workflow in ShortFreeURL. Copy the create-only key once; it is restricted to creating links in this workspace.
- In an HTTP request action set POST, use the displayed Links endpoint and put the key in the Authorization header. Select JSON and map your public URL to originalURL. Add tags or UTM fields if needed.
- Run the workflow once and use the returned shortURL in a later action. Creating a link consumes your normal link/API quota.
- Check the generated link in Branded Links. Disconnecting revokes the key; expired plans and disabled features are checked again on each request.
Verify and troubleshoot
Check the saved connection, run its available test, and inspect Deliveries. A saved key is not proof that an external workflow completed. For HTTP workflows, run one public URL through the source application and confirm the returned shortURL appears in Branded Links.
401/403: review credentials and provider permissions. 402: review your plan. 429: reduce frequency and respect Retry-After. Do not retry a successful creation without checking for an existing link.
Disconnect
Choose Disconnect and confirm. The local connection and generated key are removed. Work already created in the external service stays there. Expired plans and disabled integration features stop future protected requests.
Resources
Connect Google Chat
Send link and domain alerts directly to Google Chat.
Connection type
Direct webhook / token
Paste a provider token or incoming webhook in the matching dashboard card.
Before you connect
Sign in as a workspace owner or admin. Review Subscription for feature availability and remaining connections. Prepare the provider account and the permissions needed for this workflow.
Step-by-step setup
- Create an incoming webhook or application token in Google Chat.
- Open Integrations & API, select Google Chat and paste the required setup fields.
- Choose Events to select notifications. Send test alert posts a real message to the configured destination.
- Inspect Deliveries and confirm the message appears in the provider. Disconnect to stop deliveries.
Verify and troubleshoot
Check the saved connection, run its available test, and inspect Deliveries. A saved key is not proof that an external workflow completed. For HTTP workflows, run one public URL through the source application and confirm the returned shortURL appears in Branded Links.
401/403: review credentials and provider permissions. 402: review your plan. 429: reduce frequency and respect Retry-After. Do not retry a successful creation without checking for an existing link.
Disconnect
Choose Disconnect and confirm. The local connection and generated key are removed. Work already created in the external service stays there. Expired plans and disabled integration features stop future protected requests.
Resources
Connect Mattermost
Send link and domain alerts directly to Mattermost.
Connection type
Direct webhook / token
Paste a provider token or incoming webhook in the matching dashboard card.
Before you connect
Sign in as a workspace owner or admin. Review Subscription for feature availability and remaining connections. Prepare the provider account and the permissions needed for this workflow.
Step-by-step setup
- Create an incoming webhook or application token in Mattermost.
- Open Integrations & API, select Mattermost and paste the required setup fields.
- Choose Events to select notifications. Send test alert posts a real message to the configured destination.
- Inspect Deliveries and confirm the message appears in the provider. Disconnect to stop deliveries.
Verify and troubleshoot
Check the saved connection, run its available test, and inspect Deliveries. A saved key is not proof that an external workflow completed. For HTTP workflows, run one public URL through the source application and confirm the returned shortURL appears in Branded Links.
401/403: review credentials and provider permissions. 402: review your plan. 429: reduce frequency and respect Retry-After. Do not retry a successful creation without checking for an existing link.
Disconnect
Choose Disconnect and confirm. The local connection and generated key are removed. Work already created in the external service stays there. Expired plans and disabled integration features stop future protected requests.
Resources
Ads tracking, email marketing and AI help — choose and verify your plan
1. Review your current subscription
Open Dashboard → Subscription → Ads, email marketing, plugins & AI. The table reads the current published plan settings. Google Ads, Google Analytics 4 and Meta tracking, plus Zapier, Make, Slack, Segment and WordPress, start on Starter, as do the other advertising connectors. Email marketing campaign drafts start on Growth. Administrators can change plan settings, so the live table is authoritative.
View current prices and allowances
2. Connect a provider account
Open Integrations & API and search for your provider. Choose Sign in for a configured OAuth connection, or enter the provider credentials requested by its setup form. A guided HTTP workflow needs Make, Zapier or n8n: open Setup guide and choose Full guide for numbered screenshots. Planned listings cannot connect yet.
3. Add another account when you need it
Keep the first connection, choose Add another account and give the second a recognizable name. Each account consumes a connection slot. The default allowances are Free 3, Starter 10, Growth 25, Business 60 and Scale unlimited. Manage automatic delivery and disconnect separately for each account.
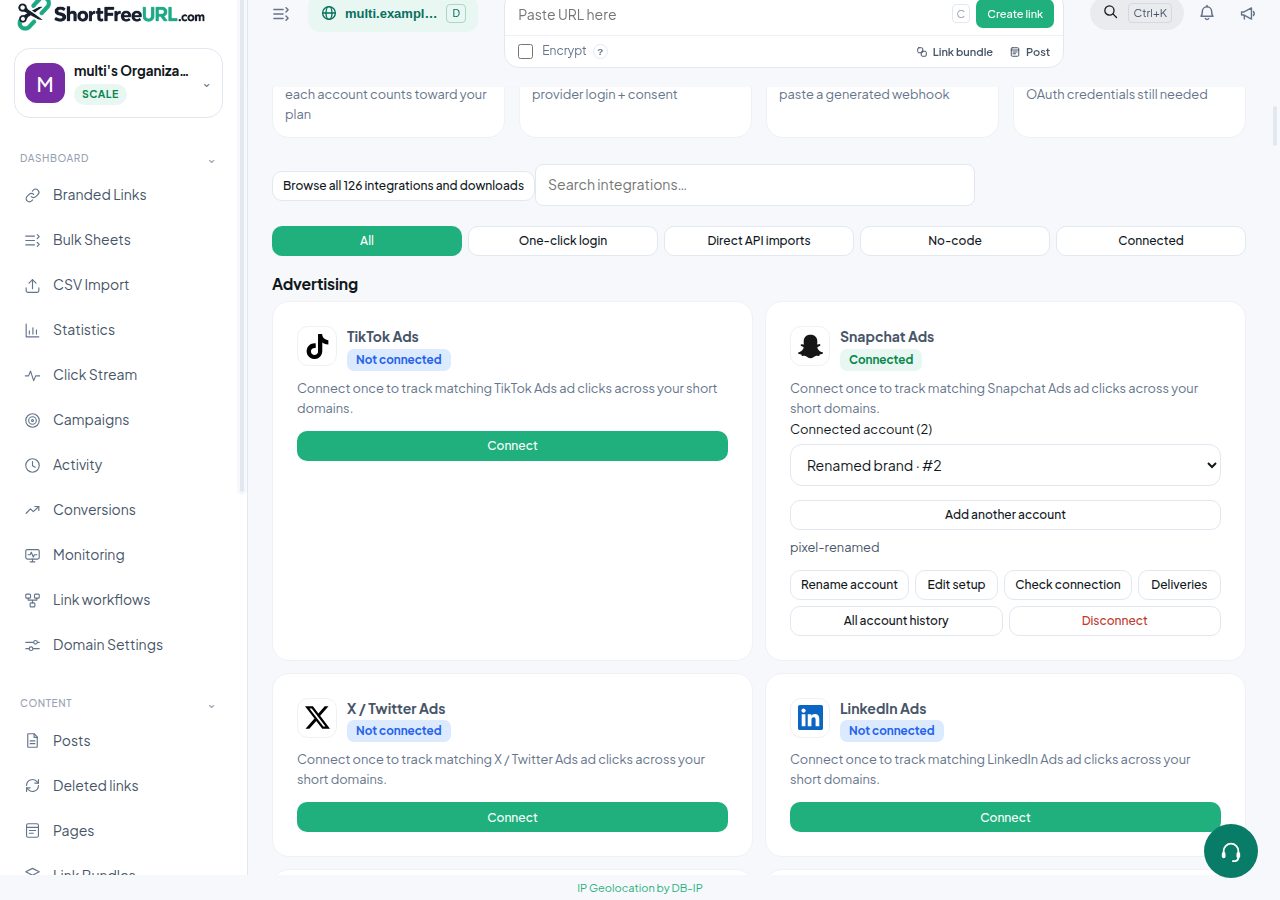
4. Verify tracking and campaign drafts
Configure tracking for a domain or connected account, make a controlled visit, then inspect Deliveries and the provider event dashboard. Free Google/Meta tracking is available at domain and connected-account level; per-link tracking overrides require the per-link tracking feature. Acceptance by a tracking API does not prove an ad conversion or purchase. For email marketing, select the audience and create a draft from a short link. Review and send in the email provider; creating a draft does not send a campaign.
5. Respect API and subscription allowances
SDKs, WordPress, MCP, CLI and Android use the same server permissions and quotas. API-created links consume a lifetime automation allowance separate from website-created links. On plan expiry or downgrade, paid integration actions stop and connections beyond the current allowance are blocked. Disconnecting an account revokes its generated API key; another account remains independently managed.
6. Ask for help from the documentation
Open any Docs or Developers page and choose Ask with AI. Ask a specific question with the feature or provider name. Answers cite current public guides, plans, integration setup and API reference. The assistant can show documentation matches when AI generation is unavailable. Never paste passwords, API keys, customer data or payment details. Account-specific help belongs in Support.
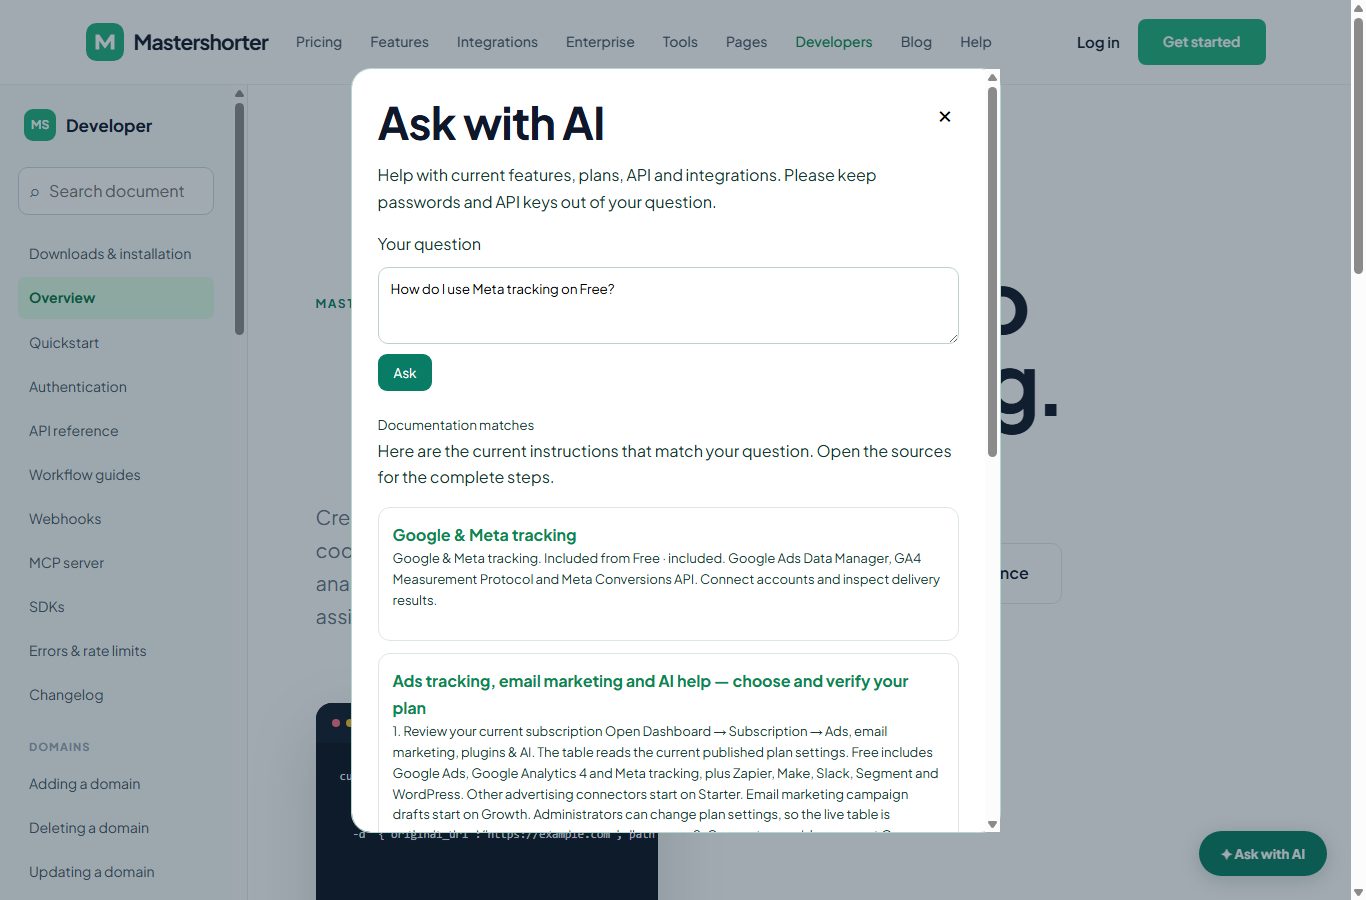
7. Help improve the guide
Use Helpful or Needs more detail below an answer. Administrators see aggregated guide feedback under AI Support → Knowledge base. Only reviewed knowledge is shared. Customer questions do not automatically become facts, change permissions or teach the assistant to execute arbitrary instructions. This is refreshed retrieval, not a claim that an external model has been retrained.
8. Keep Android and plugins current
The Android app loads the deployed website; Reload receives website features and plan changes. The Help button opens these developer guides. Native changes require installing the newly signed APK with the same signing identity. Use Settings → Check app update and follow the installation guide. WordPress and SDK downloads include the current plan and support guide.
Administrator controls
Manage plans controls prices, feature flags and connection limits. Integration provider controls pause a provider across accounts. AI Settings controls the documentation assistant and AI-generated answers; provider enablement, data-sharing consent, call ceilings, daily tokens and monthly spending limits also apply. Knowledge base shows the current index revision, document count, cache and guide feedback. Public docs questions have a maximum of five model attempts per client per UTC day, additionally limited by the configured AI budget. Further questions can still retrieve guides. The public assistant cannot run account tools. Support ticket repairs retain their own permission checks, verification and approval policies.
Connect Rocket.Chat
Send link and domain alerts directly to Rocket.Chat.
Connection type
Direct webhook / token
Paste a provider token or incoming webhook in the matching dashboard card.
Before you connect
Sign in as a workspace owner or admin. Review Subscription for feature availability and remaining connections. Prepare the provider account and the permissions needed for this workflow.
Step-by-step setup
- Create an incoming webhook or application token in Rocket.Chat.
- Open Integrations & API, select Rocket.Chat and paste the required setup fields.
- Choose Events to select notifications. Send test alert posts a real message to the configured destination.
- Inspect Deliveries and confirm the message appears in the provider. Disconnect to stop deliveries.
Verify and troubleshoot
Check the saved connection, run its available test, and inspect Deliveries. A saved key is not proof that an external workflow completed. For HTTP workflows, run one public URL through the source application and confirm the returned shortURL appears in Branded Links.
401/403: review credentials and provider permissions. 402: review your plan. 429: reduce frequency and respect Retry-After. Do not retry a successful creation without checking for an existing link.
Disconnect
Choose Disconnect and confirm. The local connection and generated key are removed. Work already created in the external service stays there. Expired plans and disabled integration features stop future protected requests.
Resources
Connect Google Tag Manager
Google Tag Manager can run on visitor-facing pages that ShortFreeURL renders, including bundles and supported interstitial pages. Redirect-only links do not render a page, so no browser container runs on those requests.
1. Copy the container ID
In Google Tag Manager, open Admin → Install Google Tag Manager and copy the container ID in the form GTM-XXXXXXX.
2. Add it to ShortFreeURL
Open Dashboard → Integrations & API, choose Google Tag Manager, enter the container ID and save. Select the domains or rendered pages where it should load.
3. Configure the data layer
Create variables and triggers for the documented link, domain, path and campaign values. Publish a container version only after Preview confirms the expected event.
4. Verify
Open a bundle or supported interstitial in Tag Assistant. Confirm the container loads once and the data layer event contains the intended non-sensitive campaign fields. A normal redirect has no page on which GTM can execute.
Privacy and plans
Do not place API keys, passwords, visitor IP addresses or private link destinations in the data layer. Availability and per-link overrides follow the current Subscription feature matrix. Disconnecting stops future injection but does not remove versions already published in Google Tag Manager.
Connect Flock
Send link and domain alerts directly to Flock.
Connection type
Direct webhook / token
Paste a provider token or incoming webhook in the matching dashboard card.
Before you connect
Sign in as a workspace owner or admin. Review Subscription for feature availability and remaining connections. Prepare the provider account and the permissions needed for this workflow.
Step-by-step setup
- Create an incoming webhook or application token in Flock.
- Open Integrations & API, select Flock and paste the required setup fields.
- Choose Events to select notifications. Send test alert posts a real message to the configured destination.
- Inspect Deliveries and confirm the message appears in the provider. Disconnect to stop deliveries.
Verify and troubleshoot
Check the saved connection, run its available test, and inspect Deliveries. A saved key is not proof that an external workflow completed. For HTTP workflows, run one public URL through the source application and confirm the returned shortURL appears in Branded Links.
401/403: review credentials and provider permissions. 402: review your plan. 429: reduce frequency and respect Retry-After. Do not retry a successful creation without checking for an existing link.
Disconnect
Choose Disconnect and confirm. The local connection and generated key are removed. Work already created in the external service stays there. Expired plans and disabled integration features stop future protected requests.
Resources
Create links from GitLab CI
Use the ShortFreeURL CLI or REST API in a GitLab pipeline to create release and documentation links from a reviewed file in your repository.
1. Create a restricted key
Create an API key in Dashboard → Integrations & API. Give it only the domain and write permissions the pipeline needs.
2. Save the key as a masked variable
In GitLab, open Settings → CI/CD → Variables. Add SHORTFREEURL_API_KEY as a masked, protected variable. Add SHORTFREEURL_BASE_URL for self-hosted installations. Never commit the key to .gitlab-ci.yml.
3. Add a pipeline job
Install the CLI from Downloads, then run the documented sync command against the reviewed links file. Use a fixed CLI version so pipeline behavior changes only when you update it.
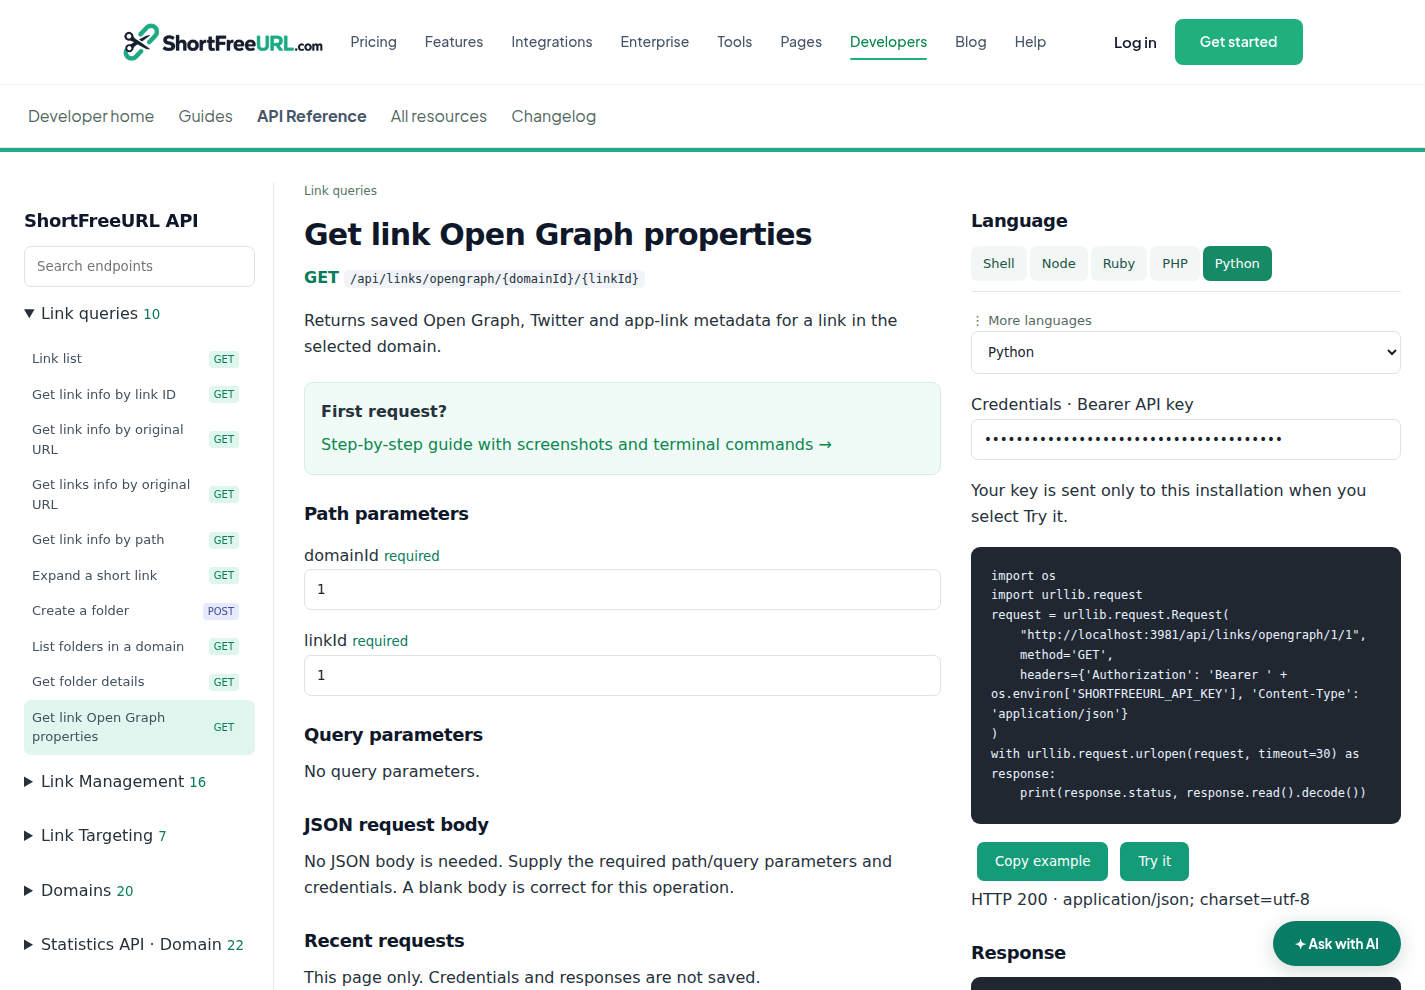
4. Verify safely
Run the job on a test branch and review its log. Open Branded Links and confirm the expected paths and destinations. If the request times out, look up the link before retrying so the pipeline does not create a duplicate.
Permissions and failures
401 means the key is missing or invalid. 403 means its scope or workspace role is insufficient. 402 means the current plan does not allow that action. 409 means a path or idempotency rule conflicted. Rotate the GitLab variable immediately if its value appears in a job log.
Connect Lark
Send link and domain alerts directly to Lark.
Connection type
Direct webhook / token
Paste a provider token or incoming webhook in the matching dashboard card.
Before you connect
Sign in as a workspace owner or admin. Review Subscription for feature availability and remaining connections. Prepare the provider account and the permissions needed for this workflow.
Step-by-step setup
- Create an incoming webhook or application token in Lark.
- Open Integrations & API, select Lark and paste the required setup fields.
- Choose Events to select notifications. Send test alert posts a real message to the configured destination.
- Inspect Deliveries and confirm the message appears in the provider. Disconnect to stop deliveries.
Verify and troubleshoot
Check the saved connection, run its available test, and inspect Deliveries. A saved key is not proof that an external workflow completed. For HTTP workflows, run one public URL through the source application and confirm the returned shortURL appears in Branded Links.
401/403: review credentials and provider permissions. 402: review your plan. 429: reduce frequency and respect Retry-After. Do not retry a successful creation without checking for an existing link.
Disconnect
Choose Disconnect and confirm. The local connection and generated key are removed. Work already created in the external service stays there. Expired plans and disabled integration features stop future protected requests.
Resources
Connect Zulip
Send link and domain alerts directly to Zulip.
Connection type
Direct webhook / token
Paste a provider token or incoming webhook in the matching dashboard card.
Before you connect
Sign in as a workspace owner or admin. Review Subscription for feature availability and remaining connections. Prepare the provider account and the permissions needed for this workflow.
Step-by-step setup
- Create an incoming webhook or application token in Zulip.
- Open Integrations & API, select Zulip and paste the required setup fields.
- Choose Events to select notifications. Send test alert posts a real message to the configured destination.
- Inspect Deliveries and confirm the message appears in the provider. Disconnect to stop deliveries.
Verify and troubleshoot
Check the saved connection, run its available test, and inspect Deliveries. A saved key is not proof that an external workflow completed. For HTTP workflows, run one public URL through the source application and confirm the returned shortURL appears in Branded Links.
401/403: review credentials and provider permissions. 402: review your plan. 429: reduce frequency and respect Retry-After. Do not retry a successful creation without checking for an existing link.
Disconnect
Choose Disconnect and confirm. The local connection and generated key are removed. Work already created in the external service stays there. Expired plans and disabled integration features stop future protected requests.
Resources
Connect Gotify
Send link and domain alerts directly to Gotify.
Connection type
Direct webhook / token
Paste a provider token or incoming webhook in the matching dashboard card.
Before you connect
Sign in as a workspace owner or admin. Review Subscription for feature availability and remaining connections. Prepare the provider account and the permissions needed for this workflow.
Step-by-step setup
- Create an incoming webhook or application token in Gotify.
- Open Integrations & API, select Gotify and paste the required setup fields.
- Choose Events to select notifications. Send test alert posts a real message to the configured destination.
- Inspect Deliveries and confirm the message appears in the provider. Disconnect to stop deliveries.
Verify and troubleshoot
Check the saved connection, run its available test, and inspect Deliveries. A saved key is not proof that an external workflow completed. For HTTP workflows, run one public URL through the source application and confirm the returned shortURL appears in Branded Links.
401/403: review credentials and provider permissions. 402: review your plan. 429: reduce frequency and respect Retry-After. Do not retry a successful creation without checking for an existing link.
Disconnect
Choose Disconnect and confirm. The local connection and generated key are removed. Work already created in the external service stays there. Expired plans and disabled integration features stop future protected requests.
Resources
Connect ntfy
Send link and domain alerts directly to ntfy.
Connection type
Direct webhook / token
Paste a provider token or incoming webhook in the matching dashboard card.
Before you connect
Sign in as a workspace owner or admin. Review Subscription for feature availability and remaining connections. Prepare the provider account and the permissions needed for this workflow.
Step-by-step setup
- Create an incoming webhook or application token in ntfy.
- Open Integrations & API, select ntfy and paste the required setup fields.
- Choose Events to select notifications. Send test alert posts a real message to the configured destination.
- Inspect Deliveries and confirm the message appears in the provider. Disconnect to stop deliveries.
Verify and troubleshoot
Check the saved connection, run its available test, and inspect Deliveries. A saved key is not proof that an external workflow completed. For HTTP workflows, run one public URL through the source application and confirm the returned shortURL appears in Branded Links.
401/403: review credentials and provider permissions. 402: review your plan. 429: reduce frequency and respect Retry-After. Do not retry a successful creation without checking for an existing link.
Disconnect
Choose Disconnect and confirm. The local connection and generated key are removed. Work already created in the external service stays there. Expired plans and disabled integration features stop future protected requests.
Resources
Connect multiple accounts to the same provider
1. Keep your existing account
Open Integrations & API and find the provider, for example Snapchat Ads. Your existing account remains connected.
2. Add another account
Choose Add another account. Enter a recognizable account name, then sign in to a different provider account or paste its own API credentials. Never reuse the first account token by accident.
3. Choose the active account to manage
Use Connected account to select one account. Edit setup, Rename account, Check connection, Events and Deliveries apply only to that selected account. Selecting an account does not pause the other account.
4. Configure automatic delivery
For advertising connectors, turn Automatic ad-click tracking on for each account that should receive matching clicks. Choose a domain or leave the domain blank for all workspace domains. Both enabled Snapchat accounts can receive the same matching click, each with independent duplicate protection. Email draft and notification settings are also account-specific.
5. Verify and disconnect safely
Run Check connection for each account and inspect its Deliveries. All account history includes past provider deliveries, including disconnected accounts. Disconnect removes only the selected account and revokes its generated key. External OAuth revocation depends on the provider; reconnect any other grant the provider also invalidates.
Limits and tracking defaults
Every account consumes one integration slot. An expired plan or a lower account allowance blocks accounts beyond the allowance. GA4 Measurement Protocol, Meta and Segment also support multiple accounts with independent Automatic click tracking and Domain controls. A domain-specific tracking destination takes precedence over workspace accounts for that provider. Account deliveries are recorded separately and matching event IDs are deduplicated for seven days.
Trello Direct Import — step-by-step setup
Connect your account and import selected board URLs as branded links.
Direct connection
- Open Integrations & API and find Trello · Direct.
- Enter the provider API token and the additional fields shown. Trello API key and account token with read access.
- Choose Check connection, then Import links. The app fetches your account items directly.
- Select the items and your short-link domain. Create selected short links. No source permissions are changed.
- Review created or reused links. Use Next page for more items; fetch a new preview after ten minutes.
- Use the account selector for additional accounts. Disconnect stops future access and invalidates pending previews.
Illustrated example
Permissions and limits
An owner or administrator must connect and import. Imports consume link and API creation allowances. Previews are encrypted, bound to your account and expire after ten minutes. Changed credentials, removed membership, plan expiry or disconnect prevent an old preview from importing. A failed batch rolls back its local writes.
Verify the result
Open Branded Links and the original source item. Existing destination links are reused. The original service still controls access to private items. Check Deliveries for failed account fetches.
Provider documentation
ClickUp Direct Import — step-by-step setup
Connect your account and import selected task URLs as branded links.
Direct connection
- Open Integrations & API and find ClickUp · Direct.
- Enter the provider API token and the additional fields shown. ClickUp Settings → Apps → API Token. Copy your List ID from its URL.
- Choose Check connection, then Import links. The app fetches your account items directly.
- Select the items and your short-link domain. Create selected short links. No source permissions are changed.
- Review created or reused links. Use Next page for more items; fetch a new preview after ten minutes.
- Use the account selector for additional accounts. Disconnect stops future access and invalidates pending previews.
Illustrated example
Permissions and limits
An owner or administrator must connect and import. Imports consume link and API creation allowances. Previews are encrypted, bound to your account and expire after ten minutes. Changed credentials, removed membership, plan expiry or disconnect prevent an old preview from importing. A failed batch rolls back its local writes.
Verify the result
Open Branded Links and the original source item. Existing destination links are reused. The original service still controls access to private items. Check Deliveries for failed account fetches.
Provider documentation
Todoist Direct Import — step-by-step setup
Connect your account and import selected task URLs as branded links.
Direct connection
- Open Integrations & API and find Todoist · Direct.
- Enter the provider API token and the additional fields shown. Todoist Settings → Integrations → Developer → API token.
- Choose Check connection, then Import links. The app fetches your account items directly.
- Select the items and your short-link domain. Create selected short links. No source permissions are changed.
- Review created or reused links. Use Next page for more items; fetch a new preview after ten minutes.
- Use the account selector for additional accounts. Disconnect stops future access and invalidates pending previews.
Illustrated example
Permissions and limits
An owner or administrator must connect and import. Imports consume link and API creation allowances. Previews are encrypted, bound to your account and expire after ten minutes. Changed credentials, removed membership, plan expiry or disconnect prevent an old preview from importing. A failed batch rolls back its local writes.
Verify the result
Open Branded Links and the original source item. Existing destination links are reused. The original service still controls access to private items. Check Deliveries for failed account fetches.
Provider documentation
Typeform Direct Import — step-by-step setup
Connect your account and import selected form URLs as branded links.
Direct connection
- Open Integrations & API and find Typeform · Direct.
- Enter the provider API token and the additional fields shown. Typeform personal access token with forms:read scope.
- Choose Check connection, then Import links. The app fetches your account items directly.
- Select the items and your short-link domain. Create selected short links. No source permissions are changed.
- Review created or reused links. Use Next page for more items; fetch a new preview after ten minutes.
- Use the account selector for additional accounts. Disconnect stops future access and invalidates pending previews.
Illustrated example
Permissions and limits
An owner or administrator must connect and import. Imports consume link and API creation allowances. Previews are encrypted, bound to your account and expire after ten minutes. Changed credentials, removed membership, plan expiry or disconnect prevent an old preview from importing. A failed batch rolls back its local writes.
Verify the result
Open Branded Links and the original source item. Existing destination links are reused. The original service still controls access to private items. Check Deliveries for failed account fetches.
Provider documentation
Coda Direct Import — step-by-step setup
Connect your account and import selected document URLs as branded links.
Direct connection
- Open Integrations & API and find Coda · Direct.
- Enter the provider API token and the additional fields shown. Coda account settings → API settings → Generate API token. Grant read access to the documents you want to shorten.
- Choose Check connection, then Import links. The app fetches your account items directly.
- Select the items and your short-link domain. Create selected short links. No source permissions are changed.
- Review created or reused links. Use Next page for more items; fetch a new preview after ten minutes.
- Use the account selector for additional accounts. Disconnect stops future access and invalidates pending previews.
Illustrated example
Permissions and limits
An owner or administrator must connect and import. Imports consume link and API creation allowances. Previews are encrypted, bound to your account and expire after ten minutes. Changed credentials, removed membership, plan expiry or disconnect prevent an old preview from importing. A failed batch rolls back its local writes.
Verify the result
Open Branded Links and the original source item. Existing destination links are reused. The original service still controls access to private items. Check Deliveries for failed account fetches.
Provider documentation
Smartsheet Direct Import — step-by-step setup
Connect your account and import selected sheet URLs as branded links.
Direct connection
- Open Integrations & API and find Smartsheet · Direct.
- Enter the provider API token and the additional fields shown. Smartsheet Account → Personal Settings → API Access. Use a token with sheet read access.
- Choose Check connection, then Import links. The app fetches your account items directly.
- Select the items and your short-link domain. Create selected short links. No source permissions are changed.
- Review created or reused links. Use Next page for more items; fetch a new preview after ten minutes.
- Use the account selector for additional accounts. Disconnect stops future access and invalidates pending previews.
Illustrated example
Permissions and limits
An owner or administrator must connect and import. Imports consume link and API creation allowances. Previews are encrypted, bound to your account and expire after ten minutes. Changed credentials, removed membership, plan expiry or disconnect prevent an old preview from importing. A failed batch rolls back its local writes.
Verify the result
Open Branded Links and the original source item. Existing destination links are reused. The original service still controls access to private items. Check Deliveries for failed account fetches.
Provider documentation
Wrike Direct Import — step-by-step setup
Connect your account and import selected task URLs as branded links.
Direct connection
- Open Integrations & API and find Wrike · Direct.
- Enter the provider API token and the additional fields shown. Create a permanent token in the Wrike API application console with task read access. Select your account data region.
- Choose Check connection, then Import links. The app fetches your account items directly.
- Select the items and your short-link domain. Create selected short links. No source permissions are changed.
- Review created or reused links. Use Next page for more items; fetch a new preview after ten minutes.
- Use the account selector for additional accounts. Disconnect stops future access and invalidates pending previews.
Illustrated example
Permissions and limits
An owner or administrator must connect and import. Imports consume link and API creation allowances. Previews are encrypted, bound to your account and expire after ten minutes. Changed credentials, removed membership, plan expiry or disconnect prevent an old preview from importing. A failed batch rolls back its local writes.
Verify the result
Open Branded Links and the original source item. Existing destination links are reused. The original service still controls access to private items. Check Deliveries for failed account fetches.
Provider documentation
Jotform Direct Import — step-by-step setup
Connect your account and import selected form URLs as branded links.
Direct connection
- Open Integrations & API and find Jotform · Direct.
- Enter the provider API token and the additional fields shown. Jotform My Account → API → Create API key with read access. Match your account region.
- Choose Check connection, then Import links. The app fetches your account items directly.
- Select the items and your short-link domain. Create selected short links. No source permissions are changed.
- Review created or reused links. Use Next page for more items; fetch a new preview after ten minutes.
- Use the account selector for additional accounts. Disconnect stops future access and invalidates pending previews.
Illustrated example
Permissions and limits
An owner or administrator must connect and import. Imports consume link and API creation allowances. Previews are encrypted, bound to your account and expire after ten minutes. Changed credentials, removed membership, plan expiry or disconnect prevent an old preview from importing. A failed batch rolls back its local writes.
Verify the result
Open Branded Links and the original source item. Existing destination links are reused. The original service still controls access to private items. Check Deliveries for failed account fetches.
Provider documentation
Calendly Direct Import — step-by-step setup
Connect your account and import selected scheduling URLs as branded links.
Direct connection
- Open Integrations & API and find Calendly · Direct.
- Enter the provider API token and the additional fields shown. Calendly Integrations & apps → API and webhooks → Personal access tokens. Allow users:read and event_types:read.
- Choose Check connection, then Import links. The app fetches your account items directly.
- Select the items and your short-link domain. Create selected short links. No source permissions are changed.
- Review created or reused links. Use Next page for more items; fetch a new preview after ten minutes.
- Use the account selector for additional accounts. Disconnect stops future access and invalidates pending previews.
Illustrated example
Permissions and limits
An owner or administrator must connect and import. Imports consume link and API creation allowances. Previews are encrypted, bound to your account and expire after ten minutes. Changed credentials, removed membership, plan expiry or disconnect prevent an old preview from importing. A failed batch rolls back its local writes.
Verify the result
Open Branded Links and the original source item. Existing destination links are reused. The original service still controls access to private items. Check Deliveries for failed account fetches.
Provider documentation
API reference
Authentication, rate limits and conventions
The REST API covers everything the dashboard does. This page describes the conventions that apply to every endpoint; the endpoint list itself is generated from the running routes.
Authentication
Pass an API key in the Authorization header:
curl https://your-instance/api/links \
  -H "Authorization: YOUR_SECRET_KEY"
Secret keys have full access to the organization. Public keys can only create links, and are the right choice for anything shipped to a browser or a mobile app. A key can be scoped to a single domain, in which case every request is confined to that domain.
Session cookies also authenticate, which is how the dashboard itself calls the API. Anything you can do in the dashboard you can do with a key, subject to your role: readonly members get 403 on write endpoints.
Request and response shape
Requests are JSON with Content-Type: application/json. Responses are JSON. Field names in responses use camelCase — originalURL, shortURL, createdAt — while write payloads accept both camelCase and the underlying snake_case names, so original_url and originalURL are both understood on create and update.
Rate limits
Requests are limited per key at the rate shown on the API tab under Integrations. Exceeding it returns 429. Back off and retry; do not spin. For volume, use the bulk endpoints rather than a loop of single requests.
Plan gating
Some fields require a paid plan. If a write includes gated fields your plan cannot use — geo rules, expiry, cloaking, password, social metadata, per-link tracking, link permissions — the request still succeeds, the gated fields are dropped, and the response carries an upgradeRequired list naming the features that were stripped. Check for it rather than assuming a 200 means everything was applied.
Limits and quotas
Creating a link when a plan limit is reached returns an error naming the limit. Links created through the API count against the API link allowance separately from the total link count.
Discovery
GET /api/openapi.json returns an OpenAPI description of the live routes, which is the fastest way to generate a client. GET /api/zapier returns the trigger and action catalogue used by the automation platforms.
Working with links over the API
Links are the core resource. Everything the editor changes is a field on a link, and the same fields are accepted here.
Creating
curl -X POST https://your-instance/api/links \
  -H "Authorization: YOUR_SECRET_KEY" \
  -H "Content-Type: application/json" \
  -d '{"originalURL":"https://example.com/page","path":"spring","tags":["promo"]}'
Only the destination is required. Omit path and a slug is generated using the domain's rule. Omit the domain and your favourite domain is used.
If a link to the same destination already exists on the domain and duplicates are not allowed, the response is a 409 carrying the existing link, so you can reuse it rather than creating a near-duplicate. Pass allowDuplicates: true to create one anyway.
Reading
GET /api/linkslists links with search, sorting and offset paging. Thequeryparameter takes the same syntax as the dashboard search box, includingtag:,clicks:>500andarchived:true.GET /api/links/:idreturns one link.GET /api/links/expandresolves a short URL to its destination.GET /api/links/by-original-urlfinds an existing link for a destination — the check to make before creating one.POST /api/links/multiplefetches several links by ID in one request.
Updating and deleting
POST or PUT to /api/links/:id with the fields to change. DELETE removes the link permanently and frees its slug. There are also /archive, /unarchive and /duplicate actions, which do exactly what the row menu does.
Bulk
POST /api/links/bulk creates many links in one request. POST /api/links/bulk/action applies one change — tags, UTM values, folder, expiry, redirect type, cloaking, archive state — across a set of link IDs. POST /api/links/bulk/delete deletes up to 150 at a time.
Folders and tags
GET/POST /api/folders manages folders and their defaults; GET /api/tags returns the tags in use on a domain with counts, derived from the links themselves.
Restricted links
A link restricted to named users returns 404 rather than 403 to anyone outside the list, so a restricted link does not reveal that it exists.
Reading statistics over the API
Every number in the dashboard is available as JSON, with the same date range and filter parameters the UI uses.
Summaries
GET /statistics/domain/:id— the full summary for a domain: KPI cards, the time series, every breakdown, the heatmap, conversions and QR scans.GET /statistics/link/:id— the same shape for one link, plus the link itself and its A/B variations.GET /api/statistics/overview— organisation-wide totals across all domains.
The KPI block returns four entries — short URLs created, total clicks, average clicks per link, and human clicks — each with the current value and a comparison against the immediately preceding window. When the previous window is empty, the change is null rather than a fabricated percentage.
Breakdowns
GET /statistics/domain/:id/top returns the top rows for every dimension at once. GET /statistics/domain/:id/details/:dimension returns the full list for one. The dimensions are country, region, city, path, browser, os, device, social, refhost, utm_source, utm_medium, utm_campaign, language and ab_path.
GET /statistics/domain/:id/filter-values returns the values actually present in your data for each filterable dimension — the right way to build a filter UI without offering countries that have never clicked.
Parameters
A period or an explicit start and end, an interval of hour, day, week or month, a click mode of all, humans or robots, and any of the dimension filters. Multiple values in one dimension are OR; different dimensions are AND. Dimension filters require the Growth plan or above; when the plan does not allow them the response says so rather than silently ignoring them.
Raw clicks
GET /statistics/clickstream returns individual clicks, newest first, with limit and offset, honouring the same filters. Add format=csv to download instead. GET /statistics/click/:clid returns everything recorded about one click.
Exports and shares
GET /statistics/domain/:id/export produces the spreadsheet export of the current view. POST /api/statistics/share publishes a read-only statistics page and returns its URL; GET lists shares and DELETE revokes one.
Conversions
POST /api/conversions records a conversion against a click ID; GET /api/conversions returns the summary and recent rows.
Bulk import, the sheet and exports over the API
The bulk endpoints exist because creating ten thousand links one request at a time is slow, hits rate limits, and gives you no useful error report.
The canonical columns
Bulk work uses one column layout everywhere — the CSV import, the in-browser sheet, and the exports:
Short URL, Status, Id, Original URL, Link slug, Cloaking,
UTM Source, UTM Medium, UTM Campaign, UTM Term, UTM Content,
Expires at, Clicks limit, Expiration link, TTL, Tags, Link title,
iOS Link, Android Link, Creation date, Delete, Folder, Redirect type, Password
GET /api/bulk/templates returns this list, the recognised import templates and the full header mapping. GET /api/bulk/template.csv?kind=… downloads an empty template.
Importing
POST /api/bulk/preview accepts a file or pasted text and returns the detected headers, the field each maps to, the total row count and the first twenty rows. Correct the mapping, then POST /api/bulk/import with the same file plus the mapping to apply it. Imports are capped at 10,000 rows per file.
Header mapping is automatic for exports from several common shorteners: Bitlink, slashtag, alias, keyword, back-half and custom back-half all map to the slug; destination, long URL and original URL map to the target. Tags split on commas, semicolons or pipes.
The sheet
GET /api/bulk/sheet returns every link on a domain in the canonical layout. Edit rows and send them to POST /api/bulk/sheet/apply. The rules are simple and worth knowing:
- A row with an
Idupdates that link. - A row without an
Idand with an Original URL creates a link. - A row with
1in theDeletecolumn deletes that link. - Anything else is skipped.
The response reports created, updated, deleted and failed counts plus per-row errors, and the run is recorded as a job.
Jobs and errors
GET /api/bulk/jobs lists import and bulk runs with their status and counts. GET /api/bulk/jobs/:id/errors.csv downloads the failed rows with their error messages, so you can fix and re-import only those.
Exports
GET /api/bulk/export.csv produces the same layout for offline editing, and GET /api/export/links exports links for backup.
Errors, status codes and how to handle them
Failures come back as JSON with a message written to be shown to a person. The status code tells you what kind of problem it is and whether retrying will help.
Codes you will see
- 400 — the request is wrong. A missing destination, an invalid URL, a slug containing characters that are not allowed, a reserved slug, an import with no rows. Fix the request; retrying is pointless.
- 401 — no valid credentials. The key is missing, malformed, revoked or expired.
- 402 — a plan limit is in the way. Returned by the conversions endpoint when the monthly conversion allowance is used up, with an upgrade flag on the body.
- 403 — authenticated but not allowed. A readonly member on a write endpoint, or a non-admin on billing, key management or domain deletion.
- 404 — not found, or deliberately hidden. A link restricted to named users returns 404 to everyone else so its existence is not disclosed.
- 409 — a conflict. A slug already used on the domain, or a duplicate destination on a domain that does not allow duplicates. The duplicate response includes the existing link so you can use it.
- 429 — rate limited. Back off and retry with increasing delay.
- 5xx — a server-side failure. Retry with backoff; if it persists, the delivery or job logs usually say more.
Partial success is not an error
Two cases return 200 while not doing everything you asked:
- Gated fields. A write containing Pro-only fields on a free plan succeeds with those fields dropped, and the response carries
upgradeRequirednaming them. - Bulk operations. An import or a sheet apply returns counts of created, updated, deleted and failed rows plus per-row errors. A 200 here means the run completed, not that every row worked.
Check both. A client that treats 200 as complete success will quietly lose settings on a free plan and quietly lose rows on an import.
Writing a resilient client
- Retry only 429 and 5xx, with exponential backoff and a cap.
- Treat 409 on create as "fetch the existing link and use it".
- Log the message body — it names the specific limit, host restriction or validation rule that failed.
- Check for a blocked destination: a domain can restrict destinations to an allowed list, and links to hosts on the global abuse blocklist are refused outright.
The OpenAPI document, SDKs and client generation
Rather than hand-writing a client, start from the machine-readable description of the live routes.
The OpenAPI document
GET /api/openapi.json returns an OpenAPI specification generated from the running routes on your instance, with the correct base URL for that instance. Because it comes from the routes themselves, it cannot drift from what the server actually accepts.
Use it to generate a typed client in your language, to import the API into a request client for exploration, or to validate that a change on your side still matches what the server expects.
SDKs
Client libraries are published for Node.js, browser JavaScript, Python, PHP, Ruby, Go, Swift for iOS, Kotlin for Android, and a command-line tool. They wrap the same endpoints with the same field names, and they exist mainly to save you writing the authentication header and the error handling twice.
If your language is not in that list, generating from the OpenAPI document is a five-minute job and produces something you can maintain.
Choosing keys for a client
- Server code — a secret key from an environment variable or a secrets manager.
- Browser or mobile code — a public key, scoped to one domain. It can create links and nothing else, so shipping it is acceptable.
- CI — a secret key held as a repository secret, ideally with an expiry date so an abandoned pipeline stops working rather than lingering.
The discovery endpoints
Three other documents are worth knowing:
GET /api/zapier— the trigger and action catalogue used by Zapier and Make.GET /mcp— the MCP server description and its tool list.GET /api/bulk/templates— the canonical bulk column layout and the header mappings used by the importer.
Versioning and change
Endpoints are additive: fields are added, not renamed out from under you. Write clients that ignore unknown fields rather than rejecting them, and do not depend on the ordering of arrays that are not explicitly sorted.
A first request
The quickest confidence check is a create followed by an expand: create a link, then call GET /api/links/expand with the short URL and confirm the destination comes back.
Security
Two-factor authentication, passkeys and sessions
Account security lives under Settings, Security. Everything here is per person; the organization-wide enforcement lives on teams.
Two-factor authentication
Start setup and you are shown a secret and a QR code for an authenticator app. Enter a code from the app to enable it. Once enabled, login asks for a code after the password.
Backup codes are generated at the same time. Store them somewhere that is not the phone holding the authenticator — the common way to lose an account is to lose the only device that can prove you own it. You can regenerate the set, which invalidates the previous one.
Disabling 2FA requires your password, so someone with a borrowed session cannot quietly turn it off.
Passkeys
Passkeys authenticate with the device you already unlock: Touch ID, Windows Hello, a security key. Register one from Security, give it a label so you can tell devices apart later, and it appears in the list with when it was added.
Register at least two — a laptop and a phone — so losing one device is an inconvenience rather than a lockout. Removing a passkey takes effect immediately.
Sessions
The sessions list shows where your account is signed in. Revoke all sessions signs out every device except the one you are using, which is the correct first move if you suspect a device is compromised or you have just left a shared computer signed in.
Passwords and sign-in methods
Change your password from the same page. Sign-in also supports a magic link by email and Google sign-in; an account can use more than one method. Email addresses are verified, and changing an address requires confirming the new one.
Enforcement for a team
Requiring 2FA for everyone is a team setting rather than a personal one. A team can also carry SAML single sign-on, which is the stronger control for an organization of any size.
API keys are separate
None of this protects an API key. A key is a bearer credential: whoever holds it can act with its permissions, regardless of your 2FA. Scope keys narrowly, give them expiry dates and revoke them when an integration is retired.
SAML single sign-on for a team
Single sign-on is configured per team rather than per organization, which lets one organization serve several groups with different identity providers — an agency and its client, or two subsidiaries.
What you configure
On the team, set:
- Entry point — your identity provider's SSO URL, where people are sent to authenticate.
- Certificate — the provider's signing certificate, used to verify assertions.
- Entity ID — the identifier your provider expects for this service.
- ACS URL — the endpoint your provider posts assertions back to. This value is shown on the team page; paste it into your provider's configuration.
The flow
A person visits the team's SAML entry point and is sent to your identity provider. The provider authenticates them and posts a signed assertion to the ACS URL. The assertion signature is verified against the configured certificate, and a session is created for the matching user.
Practical setup order
- Create the team and add the domains it should own.
- Copy the ACS URL and entity ID into your identity provider and create the application there.
- Paste the provider's entry point and certificate back into the team.
- Test with one account before pointing everyone at it.
Keep one owner account that can sign in without SSO until you are certain the configuration works. A misconfigured certificate locks out everyone who depends on it, and the fix requires being signed in.
Certificate rotation
Identity provider certificates expire. When yours rotates, paste the new certificate into the team before the old one expires; assertions signed with an unknown certificate are rejected. Put the expiry in a calendar — this is the single most common cause of an SSO outage.
Roles
SSO authenticates; it does not decide permissions. Roles stay in ShortFreeURL: owner, admin, user and readonly. Someone signing in through SSO gets the role their membership carries.
Combining with 2FA
A team can also require two-factor authentication. If your identity provider already enforces MFA, requiring it again here is usually redundant. If it does not, turn it on.
SSO is on the Scale plan; teams themselves start on Growth.
Roles, teams and per-link permissions
Access is decided at three levels: your role in the organization, the team that owns a domain, and an optional list of people attached to a single link.
Roles
- Owner — one per organization. Can transfer domains, transfer ownership and delete the organization. Transferring ownership demotes the previous owner to admin in the same action.
- Admin — everything except ownership transfer: billing, member management, API keys, the audit log, domain deletion and statistics deletion.
- User — creates and edits links, folders, bundles, posts and QR codes.
- Readonly — sees links and statistics and changes nothing. Write endpoints return 403.
Give day-to-day contributors the user role and keep admin for the two or three people who handle billing and domains.
Teams
A team groups people and owns domains. Assign a domain to a team and only that team's members see it in the domain switcher. This is the right tool when one organization serves several clients, or when a domain should not be visible to everyone.
Teams also carry two group-level security settings: enforced two-factor authentication and SAML single sign-on.
Per-link permissions
A single link can be restricted to named organization members. Anyone outside the list — except the link's creator and the organization's owners and admins — gets a 404 from the API rather than a 403, so a restricted link does not disclose that it exists.
This restricts management of the link, not the redirect. The short URL still works for anyone who has it. If the destination must be protected, protect it at the destination, or use a password-protected or encrypted link.
The audit log
Sensitive actions are recorded with the user, the entity and the IP: API key creation and revocation, member and role changes, domain deletion, statistics deletion, transfers. Admins and owners can read it. It is the first place to look when something changed and nobody remembers changing it.
A workable default
Most organizations need: one owner, two admins, everyone else a user, readonly for clients and contractors who only need numbers, and per-link permissions used rarely and deliberately.
Password-protected and encrypted links
Two different mechanisms for two different threat models. Choose the one that matches what you are actually protecting against.
Password protection
Set a password on a link and visitors see a gate page before the redirect. On success a signed cookie is set for that link, so the password is asked for once per browser per day rather than on every click. A contact address can be shown on the page for people who do not have the password.
What this does and does not do:
- The destination URL is stored in the clear and is visible to anyone who can see the link in the dashboard.
- Anyone who passes the gate has the real destination and can share it. Protect genuinely sensitive material at the destination too.
- Link previews stop working, because crawlers see the password page. That is correct behaviour, not a bug.
- Removing a password is a save with the field cleared.
Password protection is right for mild gating: an unlisted document, a pre-launch page, a link you would rather not have indexed or forwarded casually.
Encrypted links
Encryption is chosen at creation and cannot be added or removed afterwards. The destination is encrypted with a key that is returned to you once and never stored — it travels in the URL fragment, which browsers do not send to servers. Opening the link serves a page that decrypts the destination in the browser using the key from the fragment.
The consequences are worth stating plainly:
- The server cannot read the destination. Neither can anyone with database access.
- A link without its fragment is useless. If you lose the key, the destination is not recoverable — recreate the link.
- The dashboard cannot show you the destination either. The links table marks the link as encrypted and nothing more.
- Statistics still work; the destination column records that the click was to an encrypted link.
Encryption is right when the destination itself is the secret.
Combining
A link can be both protected and encrypted. Password protection starts on Growth and encryption on Business, and encryption in particular is a one-way decision at creation, so decide before you create.
Signed redirects: proving traffic came from your links
Signed redirects let your destination server verify that a visitor actually arrived through one of your short links, rather than through a URL someone copied, guessed or fabricated.
What it does
Enable signing under Domain settings, Signature key, and every redirect from that domain carries three extra parameters on the destination URL: ms_sig, ms_exp and ms_alg. The signature is computed with HMAC-SHA3-512 over the destination and expiry, using a key held for the domain, and it is valid for ten minutes.
Your destination server recomputes the signature with the same key and rejects anything that does not match or has expired. Verification examples for several languages are shown in the settings panel.
When this is worth it
- Paid campaigns where the destination is a landing page you do not want scraped or replayed at scale.
- Affiliate or partner traffic where you need to distinguish genuine referrals from fabricated ones.
- Any endpoint that acts on arrival — issuing a token, starting a session, counting a lead — and should only act on traffic that came through a link you control.
The key
The key is generated per domain and shown once, with a copy button. Store it in your destination application's secrets. Regenerating the key invalidates the old one immediately, which will break any server still verifying with it — coordinate the change.
Things to get right
- Clock skew. Ten minutes is not a long window. If your server's clock drifts, valid traffic fails verification. Run NTP.
- Constant-time comparison. Compare the signature with a constant-time function, not string equality.
- Do not strip the parameters upstream. A CDN or a redirect on your side that drops query parameters removes the signature.
- Fail sensibly. Decide in advance what an invalid signature means: a hard rejection, or a flag on the session. A hard rejection combined with a clock problem takes your landing page down.
What it is not
A signature proves a URL was produced by your domain within the last ten minutes. It does not prove who the visitor is, and it does not stop someone forwarding a signed URL within the window. It is a filter against bulk and stale traffic, not authentication.
Signed redirects are on the Growth plan and above.
Privacy, visitor data and retention
Link analytics necessarily involve visitor data. The controls here decide how much of it is kept and for how long.
What a click records
Country, region, city, timezone, continent, browser, OS, device, language, referrer, UTM values, and — unless you turn it off — the visitor's IP address along with its ASN and network. The full list is visible in the click stream, and the same fields go into the S3 export.
Hide visitor IP
Turn this on in Domain settings, Statistics, and the IP is used to derive country and city and then discarded. It is never stored. Recommended for GDPR, and it costs you nothing except the ability to exclude a specific address after the fact.
Set the IP exclusion list first if you use it — exclusions are matched at click time and work regardless of whether the address is stored afterwards.
Retention
Click data is kept for a bounded number of days that grows with the plan, and indefinitely on Scale. Retention is the setting most worth deciding deliberately: keeping less reduces your exposure, keeping more gives you year-on-year comparisons. If you need a short retention window for policy reasons but long-term aggregates for reporting, use the daily S3 export and keep the aggregates on your side.
Consent
A redirect gives you no opportunity to ask for consent. That matters for the per-link and per-domain tracking pixels and the ad-platform conversion APIs, which are what regulators care about — not the click counting. In the EU and UK, take advice before enabling retargeting on links seen by European visitors.
Deleting data
Delete statistics removes a domain's click history while leaving the links intact. Deleting a link deletes its clicks with it. Both are irreversible.
An individual can export everything held about their account from profile settings, and delete their account from the same place.
The audit log
Administrative actions are recorded with user, entity and IP. This is a security control rather than visitor data, and it is the evidence trail when you need to explain who changed what.
Domains and abuse
Destinations are checked against a global abuse blocklist at creation, and a domain can restrict destinations to an allowed list of hostnames — useful when several people can create links and you do not want your brand pointing at arbitrary sites.
Pages
Build a bakery page
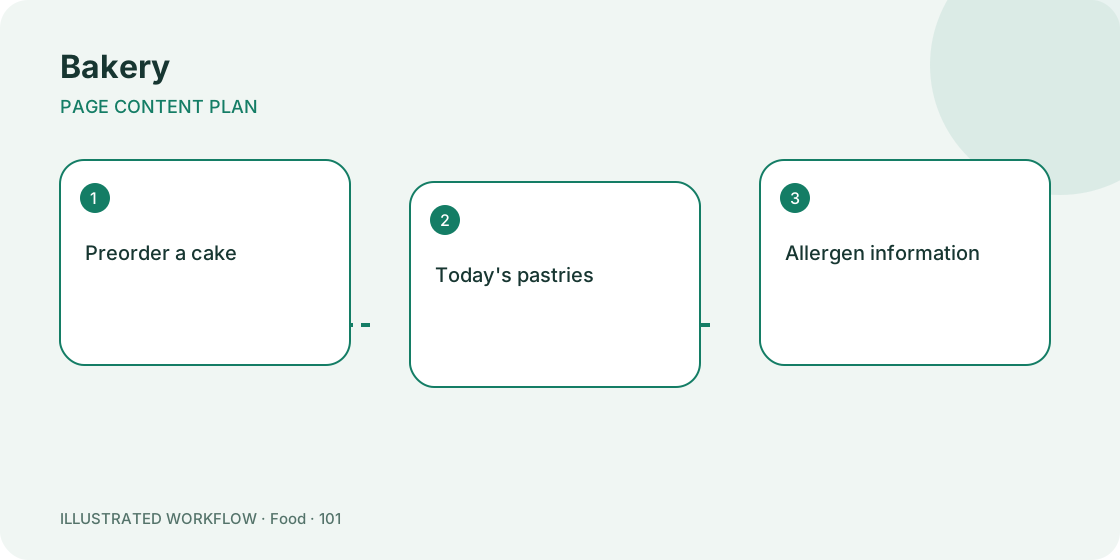
A weekend cake order needs a collection date before payment. This guide creates a page that makes the next action clear.
Before you start
Sign in to ShortFreeURL and open Pages in the dashboard. A standalone page does not require a short domain or a paid link-shortening plan. Prepare the real destinations for Preorder a cake, Today's pastries, Allergen information, Pickup hours. Example template links are placeholders and must be replaced.
Set up the content
- Choose the bakery template or Create page. Enter a title visitors will recognise.
- Put “Preorder a cake” first. Give the destination a label that describes the action rather than “Click here”.
- Add “Today's pastries”, “Allergen information” and “Pickup hours”. Use the up/down controls to change their order.
- Use a text block for essential context, a heading to separate topics, and a contact block for a valid email or telephone link.
- Choose a layout and colours with readable contrast. Save draft, check the preview, and publish when the real destinations are ready.
Expected result
The published page has a stable /p/ address and clearly named actions. Open page takes you to the visitor-facing version. Share this address through qr labels on takeaway boxes; customers do not need a ShortFreeURL account to view a published page.
If something is wrong
A draft is intentionally unavailable to the public. Publish the page to make it accessible. Invalid destination schemes are rejected; use a complete http/https address, mailto email link or tel telephone link. Save errors should be resolved before closing the editor.
Avoid sending yesterday's menu when stock changes. If you want to try another layout, duplicate the page and keep the copy as a draft until it is ready.
Related steps
Review a bakery page
Avoid sending yesterday's menu when stock changes. Use this review before sharing a new page and whenever its destinations change.
Before you start
Have the public page address, a phone, and the intended destination for each button ready. If the page is still a draft, publish only after checking the information. Keep any private customer, guest or client information out of the public content.
Check the journey
- Open the public page from qr labels on takeaway boxes. Check that it loads without your dashboard session.
- Select “Preorder a cake” and confirm that the receiving page performs that action. Check any opening hours, dates or availability it displays.
- Test “Today's pastries” on a narrow phone screen. Check that text, forms and consent controls remain usable.
- Check “Allergen information” and “Pickup hours”. Remove destinations that are no longer maintained rather than leaving unexplained errors.
- Return to Pages and record the review date outside the public page. Make corrections in the editor, publish the updated version and repeat the affected checks.
Expected result
Every button reaches the destination its label promises. Count preorder-button taps separately from completed orders. Dashboard views and button clicks are activity counts, not unique people or guaranteed completed actions.
If something is wrong
An unavailable external destination must be corrected at its source or replaced in the page editor. A working preview does not prove that an external booking or checkout completes. Test that flow separately using its normal test process.
Avoid sending yesterday's menu when stock changes. After an edit, confirm that the page is still published; Save draft deliberately removes it from public access.
Related steps
Build a coffee shop page
A commuter wants to collect a drink without joining the queue. This guide creates a page that makes the next action clear.
Before you start
Sign in to ShortFreeURL and open Pages in the dashboard. A standalone page does not require a short domain or a paid link-shortening plan. Prepare the real destinations for Seasonal drinks, Order ahead, Find the cafe, Loyalty programme. Example template links are placeholders and must be replaced.
Set up the content
- Choose the coffee shop template or Create page. Enter a title visitors will recognise.
- Put “Seasonal drinks” first. Give the destination a label that describes the action rather than “Click here”.
- Add “Order ahead”, “Find the cafe” and “Loyalty programme”. Use the up/down controls to change their order.
- Use a text block for essential context, a heading to separate topics, and a contact block for a valid email or telephone link.
- Choose a layout and colours with readable contrast. Save draft, check the preview, and publish when the real destinations are ready.
Expected result
The published page has a stable /p/ address and clearly named actions. Open page takes you to the visitor-facing version. Share this address through counter cards beside the till; customers do not need a ShortFreeURL account to view a published page.
If something is wrong
A draft is intentionally unavailable to the public. Publish the page to make it accessible. Invalid destination schemes are rejected; use a complete http/https address, mailto email link or tel telephone link. Save errors should be resolved before closing the editor.
A loyalty link must explain whether an account is required. If you want to try another layout, duplicate the page and keep the copy as a draft until it is ready.
Related steps
Review a coffee shop page
A loyalty link must explain whether an account is required. Use this review before sharing a new page and whenever its destinations change.
Before you start
Have the public page address, a phone, and the intended destination for each button ready. If the page is still a draft, publish only after checking the information. Keep any private customer, guest or client information out of the public content.
Check the journey
- Open the public page from counter cards beside the till. Check that it loads without your dashboard session.
- Select “Seasonal drinks” and confirm that the receiving page performs that action. Check any opening hours, dates or availability it displays.
- Test “Order ahead” on a narrow phone screen. Check that text, forms and consent controls remain usable.
- Check “Find the cafe” and “Loyalty programme”. Remove destinations that are no longer maintained rather than leaving unexplained errors.
- Return to Pages and record the review date outside the public page. Make corrections in the editor, publish the updated version and repeat the affected checks.
Expected result
Every button reaches the destination its label promises. Compare order-ahead taps by morning and afternoon. Dashboard views and button clicks are activity counts, not unique people or guaranteed completed actions.
If something is wrong
An unavailable external destination must be corrected at its source or replaced in the page editor. A working preview does not prove that an external booking or checkout completes. Test that flow separately using its normal test process.
A loyalty link must explain whether an account is required. After an edit, confirm that the page is still published; Save draft deliberately removes it from public access.
Related steps
Build a restaurant page
A diner needs opening hours and booking availability on the same page. This guide creates a page that makes the next action clear.
Before you start
Sign in to ShortFreeURL and open Pages in the dashboard. A standalone page does not require a short domain or a paid link-shortening plan. Prepare the real destinations for Book a table, Dinner menu, Dietary requests, Private dining. Example template links are placeholders and must be replaced.
Set up the content
- Choose the restaurant template or Create page. Enter a title visitors will recognise.
- Put “Book a table” first. Give the destination a label that describes the action rather than “Click here”.
- Add “Dinner menu”, “Dietary requests” and “Private dining”. Use the up/down controls to change their order.
- Use a text block for essential context, a heading to separate topics, and a contact block for a valid email or telephone link.
- Choose a layout and colours with readable contrast. Save draft, check the preview, and publish when the real destinations are ready.
Expected result
The published page has a stable /p/ address and clearly named actions. Open page takes you to the visitor-facing version. Share this address through table tents and reservation emails; customers do not need a ShortFreeURL account to view a published page.
If something is wrong
A draft is intentionally unavailable to the public. Publish the page to make it accessible. Invalid destination schemes are rejected; use a complete http/https address, mailto email link or tel telephone link. Save errors should be resolved before closing the editor.
Do not put a PDF download ahead of a reservation button. If you want to try another layout, duplicate the page and keep the copy as a draft until it is ready.
Related steps
Review a restaurant page
Do not put a PDF download ahead of a reservation button. Use this review before sharing a new page and whenever its destinations change.
Before you start
Have the public page address, a phone, and the intended destination for each button ready. If the page is still a draft, publish only after checking the information. Keep any private customer, guest or client information out of the public content.
Check the journey
- Open the public page from table tents and reservation emails. Check that it loads without your dashboard session.
- Select “Book a table” and confirm that the receiving page performs that action. Check any opening hours, dates or availability it displays.
- Test “Dinner menu” on a narrow phone screen. Check that text, forms and consent controls remain usable.
- Check “Dietary requests” and “Private dining”. Remove destinations that are no longer maintained rather than leaving unexplained errors.
- Return to Pages and record the review date outside the public page. Make corrections in the editor, publish the updated version and repeat the affected checks.
Expected result
Every button reaches the destination its label promises. Separate menu browsing from reservation completion. Dashboard views and button clicks are activity counts, not unique people or guaranteed completed actions.
If something is wrong
An unavailable external destination must be corrected at its source or replaced in the page editor. A working preview does not prove that an external booking or checkout completes. Test that flow separately using its normal test process.
Do not put a PDF download ahead of a reservation button. After an edit, confirm that the page is still published; Save draft deliberately removes it from public access.
Related steps
Build a food truck page
A lunch customer must know where the truck is today. This guide creates a page that makes the next action clear.
Before you start
Sign in to ShortFreeURL and open Pages in the dashboard. A standalone page does not require a short domain or a paid link-shortening plan. Prepare the real destinations for Today's location, Street menu, Order pickup, Event catering. Example template links are placeholders and must be replaced.
Set up the content
- Choose the food truck template or Create page. Enter a title visitors will recognise.
- Put “Today's location” first. Give the destination a label that describes the action rather than “Click here”.
- Add “Street menu”, “Order pickup” and “Event catering”. Use the up/down controls to change their order.
- Use a text block for essential context, a heading to separate topics, and a contact block for a valid email or telephone link.
- Choose a layout and colours with readable contrast. Save draft, check the preview, and publish when the real destinations are ready.
Expected result
The published page has a stable /p/ address and clearly named actions. Open page takes you to the visitor-facing version. Share this address through truck-side poster; customers do not need a ShortFreeURL account to view a published page.
If something is wrong
A draft is intentionally unavailable to the public. Publish the page to make it accessible. Invalid destination schemes are rejected; use a complete http/https address, mailto email link or tel telephone link. Save errors should be resolved before closing the editor.
An old location can be more damaging than a missing photo. If you want to try another layout, duplicate the page and keep the copy as a draft until it is ready.
Related steps
Review a food truck page
An old location can be more damaging than a missing photo. Use this review before sharing a new page and whenever its destinations change.
Before you start
Have the public page address, a phone, and the intended destination for each button ready. If the page is still a draft, publish only after checking the information. Keep any private customer, guest or client information out of the public content.
Check the journey
- Open the public page from truck-side poster. Check that it loads without your dashboard session.
- Select “Today's location” and confirm that the receiving page performs that action. Check any opening hours, dates or availability it displays.
- Test “Street menu” on a narrow phone screen. Check that text, forms and consent controls remain usable.
- Check “Order pickup” and “Event catering”. Remove destinations that are no longer maintained rather than leaving unexplained errors.
- Return to Pages and record the review date outside the public page. Make corrections in the editor, publish the updated version and repeat the affected checks.
Expected result
Every button reaches the destination its label promises. Track location-button taps on service days. Dashboard views and button clicks are activity counts, not unique people or guaranteed completed actions.
If something is wrong
An unavailable external destination must be corrected at its source or replaced in the page editor. A working preview does not prove that an external booking or checkout completes. Test that flow separately using its normal test process.
An old location can be more damaging than a missing photo. After an edit, confirm that the page is still published; Save draft deliberately removes it from public access.
Related steps
Build a farm shop page
A customer collecting a vegetable box needs the correct entrance. This guide creates a page that makes the next action clear.
Before you start
Sign in to ShortFreeURL and open Pages in the dashboard. A standalone page does not require a short domain or a paid link-shortening plan. Prepare the real destinations for This week's produce, Collection slots, Farm directions, Growing methods. Example template links are placeholders and must be replaced.
Set up the content
- Choose the farm shop template or Create page. Enter a title visitors will recognise.
- Put “This week's produce” first. Give the destination a label that describes the action rather than “Click here”.
- Add “Collection slots”, “Farm directions” and “Growing methods”. Use the up/down controls to change their order.
- Use a text block for essential context, a heading to separate topics, and a contact block for a valid email or telephone link.
- Choose a layout and colours with readable contrast. Save draft, check the preview, and publish when the real destinations are ready.
Expected result
The published page has a stable /p/ address and clearly named actions. Open page takes you to the visitor-facing version. Share this address through printed box inserts; customers do not need a ShortFreeURL account to view a published page.
If something is wrong
A draft is intentionally unavailable to the public. Publish the page to make it accessible. Invalid destination schemes are rejected; use a complete http/https address, mailto email link or tel telephone link. Save errors should be resolved before closing the editor.
Do not promise products that depend on an uncertain harvest. If you want to try another layout, duplicate the page and keep the copy as a draft until it is ready.
Related steps
Review a farm shop page
Do not promise products that depend on an uncertain harvest. Use this review before sharing a new page and whenever its destinations change.
Before you start
Have the public page address, a phone, and the intended destination for each button ready. If the page is still a draft, publish only after checking the information. Keep any private customer, guest or client information out of the public content.
Check the journey
- Open the public page from printed box inserts. Check that it loads without your dashboard session.
- Select “This week's produce” and confirm that the receiving page performs that action. Check any opening hours, dates or availability it displays.
- Test “Collection slots” on a narrow phone screen. Check that text, forms and consent controls remain usable.
- Check “Farm directions” and “Growing methods”. Remove destinations that are no longer maintained rather than leaving unexplained errors.
- Return to Pages and record the review date outside the public page. Make corrections in the editor, publish the updated version and repeat the affected checks.
Expected result
Every button reaches the destination its label promises. Measure collection-slot visits before changing the offer. Dashboard views and button clicks are activity counts, not unique people or guaranteed completed actions.
If something is wrong
An unavailable external destination must be corrected at its source or replaced in the page editor. A working preview does not prove that an external booking or checkout completes. Test that flow separately using its normal test process.
Do not promise products that depend on an uncertain harvest. After an edit, confirm that the page is still published; Save draft deliberately removes it from public access.
Related steps
Build a caterer page
An organiser needs headcount and event date before a meaningful quote. This guide creates a page that makes the next action clear.
Before you start
Sign in to ShortFreeURL and open Pages in the dashboard. A standalone page does not require a short domain or a paid link-shortening plan. Prepare the real destinations for Request a quote, Sample menus, Dietary options, Event gallery. Example template links are placeholders and must be replaced.
Set up the content
- Choose the caterer template or Create page. Enter a title visitors will recognise.
- Put “Request a quote” first. Give the destination a label that describes the action rather than “Click here”.
- Add “Sample menus”, “Dietary options” and “Event gallery”. Use the up/down controls to change their order.
- Use a text block for essential context, a heading to separate topics, and a contact block for a valid email or telephone link.
- Choose a layout and colours with readable contrast. Save draft, check the preview, and publish when the real destinations are ready.
Expected result
The published page has a stable /p/ address and clearly named actions. Open page takes you to the visitor-facing version. Share this address through proposal cover sheets; customers do not need a ShortFreeURL account to view a published page.
If something is wrong
A draft is intentionally unavailable to the public. Publish the page to make it accessible. Invalid destination schemes are rejected; use a complete http/https address, mailto email link or tel telephone link. Save errors should be resolved before closing the editor.
Avoid collecting sensitive dietary details in a URL. If you want to try another layout, duplicate the page and keep the copy as a draft until it is ready.
Related steps
Review a caterer page
Avoid collecting sensitive dietary details in a URL. Use this review before sharing a new page and whenever its destinations change.
Before you start
Have the public page address, a phone, and the intended destination for each button ready. If the page is still a draft, publish only after checking the information. Keep any private customer, guest or client information out of the public content.
Check the journey
- Open the public page from proposal cover sheets. Check that it loads without your dashboard session.
- Select “Request a quote” and confirm that the receiving page performs that action. Check any opening hours, dates or availability it displays.
- Test “Sample menus” on a narrow phone screen. Check that text, forms and consent controls remain usable.
- Check “Dietary options” and “Event gallery”. Remove destinations that are no longer maintained rather than leaving unexplained errors.
- Return to Pages and record the review date outside the public page. Make corrections in the editor, publish the updated version and repeat the affected checks.
Expected result
Every button reaches the destination its label promises. Measure quote-form completions in the booking system. Dashboard views and button clicks are activity counts, not unique people or guaranteed completed actions.
If something is wrong
An unavailable external destination must be corrected at its source or replaced in the page editor. A working preview does not prove that an external booking or checkout completes. Test that flow separately using its normal test process.
Avoid collecting sensitive dietary details in a URL. After an edit, confirm that the page is still published; Save draft deliberately removes it from public access.
Related steps
Build a fitness coach page
A first-time client needs to understand session format before booking. This guide creates a page that makes the next action clear.
Before you start
Sign in to ShortFreeURL and open Pages in the dashboard. A standalone page does not require a short domain or a paid link-shortening plan. Prepare the real destinations for Book an introduction, Class timetable, Training approach, Contact coach. Example template links are placeholders and must be replaced.
Set up the content
- Choose the fitness coach template or Create page. Enter a title visitors will recognise.
- Put “Book an introduction” first. Give the destination a label that describes the action rather than “Click here”.
- Add “Class timetable”, “Training approach” and “Contact coach”. Use the up/down controls to change their order.
- Use a text block for essential context, a heading to separate topics, and a contact block for a valid email or telephone link.
- Choose a layout and colours with readable contrast. Save draft, check the preview, and publish when the real destinations are ready.
Expected result
The published page has a stable /p/ address and clearly named actions. Open page takes you to the visitor-facing version. Share this address through gym noticeboard; customers do not need a ShortFreeURL account to view a published page.
If something is wrong
A draft is intentionally unavailable to the public. Publish the page to make it accessible. Invalid destination schemes are rejected; use a complete http/https address, mailto email link or tel telephone link. Save errors should be resolved before closing the editor.
Avoid health promises that the programme cannot substantiate. If you want to try another layout, duplicate the page and keep the copy as a draft until it is ready.
Related steps
Review a fitness coach page
Avoid health promises that the programme cannot substantiate. Use this review before sharing a new page and whenever its destinations change.
Before you start
Have the public page address, a phone, and the intended destination for each button ready. If the page is still a draft, publish only after checking the information. Keep any private customer, guest or client information out of the public content.
Check the journey
- Open the public page from gym noticeboard. Check that it loads without your dashboard session.
- Select “Book an introduction” and confirm that the receiving page performs that action. Check any opening hours, dates or availability it displays.
- Test “Class timetable” on a narrow phone screen. Check that text, forms and consent controls remain usable.
- Check “Training approach” and “Contact coach”. Remove destinations that are no longer maintained rather than leaving unexplained errors.
- Return to Pages and record the review date outside the public page. Make corrections in the editor, publish the updated version and repeat the affected checks.
Expected result
Every button reaches the destination its label promises. Distinguish timetable taps from consultation requests. Dashboard views and button clicks are activity counts, not unique people or guaranteed completed actions.
If something is wrong
An unavailable external destination must be corrected at its source or replaced in the page editor. A working preview does not prove that an external booking or checkout completes. Test that flow separately using its normal test process.
Avoid health promises that the programme cannot substantiate. After an edit, confirm that the page is still published; Save draft deliberately removes it from public access.
Related steps
Build a yoga studio page
A beginner worries about equipment and arrival time. This guide creates a page that makes the next action clear.
Before you start
Sign in to ShortFreeURL and open Pages in the dashboard. A standalone page does not require a short domain or a paid link-shortening plan. Prepare the real destinations for Beginner classes, Reserve a mat, Studio directions, Class etiquette. Example template links are placeholders and must be replaced.
Set up the content
- Choose the yoga studio template or Create page. Enter a title visitors will recognise.
- Put “Beginner classes” first. Give the destination a label that describes the action rather than “Click here”.
- Add “Reserve a mat”, “Studio directions” and “Class etiquette”. Use the up/down controls to change their order.
- Use a text block for essential context, a heading to separate topics, and a contact block for a valid email or telephone link.
- Choose a layout and colours with readable contrast. Save draft, check the preview, and publish when the real destinations are ready.
Expected result
The published page has a stable /p/ address and clearly named actions. Open page takes you to the visitor-facing version. Share this address through reception cards; customers do not need a ShortFreeURL account to view a published page.
If something is wrong
A draft is intentionally unavailable to the public. Publish the page to make it accessible. Invalid destination schemes are rejected; use a complete http/https address, mailto email link or tel telephone link. Save errors should be resolved before closing the editor.
Do not let an expired timetable remain the first destination. If you want to try another layout, duplicate the page and keep the copy as a draft until it is ready.
Related steps
Review a yoga studio page
Do not let an expired timetable remain the first destination. Use this review before sharing a new page and whenever its destinations change.
Before you start
Have the public page address, a phone, and the intended destination for each button ready. If the page is still a draft, publish only after checking the information. Keep any private customer, guest or client information out of the public content.
Check the journey
- Open the public page from reception cards. Check that it loads without your dashboard session.
- Select “Beginner classes” and confirm that the receiving page performs that action. Check any opening hours, dates or availability it displays.
- Test “Reserve a mat” on a narrow phone screen. Check that text, forms and consent controls remain usable.
- Check “Studio directions” and “Class etiquette”. Remove destinations that are no longer maintained rather than leaving unexplained errors.
- Return to Pages and record the review date outside the public page. Make corrections in the editor, publish the updated version and repeat the affected checks.
Expected result
Every button reaches the destination its label promises. Review beginner-class interest separately from memberships. Dashboard views and button clicks are activity counts, not unique people or guaranteed completed actions.
If something is wrong
An unavailable external destination must be corrected at its source or replaced in the page editor. A working preview does not prove that an external booking or checkout completes. Test that flow separately using its normal test process.
Do not let an expired timetable remain the first destination. After an edit, confirm that the page is still published; Save draft deliberately removes it from public access.
Related steps
Build a physiotherapy practice page
A patient needs practical arrival instructions before a first visit. This guide creates a page that makes the next action clear.
Before you start
Sign in to ShortFreeURL and open Pages in the dashboard. A standalone page does not require a short domain or a paid link-shortening plan. Prepare the real destinations for Appointment request, Clinic location, What to bring, Contact reception. Example template links are placeholders and must be replaced.
Set up the content
- Choose the physiotherapy practice template or Create page. Enter a title visitors will recognise.
- Put “Appointment request” first. Give the destination a label that describes the action rather than “Click here”.
- Add “Clinic location”, “What to bring” and “Contact reception”. Use the up/down controls to change their order.
- Use a text block for essential context, a heading to separate topics, and a contact block for a valid email or telephone link.
- Choose a layout and colours with readable contrast. Save draft, check the preview, and publish when the real destinations are ready.
Expected result
The published page has a stable /p/ address and clearly named actions. Open page takes you to the visitor-facing version. Share this address through appointment reminders; customers do not need a ShortFreeURL account to view a published page.
If something is wrong
A draft is intentionally unavailable to the public. Publish the page to make it accessible. Invalid destination schemes are rejected; use a complete http/https address, mailto email link or tel telephone link. Save errors should be resolved before closing the editor.
Keep symptoms and patient identifiers out of campaign tags. If you want to try another layout, duplicate the page and keep the copy as a draft until it is ready.
Related steps
Review a physiotherapy practice page
Keep symptoms and patient identifiers out of campaign tags. Use this review before sharing a new page and whenever its destinations change.
Before you start
Have the public page address, a phone, and the intended destination for each button ready. If the page is still a draft, publish only after checking the information. Keep any private customer, guest or client information out of the public content.
Check the journey
- Open the public page from appointment reminders. Check that it loads without your dashboard session.
- Select “Appointment request” and confirm that the receiving page performs that action. Check any opening hours, dates or availability it displays.
- Test “Clinic location” on a narrow phone screen. Check that text, forms and consent controls remain usable.
- Check “What to bring” and “Contact reception”. Remove destinations that are no longer maintained rather than leaving unexplained errors.
- Return to Pages and record the review date outside the public page. Make corrections in the editor, publish the updated version and repeat the affected checks.
Expected result
Every button reaches the destination its label promises. Count appointment requests without exposing patient data. Dashboard views and button clicks are activity counts, not unique people or guaranteed completed actions.
If something is wrong
An unavailable external destination must be corrected at its source or replaced in the page editor. A working preview does not prove that an external booking or checkout completes. Test that flow separately using its normal test process.
Keep symptoms and patient identifiers out of campaign tags. After an edit, confirm that the page is still published; Save draft deliberately removes it from public access.
Related steps
Build a dental clinic page
A new patient needs an accurate phone number and accessible entrance. This guide creates a page that makes the next action clear.
Before you start
Sign in to ShortFreeURL and open Pages in the dashboard. A standalone page does not require a short domain or a paid link-shortening plan. Prepare the real destinations for Book a visit, New patient guide, Clinic hours, Contact reception. Example template links are placeholders and must be replaced.
Set up the content
- Choose the dental clinic template or Create page. Enter a title visitors will recognise.
- Put “Book a visit” first. Give the destination a label that describes the action rather than “Click here”.
- Add “New patient guide”, “Clinic hours” and “Contact reception”. Use the up/down controls to change their order.
- Use a text block for essential context, a heading to separate topics, and a contact block for a valid email or telephone link.
- Choose a layout and colours with readable contrast. Save draft, check the preview, and publish when the real destinations are ready.
Expected result
The published page has a stable /p/ address and clearly named actions. Open page takes you to the visitor-facing version. Share this address through reception leaflet; customers do not need a ShortFreeURL account to view a published page.
If something is wrong
A draft is intentionally unavailable to the public. Publish the page to make it accessible. Invalid destination schemes are rejected; use a complete http/https address, mailto email link or tel telephone link. Save errors should be resolved before closing the editor.
Do not imply that a link click means a patient received care. If you want to try another layout, duplicate the page and keep the copy as a draft until it is ready.
Related steps
Review a dental clinic page
Do not imply that a link click means a patient received care. Use this review before sharing a new page and whenever its destinations change.
Before you start
Have the public page address, a phone, and the intended destination for each button ready. If the page is still a draft, publish only after checking the information. Keep any private customer, guest or client information out of the public content.
Check the journey
- Open the public page from reception leaflet. Check that it loads without your dashboard session.
- Select “Book a visit” and confirm that the receiving page performs that action. Check any opening hours, dates or availability it displays.
- Test “New patient guide” on a narrow phone screen. Check that text, forms and consent controls remain usable.
- Check “Clinic hours” and “Contact reception”. Remove destinations that are no longer maintained rather than leaving unexplained errors.
- Return to Pages and record the review date outside the public page. Make corrections in the editor, publish the updated version and repeat the affected checks.
Expected result
Every button reaches the destination its label promises. Report contact actions as enquiries rather than treatments. Dashboard views and button clicks are activity counts, not unique people or guaranteed completed actions.
If something is wrong
An unavailable external destination must be corrected at its source or replaced in the page editor. A working preview does not prove that an external booking or checkout completes. Test that flow separately using its normal test process.
Do not imply that a link click means a patient received care. After an edit, confirm that the page is still published; Save draft deliberately removes it from public access.
Related steps
Build a salon page
A client needs service duration before choosing an appointment. This guide creates a page that makes the next action clear.
Before you start
Sign in to ShortFreeURL and open Pages in the dashboard. A standalone page does not require a short domain or a paid link-shortening plan. Prepare the real destinations for Book a service, Price list, Stylist portfolio, Cancellation policy. Example template links are placeholders and must be replaced.
Set up the content
- Choose the salon template or Create page. Enter a title visitors will recognise.
- Put “Book a service” first. Give the destination a label that describes the action rather than “Click here”.
- Add “Price list”, “Stylist portfolio” and “Cancellation policy”. Use the up/down controls to change their order.
- Use a text block for essential context, a heading to separate topics, and a contact block for a valid email or telephone link.
- Choose a layout and colours with readable contrast. Save draft, check the preview, and publish when the real destinations are ready.
Expected result
The published page has a stable /p/ address and clearly named actions. Open page takes you to the visitor-facing version. Share this address through mirror stickers; customers do not need a ShortFreeURL account to view a published page.
If something is wrong
A draft is intentionally unavailable to the public. Publish the page to make it accessible. Invalid destination schemes are rejected; use a complete http/https address, mailto email link or tel telephone link. Save errors should be resolved before closing the editor.
An outdated price list causes disputes at checkout. If you want to try another layout, duplicate the page and keep the copy as a draft until it is ready.
Related steps
Review a salon page
An outdated price list causes disputes at checkout. Use this review before sharing a new page and whenever its destinations change.
Before you start
Have the public page address, a phone, and the intended destination for each button ready. If the page is still a draft, publish only after checking the information. Keep any private customer, guest or client information out of the public content.
Check the journey
- Open the public page from mirror stickers. Check that it loads without your dashboard session.
- Select “Book a service” and confirm that the receiving page performs that action. Check any opening hours, dates or availability it displays.
- Test “Price list” on a narrow phone screen. Check that text, forms and consent controls remain usable.
- Check “Stylist portfolio” and “Cancellation policy”. Remove destinations that are no longer maintained rather than leaving unexplained errors.
- Return to Pages and record the review date outside the public page. Make corrections in the editor, publish the updated version and repeat the affected checks.
Expected result
Every button reaches the destination its label promises. Review bookings by service rather than total page taps. Dashboard views and button clicks are activity counts, not unique people or guaranteed completed actions.
If something is wrong
An unavailable external destination must be corrected at its source or replaced in the page editor. A working preview does not prove that an external booking or checkout completes. Test that flow separately using its normal test process.
An outdated price list causes disputes at checkout. After an edit, confirm that the page is still published; Save draft deliberately removes it from public access.
Related steps
Build a barber page
A visitor deciding between a booking and a walk-in needs both routes. This guide creates a page that makes the next action clear.
Before you start
Sign in to ShortFreeURL and open Pages in the dashboard. A standalone page does not require a short domain or a paid link-shortening plan. Prepare the real destinations for Reserve a chair, Walk-in hours, Haircut gallery, Find the shop. Example template links are placeholders and must be replaced.
Set up the content
- Choose the barber template or Create page. Enter a title visitors will recognise.
- Put “Reserve a chair” first. Give the destination a label that describes the action rather than “Click here”.
- Add “Walk-in hours”, “Haircut gallery” and “Find the shop”. Use the up/down controls to change their order.
- Use a text block for essential context, a heading to separate topics, and a contact block for a valid email or telephone link.
- Choose a layout and colours with readable contrast. Save draft, check the preview, and publish when the real destinations are ready.
Expected result
The published page has a stable /p/ address and clearly named actions. Open page takes you to the visitor-facing version. Share this address through window decal; customers do not need a ShortFreeURL account to view a published page.
If something is wrong
A draft is intentionally unavailable to the public. Publish the page to make it accessible. Invalid destination schemes are rejected; use a complete http/https address, mailto email link or tel telephone link. Save errors should be resolved before closing the editor.
Do not advertise walk-in availability on closed days. If you want to try another layout, duplicate the page and keep the copy as a draft until it is ready.
Related steps
Review a barber page
Do not advertise walk-in availability on closed days. Use this review before sharing a new page and whenever its destinations change.
Before you start
Have the public page address, a phone, and the intended destination for each button ready. If the page is still a draft, publish only after checking the information. Keep any private customer, guest or client information out of the public content.
Check the journey
- Open the public page from window decal. Check that it loads without your dashboard session.
- Select “Reserve a chair” and confirm that the receiving page performs that action. Check any opening hours, dates or availability it displays.
- Test “Walk-in hours” on a narrow phone screen. Check that text, forms and consent controls remain usable.
- Check “Haircut gallery” and “Find the shop”. Remove destinations that are no longer maintained rather than leaving unexplained errors.
- Return to Pages and record the review date outside the public page. Make corrections in the editor, publish the updated version and repeat the affected checks.
Expected result
Every button reaches the destination its label promises. Compare booking-button use with walk-in-hours views. Dashboard views and button clicks are activity counts, not unique people or guaranteed completed actions.
If something is wrong
An unavailable external destination must be corrected at its source or replaced in the page editor. A working preview does not prove that an external booking or checkout completes. Test that flow separately using its normal test process.
Do not advertise walk-in availability on closed days. After an edit, confirm that the page is still published; Save draft deliberately removes it from public access.
Related steps
Build a pet groomer page
An owner needs to know which service fits the pet's size. This guide creates a page that makes the next action clear.
Before you start
Sign in to ShortFreeURL and open Pages in the dashboard. A standalone page does not require a short domain or a paid link-shortening plan. Prepare the real destinations for Request grooming, Service sizes, Preparation guide, Pickup instructions. Example template links are placeholders and must be replaced.
Set up the content
- Choose the pet groomer template or Create page. Enter a title visitors will recognise.
- Put “Request grooming” first. Give the destination a label that describes the action rather than “Click here”.
- Add “Service sizes”, “Preparation guide” and “Pickup instructions”. Use the up/down controls to change their order.
- Use a text block for essential context, a heading to separate topics, and a contact block for a valid email or telephone link.
- Choose a layout and colours with readable contrast. Save draft, check the preview, and publish when the real destinations are ready.
Expected result
The published page has a stable /p/ address and clearly named actions. Open page takes you to the visitor-facing version. Share this address through pet collection cards; customers do not need a ShortFreeURL account to view a published page.
If something is wrong
A draft is intentionally unavailable to the public. Publish the page to make it accessible. Invalid destination schemes are rejected; use a complete http/https address, mailto email link or tel telephone link. Save errors should be resolved before closing the editor.
Avoid putting animal medical details into public links. If you want to try another layout, duplicate the page and keep the copy as a draft until it is ready.
Related steps
Review a pet groomer page
Avoid putting animal medical details into public links. Use this review before sharing a new page and whenever its destinations change.
Before you start
Have the public page address, a phone, and the intended destination for each button ready. If the page is still a draft, publish only after checking the information. Keep any private customer, guest or client information out of the public content.
Check the journey
- Open the public page from pet collection cards. Check that it loads without your dashboard session.
- Select “Request grooming” and confirm that the receiving page performs that action. Check any opening hours, dates or availability it displays.
- Test “Service sizes” on a narrow phone screen. Check that text, forms and consent controls remain usable.
- Check “Preparation guide” and “Pickup instructions”. Remove destinations that are no longer maintained rather than leaving unexplained errors.
- Return to Pages and record the review date outside the public page. Make corrections in the editor, publish the updated version and repeat the affected checks.
Expected result
Every button reaches the destination its label promises. Measure request submissions in the appointment tool. Dashboard views and button clicks are activity counts, not unique people or guaranteed completed actions.
If something is wrong
An unavailable external destination must be corrected at its source or replaced in the page editor. A working preview does not prove that an external booking or checkout completes. Test that flow separately using its normal test process.
Avoid putting animal medical details into public links. After an edit, confirm that the page is still published; Save draft deliberately removes it from public access.
Related steps
Build a veterinary practice page
An owner must quickly distinguish routine care from emergency help. This guide creates a page that makes the next action clear.
Before you start
Sign in to ShortFreeURL and open Pages in the dashboard. A standalone page does not require a short domain or a paid link-shortening plan. Prepare the real destinations for Routine appointments, Emergency contacts, Opening hours, Travel directions. Example template links are placeholders and must be replaced.
Set up the content
- Choose the veterinary practice template or Create page. Enter a title visitors will recognise.
- Put “Routine appointments” first. Give the destination a label that describes the action rather than “Click here”.
- Add “Emergency contacts”, “Opening hours” and “Travel directions”. Use the up/down controls to change their order.
- Use a text block for essential context, a heading to separate topics, and a contact block for a valid email or telephone link.
- Choose a layout and colours with readable contrast. Save draft, check the preview, and publish when the real destinations are ready.
Expected result
The published page has a stable /p/ address and clearly named actions. Open page takes you to the visitor-facing version. Share this address through clinic entrance sign; customers do not need a ShortFreeURL account to view a published page.
If something is wrong
A draft is intentionally unavailable to the public. Publish the page to make it accessible. Invalid destination schemes are rejected; use a complete http/https address, mailto email link or tel telephone link. Save errors should be resolved before closing the editor.
Never hide the emergency number behind several menus. If you want to try another layout, duplicate the page and keep the copy as a draft until it is ready.
Related steps
Review a veterinary practice page
Never hide the emergency number behind several menus. Use this review before sharing a new page and whenever its destinations change.
Before you start
Have the public page address, a phone, and the intended destination for each button ready. If the page is still a draft, publish only after checking the information. Keep any private customer, guest or client information out of the public content.
Check the journey
- Open the public page from clinic entrance sign. Check that it loads without your dashboard session.
- Select “Routine appointments” and confirm that the receiving page performs that action. Check any opening hours, dates or availability it displays.
- Test “Emergency contacts” on a narrow phone screen. Check that text, forms and consent controls remain usable.
- Check “Opening hours” and “Travel directions”. Remove destinations that are no longer maintained rather than leaving unexplained errors.
- Return to Pages and record the review date outside the public page. Make corrections in the editor, publish the updated version and repeat the affected checks.
Expected result
Every button reaches the destination its label promises. Audit emergency-contact visibility rather than optimising only clicks. Dashboard views and button clicks are activity counts, not unique people or guaranteed completed actions.
If something is wrong
An unavailable external destination must be corrected at its source or replaced in the page editor. A working preview does not prove that an external booking or checkout completes. Test that flow separately using its normal test process.
Never hide the emergency number behind several menus. After an edit, confirm that the page is still published; Save draft deliberately removes it from public access.
Related steps
Build a dog walker page
An owner needs to know whether their neighbourhood is covered. This guide creates a page that makes the next action clear.
Before you start
Sign in to ShortFreeURL and open Pages in the dashboard. A standalone page does not require a short domain or a paid link-shortening plan. Prepare the real destinations for Meet the walker, Service area, Arrange a trial, Safety policy. Example template links are placeholders and must be replaced.
Set up the content
- Choose the dog walker template or Create page. Enter a title visitors will recognise.
- Put “Meet the walker” first. Give the destination a label that describes the action rather than “Click here”.
- Add “Service area”, “Arrange a trial” and “Safety policy”. Use the up/down controls to change their order.
- Use a text block for essential context, a heading to separate topics, and a contact block for a valid email or telephone link.
- Choose a layout and colours with readable contrast. Save draft, check the preview, and publish when the real destinations are ready.
Expected result
The published page has a stable /p/ address and clearly named actions. Open page takes you to the visitor-facing version. Share this address through community noticeboard; customers do not need a ShortFreeURL account to view a published page.
If something is wrong
A draft is intentionally unavailable to the public. Publish the page to make it accessible. Invalid destination schemes are rejected; use a complete http/https address, mailto email link or tel telephone link. Save errors should be resolved before closing the editor.
Avoid publishing clients' home addresses in sample routes. If you want to try another layout, duplicate the page and keep the copy as a draft until it is ready.
Related steps
Review a dog walker page
Avoid publishing clients' home addresses in sample routes. Use this review before sharing a new page and whenever its destinations change.
Before you start
Have the public page address, a phone, and the intended destination for each button ready. If the page is still a draft, publish only after checking the information. Keep any private customer, guest or client information out of the public content.
Check the journey
- Open the public page from community noticeboard. Check that it loads without your dashboard session.
- Select “Meet the walker” and confirm that the receiving page performs that action. Check any opening hours, dates or availability it displays.
- Test “Service area” on a narrow phone screen. Check that text, forms and consent controls remain usable.
- Check “Arrange a trial” and “Safety policy”. Remove destinations that are no longer maintained rather than leaving unexplained errors.
- Return to Pages and record the review date outside the public page. Make corrections in the editor, publish the updated version and repeat the affected checks.
Expected result
Every button reaches the destination its label promises. Measure qualified trial enquiries from the service area. Dashboard views and button clicks are activity counts, not unique people or guaranteed completed actions.
If something is wrong
An unavailable external destination must be corrected at its source or replaced in the page editor. A working preview does not prove that an external booking or checkout completes. Test that flow separately using its normal test process.
Avoid publishing clients' home addresses in sample routes. After an edit, confirm that the page is still published; Save draft deliberately removes it from public access.
Related steps
Build a photographer page
A couple comparing photographers needs a relevant portfolio first. This guide creates a page that makes the next action clear.
Before you start
Sign in to ShortFreeURL and open Pages in the dashboard. A standalone page does not require a short domain or a paid link-shortening plan. Prepare the real destinations for View portfolio, Check availability, Packages, Client delivery portal. Example template links are placeholders and must be replaced.
Set up the content
- Choose the photographer template or Create page. Enter a title visitors will recognise.
- Put “View portfolio” first. Give the destination a label that describes the action rather than “Click here”.
- Add “Check availability”, “Packages” and “Client delivery portal”. Use the up/down controls to change their order.
- Use a text block for essential context, a heading to separate topics, and a contact block for a valid email or telephone link.
- Choose a layout and colours with readable contrast. Save draft, check the preview, and publish when the real destinations are ready.
Expected result
The published page has a stable /p/ address and clearly named actions. Open page takes you to the visitor-facing version. Share this address through business cards; customers do not need a ShortFreeURL account to view a published page.
If something is wrong
A draft is intentionally unavailable to the public. Publish the page to make it accessible. Invalid destination schemes are rejected; use a complete http/https address, mailto email link or tel telephone link. Save errors should be resolved before closing the editor.
Client galleries should not be accidentally exposed as public samples. If you want to try another layout, duplicate the page and keep the copy as a draft until it is ready.
Related steps
Review a photographer page
Client galleries should not be accidentally exposed as public samples. Use this review before sharing a new page and whenever its destinations change.
Before you start
Have the public page address, a phone, and the intended destination for each button ready. If the page is still a draft, publish only after checking the information. Keep any private customer, guest or client information out of the public content.
Check the journey
- Open the public page from business cards. Check that it loads without your dashboard session.
- Select “View portfolio” and confirm that the receiving page performs that action. Check any opening hours, dates or availability it displays.
- Test “Check availability” on a narrow phone screen. Check that text, forms and consent controls remain usable.
- Check “Packages” and “Client delivery portal”. Remove destinations that are no longer maintained rather than leaving unexplained errors.
- Return to Pages and record the review date outside the public page. Make corrections in the editor, publish the updated version and repeat the affected checks.
Expected result
Every button reaches the destination its label promises. Compare package visits with qualified date enquiries. Dashboard views and button clicks are activity counts, not unique people or guaranteed completed actions.
If something is wrong
An unavailable external destination must be corrected at its source or replaced in the page editor. A working preview does not prove that an external booking or checkout completes. Test that flow separately using its normal test process.
Client galleries should not be accidentally exposed as public samples. After an edit, confirm that the page is still published; Save draft deliberately removes it from public access.
Related steps
Build a wedding planner page
A couple needs budget and date guidance before a call. This guide creates a page that makes the next action clear.
Before you start
Sign in to ShortFreeURL and open Pages in the dashboard. A standalone page does not require a short domain or a paid link-shortening plan. Prepare the real destinations for Start planning, Recent celebrations, Planning packages, Supplier approach. Example template links are placeholders and must be replaced.
Set up the content
- Choose the wedding planner template or Create page. Enter a title visitors will recognise.
- Put “Start planning” first. Give the destination a label that describes the action rather than “Click here”.
- Add “Recent celebrations”, “Planning packages” and “Supplier approach”. Use the up/down controls to change their order.
- Use a text block for essential context, a heading to separate topics, and a contact block for a valid email or telephone link.
- Choose a layout and colours with readable contrast. Save draft, check the preview, and publish when the real destinations are ready.
Expected result
The published page has a stable /p/ address and clearly named actions. Open page takes you to the visitor-facing version. Share this address through venue open-day cards; customers do not need a ShortFreeURL account to view a published page.
If something is wrong
A draft is intentionally unavailable to the public. Publish the page to make it accessible. Invalid destination schemes are rejected; use a complete http/https address, mailto email link or tel telephone link. Save errors should be resolved before closing the editor.
Do not describe styled shoots as paid client weddings. If you want to try another layout, duplicate the page and keep the copy as a draft until it is ready.
Related steps
Review a wedding planner page
Do not describe styled shoots as paid client weddings. Use this review before sharing a new page and whenever its destinations change.
Before you start
Have the public page address, a phone, and the intended destination for each button ready. If the page is still a draft, publish only after checking the information. Keep any private customer, guest or client information out of the public content.
Check the journey
- Open the public page from venue open-day cards. Check that it loads without your dashboard session.
- Select “Start planning” and confirm that the receiving page performs that action. Check any opening hours, dates or availability it displays.
- Test “Recent celebrations” on a narrow phone screen. Check that text, forms and consent controls remain usable.
- Check “Planning packages” and “Supplier approach”. Remove destinations that are no longer maintained rather than leaving unexplained errors.
- Return to Pages and record the review date outside the public page. Make corrections in the editor, publish the updated version and repeat the affected checks.
Expected result
Every button reaches the destination its label promises. Measure consultation requests with a stated event date. Dashboard views and button clicks are activity counts, not unique people or guaranteed completed actions.
If something is wrong
An unavailable external destination must be corrected at its source or replaced in the page editor. A working preview does not prove that an external booking or checkout completes. Test that flow separately using its normal test process.
Do not describe styled shoots as paid client weddings. After an edit, confirm that the page is still published; Save draft deliberately removes it from public access.
Related steps
Build a illustrator page
A publisher needs usage rights before requesting an illustration. This guide creates a page that makes the next action clear.
Before you start
Sign in to ShortFreeURL and open Pages in the dashboard. A standalone page does not require a short domain or a paid link-shortening plan. Prepare the real destinations for Commission artwork, Selected work, Licensing details, Contact studio. Example template links are placeholders and must be replaced.
Set up the content
- Choose the illustrator template or Create page. Enter a title visitors will recognise.
- Put “Commission artwork” first. Give the destination a label that describes the action rather than “Click here”.
- Add “Selected work”, “Licensing details” and “Contact studio”. Use the up/down controls to change their order.
- Use a text block for essential context, a heading to separate topics, and a contact block for a valid email or telephone link.
- Choose a layout and colours with readable contrast. Save draft, check the preview, and publish when the real destinations are ready.
Expected result
The published page has a stable /p/ address and clearly named actions. Open page takes you to the visitor-facing version. Share this address through portfolio postcards; customers do not need a ShortFreeURL account to view a published page.
If something is wrong
A draft is intentionally unavailable to the public. Publish the page to make it accessible. Invalid destination schemes are rejected; use a complete http/https address, mailto email link or tel telephone link. Save errors should be resolved before closing the editor.
A commission link and a licensing request are different actions. If you want to try another layout, duplicate the page and keep the copy as a draft until it is ready.
Related steps
Review a illustrator page
A commission link and a licensing request are different actions. Use this review before sharing a new page and whenever its destinations change.
Before you start
Have the public page address, a phone, and the intended destination for each button ready. If the page is still a draft, publish only after checking the information. Keep any private customer, guest or client information out of the public content.
Check the journey
- Open the public page from portfolio postcards. Check that it loads without your dashboard session.
- Select “Commission artwork” and confirm that the receiving page performs that action. Check any opening hours, dates or availability it displays.
- Test “Selected work” on a narrow phone screen. Check that text, forms and consent controls remain usable.
- Check “Licensing details” and “Contact studio”. Remove destinations that are no longer maintained rather than leaving unexplained errors.
- Return to Pages and record the review date outside the public page. Make corrections in the editor, publish the updated version and repeat the affected checks.
Expected result
Every button reaches the destination its label promises. Separate licensing enquiries from personal commissions. Dashboard views and button clicks are activity counts, not unique people or guaranteed completed actions.
If something is wrong
An unavailable external destination must be corrected at its source or replaced in the page editor. A working preview does not prove that an external booking or checkout completes. Test that flow separately using its normal test process.
A commission link and a licensing request are different actions. After an edit, confirm that the page is still published; Save draft deliberately removes it from public access.
Related steps
Build a musician page
A listener at a show wants the correct track without choosing among many profiles. This guide creates a page that makes the next action clear.
Before you start
Sign in to ShortFreeURL and open Pages in the dashboard. A standalone page does not require a short domain or a paid link-shortening plan. Prepare the real destinations for Listen now, Upcoming shows, Buy merchandise, Booking contact. Example template links are placeholders and must be replaced.
Set up the content
- Choose the musician template or Create page. Enter a title visitors will recognise.
- Put “Listen now” first. Give the destination a label that describes the action rather than “Click here”.
- Add “Upcoming shows”, “Buy merchandise” and “Booking contact”. Use the up/down controls to change their order.
- Use a text block for essential context, a heading to separate topics, and a contact block for a valid email or telephone link.
- Choose a layout and colours with readable contrast. Save draft, check the preview, and publish when the real destinations are ready.
Expected result
The published page has a stable /p/ address and clearly named actions. Open page takes you to the visitor-facing version. Share this address through merchandise table; customers do not need a ShortFreeURL account to view a published page.
If something is wrong
A draft is intentionally unavailable to the public. Publish the page to make it accessible. Invalid destination schemes are rejected; use a complete http/https address, mailto email link or tel telephone link. Save errors should be resolved before closing the editor.
Do not send sold-out show traffic to an unexplained dead checkout. If you want to try another layout, duplicate the page and keep the copy as a draft until it is ready.
Related steps
Review a musician page
Do not send sold-out show traffic to an unexplained dead checkout. Use this review before sharing a new page and whenever its destinations change.
Before you start
Have the public page address, a phone, and the intended destination for each button ready. If the page is still a draft, publish only after checking the information. Keep any private customer, guest or client information out of the public content.
Check the journey
- Open the public page from merchandise table. Check that it loads without your dashboard session.
- Select “Listen now” and confirm that the receiving page performs that action. Check any opening hours, dates or availability it displays.
- Test “Upcoming shows” on a narrow phone screen. Check that text, forms and consent controls remain usable.
- Check “Buy merchandise” and “Booking contact”. Remove destinations that are no longer maintained rather than leaving unexplained errors.
- Return to Pages and record the review date outside the public page. Make corrections in the editor, publish the updated version and repeat the affected checks.
Expected result
Every button reaches the destination its label promises. Measure listening clicks separately from ticket sales. Dashboard views and button clicks are activity counts, not unique people or guaranteed completed actions.
If something is wrong
An unavailable external destination must be corrected at its source or replaced in the page editor. A working preview does not prove that an external booking or checkout completes. Test that flow separately using its normal test process.
Do not send sold-out show traffic to an unexplained dead checkout. After an edit, confirm that the page is still published; Save draft deliberately removes it from public access.
Related steps
Build a podcast host page
A new listener needs one strong starting episode and listening-platform choices. This guide creates a page that makes the next action clear.
Before you start
Sign in to ShortFreeURL and open Pages in the dashboard. A standalone page does not require a short domain or a paid link-shortening plan. Prepare the real destinations for Latest episode, Follow the show, Episode notes, Suggest a guest. Example template links are placeholders and must be replaced.
Set up the content
- Choose the podcast host template or Create page. Enter a title visitors will recognise.
- Put “Latest episode” first. Give the destination a label that describes the action rather than “Click here”.
- Add “Follow the show”, “Episode notes” and “Suggest a guest”. Use the up/down controls to change their order.
- Use a text block for essential context, a heading to separate topics, and a contact block for a valid email or telephone link.
- Choose a layout and colours with readable contrast. Save draft, check the preview, and publish when the real destinations are ready.
Expected result
The published page has a stable /p/ address and clearly named actions. Open page takes you to the visitor-facing version. Share this address through episode artwork caption; customers do not need a ShortFreeURL account to view a published page.
If something is wrong
A draft is intentionally unavailable to the public. Publish the page to make it accessible. Invalid destination schemes are rejected; use a complete http/https address, mailto email link or tel telephone link. Save errors should be resolved before closing the editor.
An external app can interrupt attribution after the first click. If you want to try another layout, duplicate the page and keep the copy as a draft until it is ready.
Related steps
Review a podcast host page
An external app can interrupt attribution after the first click. Use this review before sharing a new page and whenever its destinations change.
Before you start
Have the public page address, a phone, and the intended destination for each button ready. If the page is still a draft, publish only after checking the information. Keep any private customer, guest or client information out of the public content.
Check the journey
- Open the public page from episode artwork caption. Check that it loads without your dashboard session.
- Select “Latest episode” and confirm that the receiving page performs that action. Check any opening hours, dates or availability it displays.
- Test “Follow the show” on a narrow phone screen. Check that text, forms and consent controls remain usable.
- Check “Episode notes” and “Suggest a guest”. Remove destinations that are no longer maintained rather than leaving unexplained errors.
- Return to Pages and record the review date outside the public page. Make corrections in the editor, publish the updated version and repeat the affected checks.
Expected result
Every button reaches the destination its label promises. Use episode-specific tags instead of one permanent campaign value. Dashboard views and button clicks are activity counts, not unique people or guaranteed completed actions.
If something is wrong
An unavailable external destination must be corrected at its source or replaced in the page editor. A working preview does not prove that an external booking or checkout completes. Test that flow separately using its normal test process.
An external app can interrupt attribution after the first click. After an edit, confirm that the page is still published; Save draft deliberately removes it from public access.
Related steps
Build a writer page
A reader wants a sample before committing to a book purchase. This guide creates a page that makes the next action clear.
Before you start
Sign in to ShortFreeURL and open Pages in the dashboard. A standalone page does not require a short domain or a paid link-shortening plan. Prepare the real destinations for Read a sample, Buy the book, Join the newsletter, Invite to speak. Example template links are placeholders and must be replaced.
Set up the content
- Choose the writer template or Create page. Enter a title visitors will recognise.
- Put “Read a sample” first. Give the destination a label that describes the action rather than “Click here”.
- Add “Buy the book”, “Join the newsletter” and “Invite to speak”. Use the up/down controls to change their order.
- Use a text block for essential context, a heading to separate topics, and a contact block for a valid email or telephone link.
- Choose a layout and colours with readable contrast. Save draft, check the preview, and publish when the real destinations are ready.
Expected result
The published page has a stable /p/ address and clearly named actions. Open page takes you to the visitor-facing version. Share this address through book fair cards; customers do not need a ShortFreeURL account to view a published page.
If something is wrong
A draft is intentionally unavailable to the public. Publish the page to make it accessible. Invalid destination schemes are rejected; use a complete http/https address, mailto email link or tel telephone link. Save errors should be resolved before closing the editor.
Do not auto-enrol someone into a newsletter after a click. If you want to try another layout, duplicate the page and keep the copy as a draft until it is ready.
Related steps
Review a writer page
Do not auto-enrol someone into a newsletter after a click. Use this review before sharing a new page and whenever its destinations change.
Before you start
Have the public page address, a phone, and the intended destination for each button ready. If the page is still a draft, publish only after checking the information. Keep any private customer, guest or client information out of the public content.
Check the journey
- Open the public page from book fair cards. Check that it loads without your dashboard session.
- Select “Read a sample” and confirm that the receiving page performs that action. Check any opening hours, dates or availability it displays.
- Test “Buy the book” on a narrow phone screen. Check that text, forms and consent controls remain usable.
- Check “Join the newsletter” and “Invite to speak”. Remove destinations that are no longer maintained rather than leaving unexplained errors.
- Return to Pages and record the review date outside the public page. Make corrections in the editor, publish the updated version and repeat the affected checks.
Expected result
Every button reaches the destination its label promises. Compare sample visits with voluntary signups. Dashboard views and button clicks are activity counts, not unique people or guaranteed completed actions.
If something is wrong
An unavailable external destination must be corrected at its source or replaced in the page editor. A working preview does not prove that an external booking or checkout completes. Test that flow separately using its normal test process.
Do not auto-enrol someone into a newsletter after a click. After an edit, confirm that the page is still published; Save draft deliberately removes it from public access.
Related steps
Build a newsletter publisher page
A prospective subscriber needs proof of the editorial style. This guide creates a page that makes the next action clear.
Before you start
Sign in to ShortFreeURL and open Pages in the dashboard. A standalone page does not require a short domain or a paid link-shortening plan. Prepare the real destinations for Read latest issue, Subscribe, Browse archive, Sponsor the newsletter. Example template links are placeholders and must be replaced.
Set up the content
- Choose the newsletter publisher template or Create page. Enter a title visitors will recognise.
- Put “Read latest issue” first. Give the destination a label that describes the action rather than “Click here”.
- Add “Subscribe”, “Browse archive” and “Sponsor the newsletter”. Use the up/down controls to change their order.
- Use a text block for essential context, a heading to separate topics, and a contact block for a valid email or telephone link.
- Choose a layout and colours with readable contrast. Save draft, check the preview, and publish when the real destinations are ready.
Expected result
The published page has a stable /p/ address and clearly named actions. Open page takes you to the visitor-facing version. Share this address through social profile link; customers do not need a ShortFreeURL account to view a published page.
If something is wrong
A draft is intentionally unavailable to the public. Publish the page to make it accessible. Invalid destination schemes are rejected; use a complete http/https address, mailto email link or tel telephone link. Save errors should be resolved before closing the editor.
A subscription claim should match the actual email frequency. If you want to try another layout, duplicate the page and keep the copy as a draft until it is ready.
Related steps
Review a newsletter publisher page
A subscription claim should match the actual email frequency. Use this review before sharing a new page and whenever its destinations change.
Before you start
Have the public page address, a phone, and the intended destination for each button ready. If the page is still a draft, publish only after checking the information. Keep any private customer, guest or client information out of the public content.
Check the journey
- Open the public page from social profile link. Check that it loads without your dashboard session.
- Select “Read latest issue” and confirm that the receiving page performs that action. Check any opening hours, dates or availability it displays.
- Test “Subscribe” on a narrow phone screen. Check that text, forms and consent controls remain usable.
- Check “Browse archive” and “Sponsor the newsletter”. Remove destinations that are no longer maintained rather than leaving unexplained errors.
- Return to Pages and record the review date outside the public page. Make corrections in the editor, publish the updated version and repeat the affected checks.
Expected result
Every button reaches the destination its label promises. Measure confirmed signups rather than visits to a form. Dashboard views and button clicks are activity counts, not unique people or guaranteed completed actions.
If something is wrong
An unavailable external destination must be corrected at its source or replaced in the page editor. A working preview does not prove that an external booking or checkout completes. Test that flow separately using its normal test process.
A subscription claim should match the actual email frequency. After an edit, confirm that the page is still published; Save draft deliberately removes it from public access.
Related steps
Build a course instructor page
A learner needs prerequisites before paying for a course. This guide creates a page that makes the next action clear.
Before you start
Sign in to ShortFreeURL and open Pages in the dashboard. A standalone page does not require a short domain or a paid link-shortening plan. Prepare the real destinations for View syllabus, Sample lesson, Enrolment details, Ask a question. Example template links are placeholders and must be replaced.
Set up the content
- Choose the course instructor template or Create page. Enter a title visitors will recognise.
- Put “View syllabus” first. Give the destination a label that describes the action rather than “Click here”.
- Add “Sample lesson”, “Enrolment details” and “Ask a question”. Use the up/down controls to change their order.
- Use a text block for essential context, a heading to separate topics, and a contact block for a valid email or telephone link.
- Choose a layout and colours with readable contrast. Save draft, check the preview, and publish when the real destinations are ready.
Expected result
The published page has a stable /p/ address and clearly named actions. Open page takes you to the visitor-facing version. Share this address through webinar closing slide; customers do not need a ShortFreeURL account to view a published page.
If something is wrong
A draft is intentionally unavailable to the public. Publish the page to make it accessible. Invalid destination schemes are rejected; use a complete http/https address, mailto email link or tel telephone link. Save errors should be resolved before closing the editor.
Avoid implying that course attendance guarantees employment. If you want to try another layout, duplicate the page and keep the copy as a draft until it is ready.
Related steps
Review a course instructor page
Avoid implying that course attendance guarantees employment. Use this review before sharing a new page and whenever its destinations change.
Before you start
Have the public page address, a phone, and the intended destination for each button ready. If the page is still a draft, publish only after checking the information. Keep any private customer, guest or client information out of the public content.
Check the journey
- Open the public page from webinar closing slide. Check that it loads without your dashboard session.
- Select “View syllabus” and confirm that the receiving page performs that action. Check any opening hours, dates or availability it displays.
- Test “Sample lesson” on a narrow phone screen. Check that text, forms and consent controls remain usable.
- Check “Enrolment details” and “Ask a question”. Remove destinations that are no longer maintained rather than leaving unexplained errors.
- Return to Pages and record the review date outside the public page. Make corrections in the editor, publish the updated version and repeat the affected checks.
Expected result
Every button reaches the destination its label promises. Track sample-lesson interest and enrolments separately. Dashboard views and button clicks are activity counts, not unique people or guaranteed completed actions.
If something is wrong
An unavailable external destination must be corrected at its source or replaced in the page editor. A working preview does not prove that an external booking or checkout completes. Test that flow separately using its normal test process.
Avoid implying that course attendance guarantees employment. After an edit, confirm that the page is still published; Save draft deliberately removes it from public access.
Related steps
Build a language tutor page
A learner needs timezone and proficiency information to book correctly. This guide creates a page that makes the next action clear.
Before you start
Sign in to ShortFreeURL and open Pages in the dashboard. A standalone page does not require a short domain or a paid link-shortening plan. Prepare the real destinations for Book a trial, Lesson formats, Availability, Learning resources. Example template links are placeholders and must be replaced.
Set up the content
- Choose the language tutor template or Create page. Enter a title visitors will recognise.
- Put “Book a trial” first. Give the destination a label that describes the action rather than “Click here”.
- Add “Lesson formats”, “Availability” and “Learning resources”. Use the up/down controls to change their order.
- Use a text block for essential context, a heading to separate topics, and a contact block for a valid email or telephone link.
- Choose a layout and colours with readable contrast. Save draft, check the preview, and publish when the real destinations are ready.
Expected result
The published page has a stable /p/ address and clearly named actions. Open page takes you to the visitor-facing version. Share this address through community flyers; customers do not need a ShortFreeURL account to view a published page.
If something is wrong
A draft is intentionally unavailable to the public. Publish the page to make it accessible. Invalid destination schemes are rejected; use a complete http/https address, mailto email link or tel telephone link. Save errors should be resolved before closing the editor.
A booking page showing the wrong timezone creates missed sessions. If you want to try another layout, duplicate the page and keep the copy as a draft until it is ready.
Related steps
Review a language tutor page
A booking page showing the wrong timezone creates missed sessions. Use this review before sharing a new page and whenever its destinations change.
Before you start
Have the public page address, a phone, and the intended destination for each button ready. If the page is still a draft, publish only after checking the information. Keep any private customer, guest or client information out of the public content.
Check the journey
- Open the public page from community flyers. Check that it loads without your dashboard session.
- Select “Book a trial” and confirm that the receiving page performs that action. Check any opening hours, dates or availability it displays.
- Test “Lesson formats” on a narrow phone screen. Check that text, forms and consent controls remain usable.
- Check “Availability” and “Learning resources”. Remove destinations that are no longer maintained rather than leaving unexplained errors.
- Return to Pages and record the review date outside the public page. Make corrections in the editor, publish the updated version and repeat the affected checks.
Expected result
Every button reaches the destination its label promises. Compare trial bookings by lesson format. Dashboard views and button clicks are activity counts, not unique people or guaranteed completed actions.
If something is wrong
An unavailable external destination must be corrected at its source or replaced in the page editor. A working preview does not prove that an external booking or checkout completes. Test that flow separately using its normal test process.
A booking page showing the wrong timezone creates missed sessions. After an edit, confirm that the page is still published; Save draft deliberately removes it from public access.
Related steps
Build a music teacher page
A parent needs age suitability and instrument requirements. This guide creates a page that makes the next action clear.
Before you start
Sign in to ShortFreeURL and open Pages in the dashboard. A standalone page does not require a short domain or a paid link-shortening plan. Prepare the real destinations for Trial lesson, Instrument choices, Practice guide, Studio location. Example template links are placeholders and must be replaced.
Set up the content
- Choose the music teacher template or Create page. Enter a title visitors will recognise.
- Put “Trial lesson” first. Give the destination a label that describes the action rather than “Click here”.
- Add “Instrument choices”, “Practice guide” and “Studio location”. Use the up/down controls to change their order.
- Use a text block for essential context, a heading to separate topics, and a contact block for a valid email or telephone link.
- Choose a layout and colours with readable contrast. Save draft, check the preview, and publish when the real destinations are ready.
Expected result
The published page has a stable /p/ address and clearly named actions. Open page takes you to the visitor-facing version. Share this address through school noticeboard; customers do not need a ShortFreeURL account to view a published page.
If something is wrong
A draft is intentionally unavailable to the public. Publish the page to make it accessible. Invalid destination schemes are rejected; use a complete http/https address, mailto email link or tel telephone link. Save errors should be resolved before closing the editor.
Do not publish a child's lesson schedule on a public page. If you want to try another layout, duplicate the page and keep the copy as a draft until it is ready.
Related steps
Review a music teacher page
Do not publish a child's lesson schedule on a public page. Use this review before sharing a new page and whenever its destinations change.
Before you start
Have the public page address, a phone, and the intended destination for each button ready. If the page is still a draft, publish only after checking the information. Keep any private customer, guest or client information out of the public content.
Check the journey
- Open the public page from school noticeboard. Check that it loads without your dashboard session.
- Select “Trial lesson” and confirm that the receiving page performs that action. Check any opening hours, dates or availability it displays.
- Test “Instrument choices” on a narrow phone screen. Check that text, forms and consent controls remain usable.
- Check “Practice guide” and “Studio location”. Remove destinations that are no longer maintained rather than leaving unexplained errors.
- Return to Pages and record the review date outside the public page. Make corrections in the editor, publish the updated version and repeat the affected checks.
Expected result
Every button reaches the destination its label promises. Count parent enquiries without collecting student names in tags. Dashboard views and button clicks are activity counts, not unique people or guaranteed completed actions.
If something is wrong
An unavailable external destination must be corrected at its source or replaced in the page editor. A working preview does not prove that an external booking or checkout completes. Test that flow separately using its normal test process.
Do not publish a child's lesson schedule on a public page. After an edit, confirm that the page is still published; Save draft deliberately removes it from public access.
Related steps
Build a school club page
A student needs the next meeting room and participation rules. This guide creates a page that makes the next action clear.
Before you start
Sign in to ShortFreeURL and open Pages in the dashboard. A standalone page does not require a short domain or a paid link-shortening plan. Prepare the real destinations for Join the club, Meeting calendar, Project gallery, Contact organiser. Example template links are placeholders and must be replaced.
Set up the content
- Choose the school club template or Create page. Enter a title visitors will recognise.
- Put “Join the club” first. Give the destination a label that describes the action rather than “Click here”.
- Add “Meeting calendar”, “Project gallery” and “Contact organiser”. Use the up/down controls to change their order.
- Use a text block for essential context, a heading to separate topics, and a contact block for a valid email or telephone link.
- Choose a layout and colours with readable contrast. Save draft, check the preview, and publish when the real destinations are ready.
Expected result
The published page has a stable /p/ address and clearly named actions. Open page takes you to the visitor-facing version. Share this address through campus posters; customers do not need a ShortFreeURL account to view a published page.
If something is wrong
A draft is intentionally unavailable to the public. Publish the page to make it accessible. Invalid destination schemes are rejected; use a complete http/https address, mailto email link or tel telephone link. Save errors should be resolved before closing the editor.
Expired meeting details should be replaced promptly. If you want to try another layout, duplicate the page and keep the copy as a draft until it is ready.
Related steps
Review a school club page
Expired meeting details should be replaced promptly. Use this review before sharing a new page and whenever its destinations change.
Before you start
Have the public page address, a phone, and the intended destination for each button ready. If the page is still a draft, publish only after checking the information. Keep any private customer, guest or client information out of the public content.
Check the journey
- Open the public page from campus posters. Check that it loads without your dashboard session.
- Select “Join the club” and confirm that the receiving page performs that action. Check any opening hours, dates or availability it displays.
- Test “Meeting calendar” on a narrow phone screen. Check that text, forms and consent controls remain usable.
- Check “Project gallery” and “Contact organiser”. Remove destinations that are no longer maintained rather than leaving unexplained errors.
- Return to Pages and record the review date outside the public page. Make corrections in the editor, publish the updated version and repeat the affected checks.
Expected result
Every button reaches the destination its label promises. Measure joining-form visits per poster placement. Dashboard views and button clicks are activity counts, not unique people or guaranteed completed actions.
If something is wrong
An unavailable external destination must be corrected at its source or replaced in the page editor. A working preview does not prove that an external booking or checkout completes. Test that flow separately using its normal test process.
Expired meeting details should be replaced promptly. After an edit, confirm that the page is still published; Save draft deliberately removes it from public access.
Related steps
Build a university society page
A new student needs the membership route after an orientation fair. This guide creates a page that makes the next action clear.
Before you start
Sign in to ShortFreeURL and open Pages in the dashboard. A standalone page does not require a short domain or a paid link-shortening plan. Prepare the real destinations for Become a member, Next event, Committee contacts, Useful documents. Example template links are placeholders and must be replaced.
Set up the content
- Choose the university society template or Create page. Enter a title visitors will recognise.
- Put “Become a member” first. Give the destination a label that describes the action rather than “Click here”.
- Add “Next event”, “Committee contacts” and “Useful documents”. Use the up/down controls to change their order.
- Use a text block for essential context, a heading to separate topics, and a contact block for a valid email or telephone link.
- Choose a layout and colours with readable contrast. Save draft, check the preview, and publish when the real destinations are ready.
Expected result
The published page has a stable /p/ address and clearly named actions. Open page takes you to the visitor-facing version. Share this address through freshers fair handout; customers do not need a ShortFreeURL account to view a published page.
If something is wrong
A draft is intentionally unavailable to the public. Publish the page to make it accessible. Invalid destination schemes are rejected; use a complete http/https address, mailto email link or tel telephone link. Save errors should be resolved before closing the editor.
Remove personal committee phone numbers when officers change. If you want to try another layout, duplicate the page and keep the copy as a draft until it is ready.
Related steps
Review a university society page
Remove personal committee phone numbers when officers change. Use this review before sharing a new page and whenever its destinations change.
Before you start
Have the public page address, a phone, and the intended destination for each button ready. If the page is still a draft, publish only after checking the information. Keep any private customer, guest or client information out of the public content.
Check the journey
- Open the public page from freshers fair handout. Check that it loads without your dashboard session.
- Select “Become a member” and confirm that the receiving page performs that action. Check any opening hours, dates or availability it displays.
- Test “Next event” on a narrow phone screen. Check that text, forms and consent controls remain usable.
- Check “Committee contacts” and “Useful documents”. Remove destinations that are no longer maintained rather than leaving unexplained errors.
- Return to Pages and record the review date outside the public page. Make corrections in the editor, publish the updated version and repeat the affected checks.
Expected result
Every button reaches the destination its label promises. Compare membership enquiries from each fair location. Dashboard views and button clicks are activity counts, not unique people or guaranteed completed actions.
If something is wrong
An unavailable external destination must be corrected at its source or replaced in the page editor. A working preview does not prove that an external booking or checkout completes. Test that flow separately using its normal test process.
Remove personal committee phone numbers when officers change. After an edit, confirm that the page is still published; Save draft deliberately removes it from public access.
Related steps
Build a library page
A reader needs the right catalogue rather than a generic homepage. This guide creates a page that makes the next action clear.
Before you start
Sign in to ShortFreeURL and open Pages in the dashboard. A standalone page does not require a short domain or a paid link-shortening plan. Prepare the real destinations for Search catalogue, Book an event, Opening hours, Digital resources. Example template links are placeholders and must be replaced.
Set up the content
- Choose the library template or Create page. Enter a title visitors will recognise.
- Put “Search catalogue” first. Give the destination a label that describes the action rather than “Click here”.
- Add “Book an event”, “Opening hours” and “Digital resources”. Use the up/down controls to change their order.
- Use a text block for essential context, a heading to separate topics, and a contact block for a valid email or telephone link.
- Choose a layout and colours with readable contrast. Save draft, check the preview, and publish when the real destinations are ready.
Expected result
The published page has a stable /p/ address and clearly named actions. Open page takes you to the visitor-facing version. Share this address through bookmark inserts; customers do not need a ShortFreeURL account to view a published page.
If something is wrong
A draft is intentionally unavailable to the public. Publish the page to make it accessible. Invalid destination schemes are rejected; use a complete http/https address, mailto email link or tel telephone link. Save errors should be resolved before closing the editor.
Some digital resources require a library card after the click. If you want to try another layout, duplicate the page and keep the copy as a draft until it is ready.
Related steps
Review a library page
Some digital resources require a library card after the click. Use this review before sharing a new page and whenever its destinations change.
Before you start
Have the public page address, a phone, and the intended destination for each button ready. If the page is still a draft, publish only after checking the information. Keep any private customer, guest or client information out of the public content.
Check the journey
- Open the public page from bookmark inserts. Check that it loads without your dashboard session.
- Select “Search catalogue” and confirm that the receiving page performs that action. Check any opening hours, dates or availability it displays.
- Test “Book an event” on a narrow phone screen. Check that text, forms and consent controls remain usable.
- Check “Opening hours” and “Digital resources”. Remove destinations that are no longer maintained rather than leaving unexplained errors.
- Return to Pages and record the review date outside the public page. Make corrections in the editor, publish the updated version and repeat the affected checks.
Expected result
Every button reaches the destination its label promises. Track resource destinations without identifying individual readers. Dashboard views and button clicks are activity counts, not unique people or guaranteed completed actions.
If something is wrong
An unavailable external destination must be corrected at its source or replaced in the page editor. A working preview does not prove that an external booking or checkout completes. Test that flow separately using its normal test process.
Some digital resources require a library card after the click. After an edit, confirm that the page is still published; Save draft deliberately removes it from public access.
Related steps
Build a museum page
A visitor at an exhibit needs context without losing the exhibition route. This guide creates a page that makes the next action clear.
Before you start
Sign in to ShortFreeURL and open Pages in the dashboard. A standalone page does not require a short domain or a paid link-shortening plan. Prepare the real destinations for Plan a visit, Current exhibition, Audio guide, Accessibility. Example template links are placeholders and must be replaced.
Set up the content
- Choose the museum template or Create page. Enter a title visitors will recognise.
- Put “Plan a visit” first. Give the destination a label that describes the action rather than “Click here”.
- Add “Current exhibition”, “Audio guide” and “Accessibility”. Use the up/down controls to change their order.
- Use a text block for essential context, a heading to separate topics, and a contact block for a valid email or telephone link.
- Choose a layout and colours with readable contrast. Save draft, check the preview, and publish when the real destinations are ready.
Expected result
The published page has a stable /p/ address and clearly named actions. Open page takes you to the visitor-facing version. Share this address through exhibit labels; customers do not need a ShortFreeURL account to view a published page.
If something is wrong
A draft is intentionally unavailable to the public. Publish the page to make it accessible. Invalid destination schemes are rejected; use a complete http/https address, mailto email link or tel telephone link. Save errors should be resolved before closing the editor.
Decorative artwork must not be mistaken for a scannable QR code. If you want to try another layout, duplicate the page and keep the copy as a draft until it is ready.
Related steps
Review a museum page
Decorative artwork must not be mistaken for a scannable QR code. Use this review before sharing a new page and whenever its destinations change.
Before you start
Have the public page address, a phone, and the intended destination for each button ready. If the page is still a draft, publish only after checking the information. Keep any private customer, guest or client information out of the public content.
Check the journey
- Open the public page from exhibit labels. Check that it loads without your dashboard session.
- Select “Plan a visit” and confirm that the receiving page performs that action. Check any opening hours, dates or availability it displays.
- Test “Current exhibition” on a narrow phone screen. Check that text, forms and consent controls remain usable.
- Check “Audio guide” and “Accessibility”. Remove destinations that are no longer maintained rather than leaving unexplained errors.
- Return to Pages and record the review date outside the public page. Make corrections in the editor, publish the updated version and repeat the affected checks.
Expected result
Every button reaches the destination its label promises. Count guide openings by exhibit label. Dashboard views and button clicks are activity counts, not unique people or guaranteed completed actions.
If something is wrong
An unavailable external destination must be corrected at its source or replaced in the page editor. A working preview does not prove that an external booking or checkout completes. Test that flow separately using its normal test process.
Decorative artwork must not be mistaken for a scannable QR code. After an edit, confirm that the page is still published; Save draft deliberately removes it from public access.
Related steps
Build a gallery page
A visitor needs artwork context and a clear enquiry route. This guide creates a page that makes the next action clear.
Before you start
Sign in to ShortFreeURL and open Pages in the dashboard. A standalone page does not require a short domain or a paid link-shortening plan. Prepare the real destinations for Current show, Artist information, Opening reception, Enquire about work. Example template links are placeholders and must be replaced.
Set up the content
- Choose the gallery template or Create page. Enter a title visitors will recognise.
- Put “Current show” first. Give the destination a label that describes the action rather than “Click here”.
- Add “Artist information”, “Opening reception” and “Enquire about work”. Use the up/down controls to change their order.
- Use a text block for essential context, a heading to separate topics, and a contact block for a valid email or telephone link.
- Choose a layout and colours with readable contrast. Save draft, check the preview, and publish when the real destinations are ready.
Expected result
The published page has a stable /p/ address and clearly named actions. Open page takes you to the visitor-facing version. Share this address through artwork caption cards; customers do not need a ShortFreeURL account to view a published page.
If something is wrong
A draft is intentionally unavailable to the public. Publish the page to make it accessible. Invalid destination schemes are rejected; use a complete http/https address, mailto email link or tel telephone link. Save errors should be resolved before closing the editor.
Do not publish unapproved artist contact details. If you want to try another layout, duplicate the page and keep the copy as a draft until it is ready.
Related steps
Review a gallery page
Do not publish unapproved artist contact details. Use this review before sharing a new page and whenever its destinations change.
Before you start
Have the public page address, a phone, and the intended destination for each button ready. If the page is still a draft, publish only after checking the information. Keep any private customer, guest or client information out of the public content.
Check the journey
- Open the public page from artwork caption cards. Check that it loads without your dashboard session.
- Select “Current show” and confirm that the receiving page performs that action. Check any opening hours, dates or availability it displays.
- Test “Artist information” on a narrow phone screen. Check that text, forms and consent controls remain usable.
- Check “Opening reception” and “Enquire about work”. Remove destinations that are no longer maintained rather than leaving unexplained errors.
- Return to Pages and record the review date outside the public page. Make corrections in the editor, publish the updated version and repeat the affected checks.
Expected result
Every button reaches the destination its label promises. Separate exhibition information from purchase enquiries. Dashboard views and button clicks are activity counts, not unique people or guaranteed completed actions.
If something is wrong
An unavailable external destination must be corrected at its source or replaced in the page editor. A working preview does not prove that an external booking or checkout completes. Test that flow separately using its normal test process.
Do not publish unapproved artist contact details. After an edit, confirm that the page is still published; Save draft deliberately removes it from public access.
Related steps
Build a theatre page
A ticket holder needs arrival and access information before curtain time. This guide creates a page that makes the next action clear.
Before you start
Sign in to ShortFreeURL and open Pages in the dashboard. A standalone page does not require a short domain or a paid link-shortening plan. Prepare the real destinations for Book tickets, Show programme, Venue access, Support the theatre. Example template links are placeholders and must be replaced.
Set up the content
- Choose the theatre template or Create page. Enter a title visitors will recognise.
- Put “Book tickets” first. Give the destination a label that describes the action rather than “Click here”.
- Add “Show programme”, “Venue access” and “Support the theatre”. Use the up/down controls to change their order.
- Use a text block for essential context, a heading to separate topics, and a contact block for a valid email or telephone link.
- Choose a layout and colours with readable contrast. Save draft, check the preview, and publish when the real destinations are ready.
Expected result
The published page has a stable /p/ address and clearly named actions. Open page takes you to the visitor-facing version. Share this address through ticket confirmation email; customers do not need a ShortFreeURL account to view a published page.
If something is wrong
A draft is intentionally unavailable to the public. Publish the page to make it accessible. Invalid destination schemes are rejected; use a complete http/https address, mailto email link or tel telephone link. Save errors should be resolved before closing the editor.
Keep late-arrival rules easy to find. If you want to try another layout, duplicate the page and keep the copy as a draft until it is ready.
Related steps
Review a theatre page
Keep late-arrival rules easy to find. Use this review before sharing a new page and whenever its destinations change.
Before you start
Have the public page address, a phone, and the intended destination for each button ready. If the page is still a draft, publish only after checking the information. Keep any private customer, guest or client information out of the public content.
Check the journey
- Open the public page from ticket confirmation email. Check that it loads without your dashboard session.
- Select “Book tickets” and confirm that the receiving page performs that action. Check any opening hours, dates or availability it displays.
- Test “Show programme” on a narrow phone screen. Check that text, forms and consent controls remain usable.
- Check “Venue access” and “Support the theatre”. Remove destinations that are no longer maintained rather than leaving unexplained errors.
- Return to Pages and record the review date outside the public page. Make corrections in the editor, publish the updated version and repeat the affected checks.
Expected result
Every button reaches the destination its label promises. Compare booking traffic with visitor-information use. Dashboard views and button clicks are activity counts, not unique people or guaranteed completed actions.
If something is wrong
An unavailable external destination must be corrected at its source or replaced in the page editor. A working preview does not prove that an external booking or checkout completes. Test that flow separately using its normal test process.
Keep late-arrival rules easy to find. After an edit, confirm that the page is still published; Save draft deliberately removes it from public access.
Related steps
Build a festival page
An attendee needs travel advice and current programme changes. This guide creates a page that makes the next action clear.
Before you start
Sign in to ShortFreeURL and open Pages in the dashboard. A standalone page does not require a short domain or a paid link-shortening plan. Prepare the real destinations for Line-up, Tickets, Travel guide, Site accessibility. Example template links are placeholders and must be replaced.
Set up the content
- Choose the festival template or Create page. Enter a title visitors will recognise.
- Put “Line-up” first. Give the destination a label that describes the action rather than “Click here”.
- Add “Tickets”, “Travel guide” and “Site accessibility”. Use the up/down controls to change their order.
- Use a text block for essential context, a heading to separate topics, and a contact block for a valid email or telephone link.
- Choose a layout and colours with readable contrast. Save draft, check the preview, and publish when the real destinations are ready.
Expected result
The published page has a stable /p/ address and clearly named actions. Open page takes you to the visitor-facing version. Share this address through wristband packaging; customers do not need a ShortFreeURL account to view a published page.
If something is wrong
A draft is intentionally unavailable to the public. Publish the page to make it accessible. Invalid destination schemes are rejected; use a complete http/https address, mailto email link or tel telephone link. Save errors should be resolved before closing the editor.
A programme change must not require reprinting every QR code. If you want to try another layout, duplicate the page and keep the copy as a draft until it is ready.
Related steps
Review a festival page
A programme change must not require reprinting every QR code. Use this review before sharing a new page and whenever its destinations change.
Before you start
Have the public page address, a phone, and the intended destination for each button ready. If the page is still a draft, publish only after checking the information. Keep any private customer, guest or client information out of the public content.
Check the journey
- Open the public page from wristband packaging. Check that it loads without your dashboard session.
- Select “Line-up” and confirm that the receiving page performs that action. Check any opening hours, dates or availability it displays.
- Test “Tickets” on a narrow phone screen. Check that text, forms and consent controls remain usable.
- Check “Travel guide” and “Site accessibility”. Remove destinations that are no longer maintained rather than leaving unexplained errors.
- Return to Pages and record the review date outside the public page. Make corrections in the editor, publish the updated version and repeat the affected checks.
Expected result
Every button reaches the destination its label promises. Track travel-guide demand around event dates. Dashboard views and button clicks are activity counts, not unique people or guaranteed completed actions.
If something is wrong
An unavailable external destination must be corrected at its source or replaced in the page editor. A working preview does not prove that an external booking or checkout completes. Test that flow separately using its normal test process.
A programme change must not require reprinting every QR code. After an edit, confirm that the page is still published; Save draft deliberately removes it from public access.
Related steps
Build a conference page
A delegate needs the current room allocation between sessions. This guide creates a page that makes the next action clear.
Before you start
Sign in to ShortFreeURL and open Pages in the dashboard. A standalone page does not require a short domain or a paid link-shortening plan. Prepare the real destinations for Register, Agenda, Speaker details, Venue information. Example template links are placeholders and must be replaced.
Set up the content
- Choose the conference template or Create page. Enter a title visitors will recognise.
- Put “Register” first. Give the destination a label that describes the action rather than “Click here”.
- Add “Agenda”, “Speaker details” and “Venue information”. Use the up/down controls to change their order.
- Use a text block for essential context, a heading to separate topics, and a contact block for a valid email or telephone link.
- Choose a layout and colours with readable contrast. Save draft, check the preview, and publish when the real destinations are ready.
Expected result
The published page has a stable /p/ address and clearly named actions. Open page takes you to the visitor-facing version. Share this address through badge reverse; customers do not need a ShortFreeURL account to view a published page.
If something is wrong
A draft is intentionally unavailable to the public. Publish the page to make it accessible. Invalid destination schemes are rejected; use a complete http/https address, mailto email link or tel telephone link. Save errors should be resolved before closing the editor.
Do not expose private attendee directories on a public page. If you want to try another layout, duplicate the page and keep the copy as a draft until it is ready.
Related steps
Review a conference page
Do not expose private attendee directories on a public page. Use this review before sharing a new page and whenever its destinations change.
Before you start
Have the public page address, a phone, and the intended destination for each button ready. If the page is still a draft, publish only after checking the information. Keep any private customer, guest or client information out of the public content.
Check the journey
- Open the public page from badge reverse. Check that it loads without your dashboard session.
- Select “Register” and confirm that the receiving page performs that action. Check any opening hours, dates or availability it displays.
- Test “Agenda” on a narrow phone screen. Check that text, forms and consent controls remain usable.
- Check “Speaker details” and “Venue information”. Remove destinations that are no longer maintained rather than leaving unexplained errors.
- Return to Pages and record the review date outside the public page. Make corrections in the editor, publish the updated version and repeat the affected checks.
Expected result
Every button reaches the destination its label promises. Separate agenda taps from new registrations. Dashboard views and button clicks are activity counts, not unique people or guaranteed completed actions.
If something is wrong
An unavailable external destination must be corrected at its source or replaced in the page editor. A working preview does not prove that an external booking or checkout completes. Test that flow separately using its normal test process.
Do not expose private attendee directories on a public page. After an edit, confirm that the page is still published; Save draft deliberately removes it from public access.
Related steps
Build a workshop organiser page
A participant needs to bring the right materials to a practical session. This guide creates a page that makes the next action clear.
Before you start
Sign in to ShortFreeURL and open Pages in the dashboard. A standalone page does not require a short domain or a paid link-shortening plan. Prepare the real destinations for Reserve a place, Materials list, Session schedule, Directions. Example template links are placeholders and must be replaced.
Set up the content
- Choose the workshop organiser template or Create page. Enter a title visitors will recognise.
- Put “Reserve a place” first. Give the destination a label that describes the action rather than “Click here”.
- Add “Materials list”, “Session schedule” and “Directions”. Use the up/down controls to change their order.
- Use a text block for essential context, a heading to separate topics, and a contact block for a valid email or telephone link.
- Choose a layout and colours with readable contrast. Save draft, check the preview, and publish when the real destinations are ready.
Expected result
The published page has a stable /p/ address and clearly named actions. Open page takes you to the visitor-facing version. Share this address through confirmation card; customers do not need a ShortFreeURL account to view a published page.
If something is wrong
A draft is intentionally unavailable to the public. Publish the page to make it accessible. Invalid destination schemes are rejected; use a complete http/https address, mailto email link or tel telephone link. Save errors should be resolved before closing the editor.
State whether materials are included before linking to payment. If you want to try another layout, duplicate the page and keep the copy as a draft until it is ready.
Related steps
Review a workshop organiser page
State whether materials are included before linking to payment. Use this review before sharing a new page and whenever its destinations change.
Before you start
Have the public page address, a phone, and the intended destination for each button ready. If the page is still a draft, publish only after checking the information. Keep any private customer, guest or client information out of the public content.
Check the journey
- Open the public page from confirmation card. Check that it loads without your dashboard session.
- Select “Reserve a place” and confirm that the receiving page performs that action. Check any opening hours, dates or availability it displays.
- Test “Materials list” on a narrow phone screen. Check that text, forms and consent controls remain usable.
- Check “Session schedule” and “Directions”. Remove destinations that are no longer maintained rather than leaving unexplained errors.
- Return to Pages and record the review date outside the public page. Make corrections in the editor, publish the updated version and repeat the affected checks.
Expected result
Every button reaches the destination its label promises. Count reservations against remaining capacity elsewhere. Dashboard views and button clicks are activity counts, not unique people or guaranteed completed actions.
If something is wrong
An unavailable external destination must be corrected at its source or replaced in the page editor. A working preview does not prove that an external booking or checkout completes. Test that flow separately using its normal test process.
State whether materials are included before linking to payment. After an edit, confirm that the page is still published; Save draft deliberately removes it from public access.
Related steps
Build a community meetup page
A newcomer needs expectations and venue details before attending. This guide creates a page that makes the next action clear.
Before you start
Sign in to ShortFreeURL and open Pages in the dashboard. A standalone page does not require a short domain or a paid link-shortening plan. Prepare the real destinations for Next meeting, RSVP, Code of conduct, Contact host. Example template links are placeholders and must be replaced.
Set up the content
- Choose the community meetup template or Create page. Enter a title visitors will recognise.
- Put “Next meeting” first. Give the destination a label that describes the action rather than “Click here”.
- Add “RSVP”, “Code of conduct” and “Contact host”. Use the up/down controls to change their order.
- Use a text block for essential context, a heading to separate topics, and a contact block for a valid email or telephone link.
- Choose a layout and colours with readable contrast. Save draft, check the preview, and publish when the real destinations are ready.
Expected result
The published page has a stable /p/ address and clearly named actions. Open page takes you to the visitor-facing version. Share this address through community group profile; customers do not need a ShortFreeURL account to view a published page.
If something is wrong
A draft is intentionally unavailable to the public. Publish the page to make it accessible. Invalid destination schemes are rejected; use a complete http/https address, mailto email link or tel telephone link. Save errors should be resolved before closing the editor.
Keep the host's private home address off public flyers. If you want to try another layout, duplicate the page and keep the copy as a draft until it is ready.
Related steps
Review a community meetup page
Keep the host's private home address off public flyers. Use this review before sharing a new page and whenever its destinations change.
Before you start
Have the public page address, a phone, and the intended destination for each button ready. If the page is still a draft, publish only after checking the information. Keep any private customer, guest or client information out of the public content.
Check the journey
- Open the public page from community group profile. Check that it loads without your dashboard session.
- Select “Next meeting” and confirm that the receiving page performs that action. Check any opening hours, dates or availability it displays.
- Test “RSVP” on a narrow phone screen. Check that text, forms and consent controls remain usable.
- Check “Code of conduct” and “Contact host”. Remove destinations that are no longer maintained rather than leaving unexplained errors.
- Return to Pages and record the review date outside the public page. Make corrections in the editor, publish the updated version and repeat the affected checks.
Expected result
Every button reaches the destination its label promises. Measure RSVPs without equating them to attendance. Dashboard views and button clicks are activity counts, not unique people or guaranteed completed actions.
If something is wrong
An unavailable external destination must be corrected at its source or replaced in the page editor. A working preview does not prove that an external booking or checkout completes. Test that flow separately using its normal test process.
Keep the host's private home address off public flyers. After an edit, confirm that the page is still published; Save draft deliberately removes it from public access.
Related steps
Build a sports club page
A new player needs age group and training location. This guide creates a page that makes the next action clear.
Before you start
Sign in to ShortFreeURL and open Pages in the dashboard. A standalone page does not require a short domain or a paid link-shortening plan. Prepare the real destinations for Join the club, Training schedule, Fixtures, Volunteer. Example template links are placeholders and must be replaced.
Set up the content
- Choose the sports club template or Create page. Enter a title visitors will recognise.
- Put “Join the club” first. Give the destination a label that describes the action rather than “Click here”.
- Add “Training schedule”, “Fixtures” and “Volunteer”. Use the up/down controls to change their order.
- Use a text block for essential context, a heading to separate topics, and a contact block for a valid email or telephone link.
- Choose a layout and colours with readable contrast. Save draft, check the preview, and publish when the real destinations are ready.
Expected result
The published page has a stable /p/ address and clearly named actions. Open page takes you to the visitor-facing version. Share this address through pitch-side board; customers do not need a ShortFreeURL account to view a published page.
If something is wrong
A draft is intentionally unavailable to the public. Publish the page to make it accessible. Invalid destination schemes are rejected; use a complete http/https address, mailto email link or tel telephone link. Save errors should be resolved before closing the editor.
Fixture changes must be distinguishable from regular training. If you want to try another layout, duplicate the page and keep the copy as a draft until it is ready.
Related steps
Review a sports club page
Fixture changes must be distinguishable from regular training. Use this review before sharing a new page and whenever its destinations change.
Before you start
Have the public page address, a phone, and the intended destination for each button ready. If the page is still a draft, publish only after checking the information. Keep any private customer, guest or client information out of the public content.
Check the journey
- Open the public page from pitch-side board. Check that it loads without your dashboard session.
- Select “Join the club” and confirm that the receiving page performs that action. Check any opening hours, dates or availability it displays.
- Test “Training schedule” on a narrow phone screen. Check that text, forms and consent controls remain usable.
- Check “Fixtures” and “Volunteer”. Remove destinations that are no longer maintained rather than leaving unexplained errors.
- Return to Pages and record the review date outside the public page. Make corrections in the editor, publish the updated version and repeat the affected checks.
Expected result
Every button reaches the destination its label promises. Compare joining enquiries with fixture-information traffic. Dashboard views and button clicks are activity counts, not unique people or guaranteed completed actions.
If something is wrong
An unavailable external destination must be corrected at its source or replaced in the page editor. A working preview does not prove that an external booking or checkout completes. Test that flow separately using its normal test process.
Fixture changes must be distinguishable from regular training. After an edit, confirm that the page is still published; Save draft deliberately removes it from public access.
Related steps
Build a charity page
A supporter wants to verify the organisation before donating. This guide creates a page that makes the next action clear.
Before you start
Sign in to ShortFreeURL and open Pages in the dashboard. A standalone page does not require a short domain or a paid link-shortening plan. Prepare the real destinations for Donate securely, Current projects, Volunteer, Financial reports. Example template links are placeholders and must be replaced.
Set up the content
- Choose the charity template or Create page. Enter a title visitors will recognise.
- Put “Donate securely” first. Give the destination a label that describes the action rather than “Click here”.
- Add “Current projects”, “Volunteer” and “Financial reports”. Use the up/down controls to change their order.
- Use a text block for essential context, a heading to separate topics, and a contact block for a valid email or telephone link.
- Choose a layout and colours with readable contrast. Save draft, check the preview, and publish when the real destinations are ready.
Expected result
The published page has a stable /p/ address and clearly named actions. Open page takes you to the visitor-facing version. Share this address through fundraising leaflet; customers do not need a ShortFreeURL account to view a published page.
If something is wrong
A draft is intentionally unavailable to the public. Publish the page to make it accessible. Invalid destination schemes are rejected; use a complete http/https address, mailto email link or tel telephone link. Save errors should be resolved before closing the editor.
Do not label a donation-page visit as a completed donation. If you want to try another layout, duplicate the page and keep the copy as a draft until it is ready.
Related steps
Review a charity page
Do not label a donation-page visit as a completed donation. Use this review before sharing a new page and whenever its destinations change.
Before you start
Have the public page address, a phone, and the intended destination for each button ready. If the page is still a draft, publish only after checking the information. Keep any private customer, guest or client information out of the public content.
Check the journey
- Open the public page from fundraising leaflet. Check that it loads without your dashboard session.
- Select “Donate securely” and confirm that the receiving page performs that action. Check any opening hours, dates or availability it displays.
- Test “Current projects” on a narrow phone screen. Check that text, forms and consent controls remain usable.
- Check “Volunteer” and “Financial reports”. Remove destinations that are no longer maintained rather than leaving unexplained errors.
- Return to Pages and record the review date outside the public page. Make corrections in the editor, publish the updated version and repeat the affected checks.
Expected result
Every button reaches the destination its label promises. Report confirmed donations from the payment provider. Dashboard views and button clicks are activity counts, not unique people or guaranteed completed actions.
If something is wrong
An unavailable external destination must be corrected at its source or replaced in the page editor. A working preview does not prove that an external booking or checkout completes. Test that flow separately using its normal test process.
Do not label a donation-page visit as a completed donation. After an edit, confirm that the page is still published; Save draft deliberately removes it from public access.
Related steps
Build a animal rescue page
An adopter needs the application steps before contacting the team. This guide creates a page that makes the next action clear.
Before you start
Sign in to ShortFreeURL and open Pages in the dashboard. A standalone page does not require a short domain or a paid link-shortening plan. Prepare the real destinations for Available adoptions, Foster application, Donation page, Adoption process. Example template links are placeholders and must be replaced.
Set up the content
- Choose the animal rescue template or Create page. Enter a title visitors will recognise.
- Put “Available adoptions” first. Give the destination a label that describes the action rather than “Click here”.
- Add “Foster application”, “Donation page” and “Adoption process”. Use the up/down controls to change their order.
- Use a text block for essential context, a heading to separate topics, and a contact block for a valid email or telephone link.
- Choose a layout and colours with readable contrast. Save draft, check the preview, and publish when the real destinations are ready.
Expected result
The published page has a stable /p/ address and clearly named actions. Open page takes you to the visitor-facing version. Share this address through adoption-day cards; customers do not need a ShortFreeURL account to view a published page.
If something is wrong
A draft is intentionally unavailable to the public. Publish the page to make it accessible. Invalid destination schemes are rejected; use a complete http/https address, mailto email link or tel telephone link. Save errors should be resolved before closing the editor.
Remove adopted animals from availability without breaking shared links. If you want to try another layout, duplicate the page and keep the copy as a draft until it is ready.
Related steps
Review a animal rescue page
Remove adopted animals from availability without breaking shared links. Use this review before sharing a new page and whenever its destinations change.
Before you start
Have the public page address, a phone, and the intended destination for each button ready. If the page is still a draft, publish only after checking the information. Keep any private customer, guest or client information out of the public content.
Check the journey
- Open the public page from adoption-day cards. Check that it loads without your dashboard session.
- Select “Available adoptions” and confirm that the receiving page performs that action. Check any opening hours, dates or availability it displays.
- Test “Foster application” on a narrow phone screen. Check that text, forms and consent controls remain usable.
- Check “Donation page” and “Adoption process”. Remove destinations that are no longer maintained rather than leaving unexplained errors.
- Return to Pages and record the review date outside the public page. Make corrections in the editor, publish the updated version and repeat the affected checks.
Expected result
Every button reaches the destination its label promises. Track application starts separately from approved adoptions. Dashboard views and button clicks are activity counts, not unique people or guaranteed completed actions.
If something is wrong
An unavailable external destination must be corrected at its source or replaced in the page editor. A working preview does not prove that an external booking or checkout completes. Test that flow separately using its normal test process.
Remove adopted animals from availability without breaking shared links. After an edit, confirm that the page is still published; Save draft deliberately removes it from public access.
Related steps
Build a community garden page
A neighbour needs to know when volunteers will be present. This guide creates a page that makes the next action clear.
Before you start
Sign in to ShortFreeURL and open Pages in the dashboard. A standalone page does not require a short domain or a paid link-shortening plan. Prepare the real destinations for Visit the garden, Volunteer shifts, Growing calendar, Donate tools. Example template links are placeholders and must be replaced.
Set up the content
- Choose the community garden template or Create page. Enter a title visitors will recognise.
- Put “Visit the garden” first. Give the destination a label that describes the action rather than “Click here”.
- Add “Volunteer shifts”, “Growing calendar” and “Donate tools”. Use the up/down controls to change their order.
- Use a text block for essential context, a heading to separate topics, and a contact block for a valid email or telephone link.
- Choose a layout and colours with readable contrast. Save draft, check the preview, and publish when the real destinations are ready.
Expected result
The published page has a stable /p/ address and clearly named actions. Open page takes you to the visitor-facing version. Share this address through garden gate sign; customers do not need a ShortFreeURL account to view a published page.
If something is wrong
A draft is intentionally unavailable to the public. Publish the page to make it accessible. Invalid destination schemes are rejected; use a complete http/https address, mailto email link or tel telephone link. Save errors should be resolved before closing the editor.
Seasonal opening times should not be buried under old news. If you want to try another layout, duplicate the page and keep the copy as a draft until it is ready.
Related steps
Review a community garden page
Seasonal opening times should not be buried under old news. Use this review before sharing a new page and whenever its destinations change.
Before you start
Have the public page address, a phone, and the intended destination for each button ready. If the page is still a draft, publish only after checking the information. Keep any private customer, guest or client information out of the public content.
Check the journey
- Open the public page from garden gate sign. Check that it loads without your dashboard session.
- Select “Visit the garden” and confirm that the receiving page performs that action. Check any opening hours, dates or availability it displays.
- Test “Volunteer shifts” on a narrow phone screen. Check that text, forms and consent controls remain usable.
- Check “Growing calendar” and “Donate tools”. Remove destinations that are no longer maintained rather than leaving unexplained errors.
- Return to Pages and record the review date outside the public page. Make corrections in the editor, publish the updated version and repeat the affected checks.
Expected result
Every button reaches the destination its label promises. Measure volunteer signups by local placement. Dashboard views and button clicks are activity counts, not unique people or guaranteed completed actions.
If something is wrong
An unavailable external destination must be corrected at its source or replaced in the page editor. A working preview does not prove that an external booking or checkout completes. Test that flow separately using its normal test process.
Seasonal opening times should not be buried under old news. After an edit, confirm that the page is still published; Save draft deliberately removes it from public access.
Related steps
Build a religious community page
A visitor needs time and location details without joining a mailing list. This guide creates a page that makes the next action clear.
Before you start
Sign in to ShortFreeURL and open Pages in the dashboard. A standalone page does not require a short domain or a paid link-shortening plan. Prepare the real destinations for Service times, Community support, Upcoming events, Contact office. Example template links are placeholders and must be replaced.
Set up the content
- Choose the religious community template or Create page. Enter a title visitors will recognise.
- Put “Service times” first. Give the destination a label that describes the action rather than “Click here”.
- Add “Community support”, “Upcoming events” and “Contact office”. Use the up/down controls to change their order.
- Use a text block for essential context, a heading to separate topics, and a contact block for a valid email or telephone link.
- Choose a layout and colours with readable contrast. Save draft, check the preview, and publish when the real destinations are ready.
Expected result
The published page has a stable /p/ address and clearly named actions. Open page takes you to the visitor-facing version. Share this address through welcome leaflet; customers do not need a ShortFreeURL account to view a published page.
If something is wrong
A draft is intentionally unavailable to the public. Publish the page to make it accessible. Invalid destination schemes are rejected; use a complete http/https address, mailto email link or tel telephone link. Save errors should be resolved before closing the editor.
Keep confidential support requests out of public forms. If you want to try another layout, duplicate the page and keep the copy as a draft until it is ready.
Related steps
Review a religious community page
Keep confidential support requests out of public forms. Use this review before sharing a new page and whenever its destinations change.
Before you start
Have the public page address, a phone, and the intended destination for each button ready. If the page is still a draft, publish only after checking the information. Keep any private customer, guest or client information out of the public content.
Check the journey
- Open the public page from welcome leaflet. Check that it loads without your dashboard session.
- Select “Service times” and confirm that the receiving page performs that action. Check any opening hours, dates or availability it displays.
- Test “Community support” on a narrow phone screen. Check that text, forms and consent controls remain usable.
- Check “Upcoming events” and “Contact office”. Remove destinations that are no longer maintained rather than leaving unexplained errors.
- Return to Pages and record the review date outside the public page. Make corrections in the editor, publish the updated version and repeat the affected checks.
Expected result
Every button reaches the destination its label promises. Separate service-information views from event registrations. Dashboard views and button clicks are activity counts, not unique people or guaranteed completed actions.
If something is wrong
An unavailable external destination must be corrected at its source or replaced in the page editor. A working preview does not prove that an external booking or checkout completes. Test that flow separately using its normal test process.
Keep confidential support requests out of public forms. After an edit, confirm that the page is still published; Save draft deliberately removes it from public access.
Related steps
Build a local campaign page
A resident needs current information and a way to ask a question. This guide creates a page that makes the next action clear.
Before you start
Sign in to ShortFreeURL and open Pages in the dashboard. A standalone page does not require a short domain or a paid link-shortening plan. Prepare the real destinations for Read proposals, Attend a meeting, Volunteer, Contact organisers. Example template links are placeholders and must be replaced.
Set up the content
- Choose the local campaign template or Create page. Enter a title visitors will recognise.
- Put “Read proposals” first. Give the destination a label that describes the action rather than “Click here”.
- Add “Attend a meeting”, “Volunteer” and “Contact organisers”. Use the up/down controls to change their order.
- Use a text block for essential context, a heading to separate topics, and a contact block for a valid email or telephone link.
- Choose a layout and colours with readable contrast. Save draft, check the preview, and publish when the real destinations are ready.
Expected result
The published page has a stable /p/ address and clearly named actions. Open page takes you to the visitor-facing version. Share this address through public meeting handout; customers do not need a ShortFreeURL account to view a published page.
If something is wrong
A draft is intentionally unavailable to the public. Publish the page to make it accessible. Invalid destination schemes are rejected; use a complete http/https address, mailto email link or tel telephone link. Save errors should be resolved before closing the editor.
Do not misrepresent clicks as voter support. If you want to try another layout, duplicate the page and keep the copy as a draft until it is ready.
Related steps
Review a local campaign page
Do not misrepresent clicks as voter support. Use this review before sharing a new page and whenever its destinations change.
Before you start
Have the public page address, a phone, and the intended destination for each button ready. If the page is still a draft, publish only after checking the information. Keep any private customer, guest or client information out of the public content.
Check the journey
- Open the public page from public meeting handout. Check that it loads without your dashboard session.
- Select “Read proposals” and confirm that the receiving page performs that action. Check any opening hours, dates or availability it displays.
- Test “Attend a meeting” on a narrow phone screen. Check that text, forms and consent controls remain usable.
- Check “Volunteer” and “Contact organisers”. Remove destinations that are no longer maintained rather than leaving unexplained errors.
- Return to Pages and record the review date outside the public page. Make corrections in the editor, publish the updated version and repeat the affected checks.
Expected result
Every button reaches the destination its label promises. Measure voluntary actions without inferring political preferences. Dashboard views and button clicks are activity counts, not unique people or guaranteed completed actions.
If something is wrong
An unavailable external destination must be corrected at its source or replaced in the page editor. A working preview does not prove that an external booking or checkout completes. Test that flow separately using its normal test process.
Do not misrepresent clicks as voter support. After an edit, confirm that the page is still published; Save draft deliberately removes it from public access.
Related steps
Build a estate agent page
A buyer needs the correct property and viewing availability. This guide creates a page that makes the next action clear.
Before you start
Sign in to ShortFreeURL and open Pages in the dashboard. A standalone page does not require a short domain or a paid link-shortening plan. Prepare the real destinations for Property details, Arrange a viewing, Area guide, Contact agent. Example template links are placeholders and must be replaced.
Set up the content
- Choose the estate agent template or Create page. Enter a title visitors will recognise.
- Put “Property details” first. Give the destination a label that describes the action rather than “Click here”.
- Add “Arrange a viewing”, “Area guide” and “Contact agent”. Use the up/down controls to change their order.
- Use a text block for essential context, a heading to separate topics, and a contact block for a valid email or telephone link.
- Choose a layout and colours with readable contrast. Save draft, check the preview, and publish when the real destinations are ready.
Expected result
The published page has a stable /p/ address and clearly named actions. Open page takes you to the visitor-facing version. Share this address through property window card; customers do not need a ShortFreeURL account to view a published page.
If something is wrong
A draft is intentionally unavailable to the public. Publish the page to make it accessible. Invalid destination schemes are rejected; use a complete http/https address, mailto email link or tel telephone link. Save errors should be resolved before closing the editor.
Withdrawn listings need an informative replacement destination. If you want to try another layout, duplicate the page and keep the copy as a draft until it is ready.
Related steps
Review a estate agent page
Withdrawn listings need an informative replacement destination. Use this review before sharing a new page and whenever its destinations change.
Before you start
Have the public page address, a phone, and the intended destination for each button ready. If the page is still a draft, publish only after checking the information. Keep any private customer, guest or client information out of the public content.
Check the journey
- Open the public page from property window card. Check that it loads without your dashboard session.
- Select “Property details” and confirm that the receiving page performs that action. Check any opening hours, dates or availability it displays.
- Test “Arrange a viewing” on a narrow phone screen. Check that text, forms and consent controls remain usable.
- Check “Area guide” and “Contact agent”. Remove destinations that are no longer maintained rather than leaving unexplained errors.
- Return to Pages and record the review date outside the public page. Make corrections in the editor, publish the updated version and repeat the affected checks.
Expected result
Every button reaches the destination its label promises. Track viewing requests per property code. Dashboard views and button clicks are activity counts, not unique people or guaranteed completed actions.
If something is wrong
An unavailable external destination must be corrected at its source or replaced in the page editor. A working preview does not prove that an external booking or checkout completes. Test that flow separately using its normal test process.
Withdrawn listings need an informative replacement destination. After an edit, confirm that the page is still published; Save draft deliberately removes it from public access.
Related steps
Build a holiday rental page
A guest needs check-in instructions after confirming a reservation. This guide creates a page that makes the next action clear.
Before you start
Sign in to ShortFreeURL and open Pages in the dashboard. A standalone page does not require a short domain or a paid link-shortening plan. Prepare the real destinations for Check availability, Arrival guide, House rules, Local recommendations. Example template links are placeholders and must be replaced.
Set up the content
- Choose the holiday rental template or Create page. Enter a title visitors will recognise.
- Put “Check availability” first. Give the destination a label that describes the action rather than “Click here”.
- Add “Arrival guide”, “House rules” and “Local recommendations”. Use the up/down controls to change their order.
- Use a text block for essential context, a heading to separate topics, and a contact block for a valid email or telephone link.
- Choose a layout and colours with readable contrast. Save draft, check the preview, and publish when the real destinations are ready.
Expected result
The published page has a stable /p/ address and clearly named actions. Open page takes you to the visitor-facing version. Share this address through welcome folder; customers do not need a ShortFreeURL account to view a published page.
If something is wrong
A draft is intentionally unavailable to the public. Publish the page to make it accessible. Invalid destination schemes are rejected; use a complete http/https address, mailto email link or tel telephone link. Save errors should be resolved before closing the editor.
Private access codes belong in authenticated messages. If you want to try another layout, duplicate the page and keep the copy as a draft until it is ready.
Related steps
Review a holiday rental page
Private access codes belong in authenticated messages. Use this review before sharing a new page and whenever its destinations change.
Before you start
Have the public page address, a phone, and the intended destination for each button ready. If the page is still a draft, publish only after checking the information. Keep any private customer, guest or client information out of the public content.
Check the journey
- Open the public page from welcome folder. Check that it loads without your dashboard session.
- Select “Check availability” and confirm that the receiving page performs that action. Check any opening hours, dates or availability it displays.
- Test “Arrival guide” on a narrow phone screen. Check that text, forms and consent controls remain usable.
- Check “House rules” and “Local recommendations”. Remove destinations that are no longer maintained rather than leaving unexplained errors.
- Return to Pages and record the review date outside the public page. Make corrections in the editor, publish the updated version and repeat the affected checks.
Expected result
Every button reaches the destination its label promises. Separate booking interest from existing-guest information. Dashboard views and button clicks are activity counts, not unique people or guaranteed completed actions.
If something is wrong
An unavailable external destination must be corrected at its source or replaced in the page editor. A working preview does not prove that an external booking or checkout completes. Test that flow separately using its normal test process.
Private access codes belong in authenticated messages. After an edit, confirm that the page is still published; Save draft deliberately removes it from public access.
Related steps
Build a tour guide page
A traveller needs the precise departure point before leaving their hotel. This guide creates a page that makes the next action clear.
Before you start
Sign in to ShortFreeURL and open Pages in the dashboard. A standalone page does not require a short domain or a paid link-shortening plan. Prepare the real destinations for Choose a tour, Meeting point, What to bring, Contact guide. Example template links are placeholders and must be replaced.
Set up the content
- Choose the tour guide template or Create page. Enter a title visitors will recognise.
- Put “Choose a tour” first. Give the destination a label that describes the action rather than “Click here”.
- Add “Meeting point”, “What to bring” and “Contact guide”. Use the up/down controls to change their order.
- Use a text block for essential context, a heading to separate topics, and a contact block for a valid email or telephone link.
- Choose a layout and colours with readable contrast. Save draft, check the preview, and publish when the real destinations are ready.
Expected result
The published page has a stable /p/ address and clearly named actions. Open page takes you to the visitor-facing version. Share this address through hotel reception card; customers do not need a ShortFreeURL account to view a published page.
If something is wrong
A draft is intentionally unavailable to the public. Publish the page to make it accessible. Invalid destination schemes are rejected; use a complete http/https address, mailto email link or tel telephone link. Save errors should be resolved before closing the editor.
A map for the wrong departure time can strand a guest. If you want to try another layout, duplicate the page and keep the copy as a draft until it is ready.
Related steps
Review a tour guide page
A map for the wrong departure time can strand a guest. Use this review before sharing a new page and whenever its destinations change.
Before you start
Have the public page address, a phone, and the intended destination for each button ready. If the page is still a draft, publish only after checking the information. Keep any private customer, guest or client information out of the public content.
Check the journey
- Open the public page from hotel reception card. Check that it loads without your dashboard session.
- Select “Choose a tour” and confirm that the receiving page performs that action. Check any opening hours, dates or availability it displays.
- Test “Meeting point” on a narrow phone screen. Check that text, forms and consent controls remain usable.
- Check “What to bring” and “Contact guide”. Remove destinations that are no longer maintained rather than leaving unexplained errors.
- Return to Pages and record the review date outside the public page. Make corrections in the editor, publish the updated version and repeat the affected checks.
Expected result
Every button reaches the destination its label promises. Measure tour enquiries by referring hotel. Dashboard views and button clicks are activity counts, not unique people or guaranteed completed actions.
If something is wrong
An unavailable external destination must be corrected at its source or replaced in the page editor. A working preview does not prove that an external booking or checkout completes. Test that flow separately using its normal test process.
A map for the wrong departure time can strand a guest. After an edit, confirm that the page is still published; Save draft deliberately removes it from public access.
Related steps
Build a travel adviser page
A traveller needs the scope of a planning service before submitting a request. This guide creates a page that makes the next action clear.
Before you start
Sign in to ShortFreeURL and open Pages in the dashboard. A standalone page does not require a short domain or a paid link-shortening plan. Prepare the real destinations for Request an itinerary, Destination ideas, Planning process, Contact adviser. Example template links are placeholders and must be replaced.
Set up the content
- Choose the travel adviser template or Create page. Enter a title visitors will recognise.
- Put “Request an itinerary” first. Give the destination a label that describes the action rather than “Click here”.
- Add “Destination ideas”, “Planning process” and “Contact adviser”. Use the up/down controls to change their order.
- Use a text block for essential context, a heading to separate topics, and a contact block for a valid email or telephone link.
- Choose a layout and colours with readable contrast. Save draft, check the preview, and publish when the real destinations are ready.
Expected result
The published page has a stable /p/ address and clearly named actions. Open page takes you to the visitor-facing version. Share this address through travel fair card; customers do not need a ShortFreeURL account to view a published page.
If something is wrong
A draft is intentionally unavailable to the public. Publish the page to make it accessible. Invalid destination schemes are rejected; use a complete http/https address, mailto email link or tel telephone link. Save errors should be resolved before closing the editor.
Avoid promising availability before suppliers confirm it. If you want to try another layout, duplicate the page and keep the copy as a draft until it is ready.
Related steps
Review a travel adviser page
Avoid promising availability before suppliers confirm it. Use this review before sharing a new page and whenever its destinations change.
Before you start
Have the public page address, a phone, and the intended destination for each button ready. If the page is still a draft, publish only after checking the information. Keep any private customer, guest or client information out of the public content.
Check the journey
- Open the public page from travel fair card. Check that it loads without your dashboard session.
- Select “Request an itinerary” and confirm that the receiving page performs that action. Check any opening hours, dates or availability it displays.
- Test “Destination ideas” on a narrow phone screen. Check that text, forms and consent controls remain usable.
- Check “Planning process” and “Contact adviser”. Remove destinations that are no longer maintained rather than leaving unexplained errors.
- Return to Pages and record the review date outside the public page. Make corrections in the editor, publish the updated version and repeat the affected checks.
Expected result
Every button reaches the destination its label promises. Review qualified itinerary requests rather than raw traffic. Dashboard views and button clicks are activity counts, not unique people or guaranteed completed actions.
If something is wrong
An unavailable external destination must be corrected at its source or replaced in the page editor. A working preview does not prove that an external booking or checkout completes. Test that flow separately using its normal test process.
Avoid promising availability before suppliers confirm it. After an edit, confirm that the page is still published; Save draft deliberately removes it from public access.
Related steps
Build a hotel page
A guest needs different information before booking and after arrival. This guide creates a page that makes the next action clear.
Before you start
Sign in to ShortFreeURL and open Pages in the dashboard. A standalone page does not require a short domain or a paid link-shortening plan. Prepare the real destinations for Reserve a room, Dining options, Guest services, Find the hotel. Example template links are placeholders and must be replaced.
Set up the content
- Choose the hotel template or Create page. Enter a title visitors will recognise.
- Put “Reserve a room” first. Give the destination a label that describes the action rather than “Click here”.
- Add “Dining options”, “Guest services” and “Find the hotel”. Use the up/down controls to change their order.
- Use a text block for essential context, a heading to separate topics, and a contact block for a valid email or telephone link.
- Choose a layout and colours with readable contrast. Save draft, check the preview, and publish when the real destinations are ready.
Expected result
The published page has a stable /p/ address and clearly named actions. Open page takes you to the visitor-facing version. Share this address through room information card; customers do not need a ShortFreeURL account to view a published page.
If something is wrong
A draft is intentionally unavailable to the public. Publish the page to make it accessible. Invalid destination schemes are rejected; use a complete http/https address, mailto email link or tel telephone link. Save errors should be resolved before closing the editor.
Public pages must not expose guest-specific booking references. If you want to try another layout, duplicate the page and keep the copy as a draft until it is ready.
Related steps
Review a hotel page
Public pages must not expose guest-specific booking references. Use this review before sharing a new page and whenever its destinations change.
Before you start
Have the public page address, a phone, and the intended destination for each button ready. If the page is still a draft, publish only after checking the information. Keep any private customer, guest or client information out of the public content.
Check the journey
- Open the public page from room information card. Check that it loads without your dashboard session.
- Select “Reserve a room” and confirm that the receiving page performs that action. Check any opening hours, dates or availability it displays.
- Test “Dining options” on a narrow phone screen. Check that text, forms and consent controls remain usable.
- Check “Guest services” and “Find the hotel”. Remove destinations that are no longer maintained rather than leaving unexplained errors.
- Return to Pages and record the review date outside the public page. Make corrections in the editor, publish the updated version and repeat the affected checks.
Expected result
Every button reaches the destination its label promises. Separate room-booking taps from in-house service requests. Dashboard views and button clicks are activity counts, not unique people or guaranteed completed actions.
If something is wrong
An unavailable external destination must be corrected at its source or replaced in the page editor. A working preview does not prove that an external booking or checkout completes. Test that flow separately using its normal test process.
Public pages must not expose guest-specific booking references. After an edit, confirm that the page is still published; Save draft deliberately removes it from public access.
Related steps
Build a repair shop page
A customer needs to know whether a device is supported before travelling. This guide creates a page that makes the next action clear.
Before you start
Sign in to ShortFreeURL and open Pages in the dashboard. A standalone page does not require a short domain or a paid link-shortening plan. Prepare the real destinations for Request a repair, Supported devices, Drop-off hours, Repair policy. Example template links are placeholders and must be replaced.
Set up the content
- Choose the repair shop template or Create page. Enter a title visitors will recognise.
- Put “Request a repair” first. Give the destination a label that describes the action rather than “Click here”.
- Add “Supported devices”, “Drop-off hours” and “Repair policy”. Use the up/down controls to change their order.
- Use a text block for essential context, a heading to separate topics, and a contact block for a valid email or telephone link.
- Choose a layout and colours with readable contrast. Save draft, check the preview, and publish when the real destinations are ready.
Expected result
The published page has a stable /p/ address and clearly named actions. Open page takes you to the visitor-facing version. Share this address through repair receipt; customers do not need a ShortFreeURL account to view a published page.
If something is wrong
A draft is intentionally unavailable to the public. Publish the page to make it accessible. Invalid destination schemes are rejected; use a complete http/https address, mailto email link or tel telephone link. Save errors should be resolved before closing the editor.
Do not expose device serial numbers through tracking tags. If you want to try another layout, duplicate the page and keep the copy as a draft until it is ready.
Related steps
Review a repair shop page
Do not expose device serial numbers through tracking tags. Use this review before sharing a new page and whenever its destinations change.
Before you start
Have the public page address, a phone, and the intended destination for each button ready. If the page is still a draft, publish only after checking the information. Keep any private customer, guest or client information out of the public content.
Check the journey
- Open the public page from repair receipt. Check that it loads without your dashboard session.
- Select “Request a repair” and confirm that the receiving page performs that action. Check any opening hours, dates or availability it displays.
- Test “Supported devices” on a narrow phone screen. Check that text, forms and consent controls remain usable.
- Check “Drop-off hours” and “Repair policy”. Remove destinations that are no longer maintained rather than leaving unexplained errors.
- Return to Pages and record the review date outside the public page. Make corrections in the editor, publish the updated version and repeat the affected checks.
Expected result
Every button reaches the destination its label promises. Measure eligible repair enquiries. Dashboard views and button clicks are activity counts, not unique people or guaranteed completed actions.
If something is wrong
An unavailable external destination must be corrected at its source or replaced in the page editor. A working preview does not prove that an external booking or checkout completes. Test that flow separately using its normal test process.
Do not expose device serial numbers through tracking tags. After an edit, confirm that the page is still published; Save draft deliberately removes it from public access.
Related steps
Build a plumber page
A household needs to know whether an urgent call can be answered. This guide creates a page that makes the next action clear.
Before you start
Sign in to ShortFreeURL and open Pages in the dashboard. A standalone page does not require a short domain or a paid link-shortening plan. Prepare the real destinations for Request service, Service area, Hours, Common questions. Example template links are placeholders and must be replaced.
Set up the content
- Choose the plumber template or Create page. Enter a title visitors will recognise.
- Put “Request service” first. Give the destination a label that describes the action rather than “Click here”.
- Add “Service area”, “Hours” and “Common questions”. Use the up/down controls to change their order.
- Use a text block for essential context, a heading to separate topics, and a contact block for a valid email or telephone link.
- Choose a layout and colours with readable contrast. Save draft, check the preview, and publish when the real destinations are ready.
Expected result
The published page has a stable /p/ address and clearly named actions. Open page takes you to the visitor-facing version. Share this address through vehicle signage; customers do not need a ShortFreeURL account to view a published page.
If something is wrong
A draft is intentionally unavailable to the public. Publish the page to make it accessible. Invalid destination schemes are rejected; use a complete http/https address, mailto email link or tel telephone link. Save errors should be resolved before closing the editor.
Do not advertise round-the-clock service unless it is staffed. If you want to try another layout, duplicate the page and keep the copy as a draft until it is ready.
Related steps
Review a plumber page
Do not advertise round-the-clock service unless it is staffed. Use this review before sharing a new page and whenever its destinations change.
Before you start
Have the public page address, a phone, and the intended destination for each button ready. If the page is still a draft, publish only after checking the information. Keep any private customer, guest or client information out of the public content.
Check the journey
- Open the public page from vehicle signage. Check that it loads without your dashboard session.
- Select “Request service” and confirm that the receiving page performs that action. Check any opening hours, dates or availability it displays.
- Test “Service area” on a narrow phone screen. Check that text, forms and consent controls remain usable.
- Check “Hours” and “Common questions”. Remove destinations that are no longer maintained rather than leaving unexplained errors.
- Return to Pages and record the review date outside the public page. Make corrections in the editor, publish the updated version and repeat the affected checks.
Expected result
Every button reaches the destination its label promises. Track service-area enquiries and missed-contact patterns. Dashboard views and button clicks are activity counts, not unique people or guaranteed completed actions.
If something is wrong
An unavailable external destination must be corrected at its source or replaced in the page editor. A working preview does not prove that an external booking or checkout completes. Test that flow separately using its normal test process.
Do not advertise round-the-clock service unless it is staffed. After an edit, confirm that the page is still published; Save draft deliberately removes it from public access.
Related steps
Build a electrician page
A property owner needs the service scope before describing a job. This guide creates a page that makes the next action clear.
Before you start
Sign in to ShortFreeURL and open Pages in the dashboard. A standalone page does not require a short domain or a paid link-shortening plan. Prepare the real destinations for Book an assessment, Services, Qualifications, Contact. Example template links are placeholders and must be replaced.
Set up the content
- Choose the electrician template or Create page. Enter a title visitors will recognise.
- Put “Book an assessment” first. Give the destination a label that describes the action rather than “Click here”.
- Add “Services”, “Qualifications” and “Contact”. Use the up/down controls to change their order.
- Use a text block for essential context, a heading to separate topics, and a contact block for a valid email or telephone link.
- Choose a layout and colours with readable contrast. Save draft, check the preview, and publish when the real destinations are ready.
Expected result
The published page has a stable /p/ address and clearly named actions. Open page takes you to the visitor-facing version. Share this address through trade business card; customers do not need a ShortFreeURL account to view a published page.
If something is wrong
A draft is intentionally unavailable to the public. Publish the page to make it accessible. Invalid destination schemes are rejected; use a complete http/https address, mailto email link or tel telephone link. Save errors should be resolved before closing the editor.
Qualification claims should match current verified credentials. If you want to try another layout, duplicate the page and keep the copy as a draft until it is ready.
Related steps
Review a electrician page
Qualification claims should match current verified credentials. Use this review before sharing a new page and whenever its destinations change.
Before you start
Have the public page address, a phone, and the intended destination for each button ready. If the page is still a draft, publish only after checking the information. Keep any private customer, guest or client information out of the public content.
Check the journey
- Open the public page from trade business card. Check that it loads without your dashboard session.
- Select “Book an assessment” and confirm that the receiving page performs that action. Check any opening hours, dates or availability it displays.
- Test “Services” on a narrow phone screen. Check that text, forms and consent controls remain usable.
- Check “Qualifications” and “Contact”. Remove destinations that are no longer maintained rather than leaving unexplained errors.
- Return to Pages and record the review date outside the public page. Make corrections in the editor, publish the updated version and repeat the affected checks.
Expected result
Every button reaches the destination its label promises. Distinguish quote enquiries from general questions. Dashboard views and button clicks are activity counts, not unique people or guaranteed completed actions.
If something is wrong
An unavailable external destination must be corrected at its source or replaced in the page editor. A working preview does not prove that an external booking or checkout completes. Test that flow separately using its normal test process.
Qualification claims should match current verified credentials. After an edit, confirm that the page is still published; Save draft deliberately removes it from public access.
Related steps
Build a landscaper page
A homeowner needs examples of projects with a similar scale. This guide creates a page that makes the next action clear.
Before you start
Sign in to ShortFreeURL and open Pages in the dashboard. A standalone page does not require a short domain or a paid link-shortening plan. Prepare the real destinations for Request a visit, Garden projects, Maintenance plans, Service area. Example template links are placeholders and must be replaced.
Set up the content
- Choose the landscaper template or Create page. Enter a title visitors will recognise.
- Put “Request a visit” first. Give the destination a label that describes the action rather than “Click here”.
- Add “Garden projects”, “Maintenance plans” and “Service area”. Use the up/down controls to change their order.
- Use a text block for essential context, a heading to separate topics, and a contact block for a valid email or telephone link.
- Choose a layout and colours with readable contrast. Save draft, check the preview, and publish when the real destinations are ready.
Expected result
The published page has a stable /p/ address and clearly named actions. Open page takes you to the visitor-facing version. Share this address through site board; customers do not need a ShortFreeURL account to view a published page.
If something is wrong
A draft is intentionally unavailable to the public. Publish the page to make it accessible. Invalid destination schemes are rejected; use a complete http/https address, mailto email link or tel telephone link. Save errors should be resolved before closing the editor.
Seasonal images should not imply year-round availability. If you want to try another layout, duplicate the page and keep the copy as a draft until it is ready.
Related steps
Review a landscaper page
Seasonal images should not imply year-round availability. Use this review before sharing a new page and whenever its destinations change.
Before you start
Have the public page address, a phone, and the intended destination for each button ready. If the page is still a draft, publish only after checking the information. Keep any private customer, guest or client information out of the public content.
Check the journey
- Open the public page from site board. Check that it loads without your dashboard session.
- Select “Request a visit” and confirm that the receiving page performs that action. Check any opening hours, dates or availability it displays.
- Test “Garden projects” on a narrow phone screen. Check that text, forms and consent controls remain usable.
- Check “Maintenance plans” and “Service area”. Remove destinations that are no longer maintained rather than leaving unexplained errors.
- Return to Pages and record the review date outside the public page. Make corrections in the editor, publish the updated version and repeat the affected checks.
Expected result
Every button reaches the destination its label promises. Compare maintenance leads with new-project requests. Dashboard views and button clicks are activity counts, not unique people or guaranteed completed actions.
If something is wrong
An unavailable external destination must be corrected at its source or replaced in the page editor. A working preview does not prove that an external booking or checkout completes. Test that flow separately using its normal test process.
Seasonal images should not imply year-round availability. After an edit, confirm that the page is still published; Save draft deliberately removes it from public access.
Related steps
Build a cleaning company page
A customer needs to know which tasks are included in a quoted service. This guide creates a page that makes the next action clear.
Before you start
Sign in to ShortFreeURL and open Pages in the dashboard. A standalone page does not require a short domain or a paid link-shortening plan. Prepare the real destinations for Get an estimate, Service checklist, Available areas, Contact team. Example template links are placeholders and must be replaced.
Set up the content
- Choose the cleaning company template or Create page. Enter a title visitors will recognise.
- Put “Get an estimate” first. Give the destination a label that describes the action rather than “Click here”.
- Add “Service checklist”, “Available areas” and “Contact team”. Use the up/down controls to change their order.
- Use a text block for essential context, a heading to separate topics, and a contact block for a valid email or telephone link.
- Choose a layout and colours with readable contrast. Save draft, check the preview, and publish when the real destinations are ready.
Expected result
The published page has a stable /p/ address and clearly named actions. Open page takes you to the visitor-facing version. Share this address through door hanger; customers do not need a ShortFreeURL account to view a published page.
If something is wrong
A draft is intentionally unavailable to the public. Publish the page to make it accessible. Invalid destination schemes are rejected; use a complete http/https address, mailto email link or tel telephone link. Save errors should be resolved before closing the editor.
Do not hide exclusions behind a generic booking button. If you want to try another layout, duplicate the page and keep the copy as a draft until it is ready.
Related steps
Review a cleaning company page
Do not hide exclusions behind a generic booking button. Use this review before sharing a new page and whenever its destinations change.
Before you start
Have the public page address, a phone, and the intended destination for each button ready. If the page is still a draft, publish only after checking the information. Keep any private customer, guest or client information out of the public content.
Check the journey
- Open the public page from door hanger. Check that it loads without your dashboard session.
- Select “Get an estimate” and confirm that the receiving page performs that action. Check any opening hours, dates or availability it displays.
- Test “Service checklist” on a narrow phone screen. Check that text, forms and consent controls remain usable.
- Check “Available areas” and “Contact team”. Remove destinations that are no longer maintained rather than leaving unexplained errors.
- Return to Pages and record the review date outside the public page. Make corrections in the editor, publish the updated version and repeat the affected checks.
Expected result
Every button reaches the destination its label promises. Measure estimate requests by service type. Dashboard views and button clicks are activity counts, not unique people or guaranteed completed actions.
If something is wrong
An unavailable external destination must be corrected at its source or replaced in the page editor. A working preview does not prove that an external booking or checkout completes. Test that flow separately using its normal test process.
Do not hide exclusions behind a generic booking button. After an edit, confirm that the page is still published; Save draft deliberately removes it from public access.
Related steps
Build a software consultant page
A buyer needs evidence relevant to their technical problem. This guide creates a page that makes the next action clear.
Before you start
Sign in to ShortFreeURL and open Pages in the dashboard. A standalone page does not require a short domain or a paid link-shortening plan. Prepare the real destinations for Schedule a discovery call, Project examples, Services, Technical writing. Example template links are placeholders and must be replaced.
Set up the content
- Choose the software consultant template or Create page. Enter a title visitors will recognise.
- Put “Schedule a discovery call” first. Give the destination a label that describes the action rather than “Click here”.
- Add “Project examples”, “Services” and “Technical writing”. Use the up/down controls to change their order.
- Use a text block for essential context, a heading to separate topics, and a contact block for a valid email or telephone link.
- Choose a layout and colours with readable contrast. Save draft, check the preview, and publish when the real destinations are ready.
Expected result
The published page has a stable /p/ address and clearly named actions. Open page takes you to the visitor-facing version. Share this address through conference profile; customers do not need a ShortFreeURL account to view a published page.
If something is wrong
A draft is intentionally unavailable to the public. Publish the page to make it accessible. Invalid destination schemes are rejected; use a complete http/https address, mailto email link or tel telephone link. Save errors should be resolved before closing the editor.
An example project must not reveal a client's confidential systems. If you want to try another layout, duplicate the page and keep the copy as a draft until it is ready.
Related steps
Review a software consultant page
An example project must not reveal a client's confidential systems. Use this review before sharing a new page and whenever its destinations change.
Before you start
Have the public page address, a phone, and the intended destination for each button ready. If the page is still a draft, publish only after checking the information. Keep any private customer, guest or client information out of the public content.
Check the journey
- Open the public page from conference profile. Check that it loads without your dashboard session.
- Select “Schedule a discovery call” and confirm that the receiving page performs that action. Check any opening hours, dates or availability it displays.
- Test “Project examples” on a narrow phone screen. Check that text, forms and consent controls remain usable.
- Check “Services” and “Technical writing”. Remove destinations that are no longer maintained rather than leaving unexplained errors.
- Return to Pages and record the review date outside the public page. Make corrections in the editor, publish the updated version and repeat the affected checks.
Expected result
Every button reaches the destination its label promises. Review discovery calls with a clear problem statement. Dashboard views and button clicks are activity counts, not unique people or guaranteed completed actions.
If something is wrong
An unavailable external destination must be corrected at its source or replaced in the page editor. A working preview does not prove that an external booking or checkout completes. Test that flow separately using its normal test process.
An example project must not reveal a client's confidential systems. After an edit, confirm that the page is still published; Save draft deliberately removes it from public access.
Related steps
Build an accountant page
A business owner needs a secure document handover route. This guide creates a page that makes the next action clear.
Before you start
Sign in to ShortFreeURL and open Pages in the dashboard. A standalone page does not require a short domain or a paid link-shortening plan. Prepare the real destinations for Book an introduction, Service scope, Document checklist, Contact office. Example template links are placeholders and must be replaced.
Set up the content
- Choose the accountant template or Create page. Enter a title visitors will recognise.
- Put “Book an introduction” first. Give the destination a label that describes the action rather than “Click here”.
- Add “Service scope”, “Document checklist” and “Contact office”. Use the up/down controls to change their order.
- Use a text block for essential context, a heading to separate topics, and a contact block for a valid email or telephone link.
- Choose a layout and colours with readable contrast. Save draft, check the preview, and publish when the real destinations are ready.
Expected result
The published page has a stable /p/ address and clearly named actions. Open page takes you to the visitor-facing version. Share this address through client welcome email; customers do not need a ShortFreeURL account to view a published page.
If something is wrong
A draft is intentionally unavailable to the public. Publish the page to make it accessible. Invalid destination schemes are rejected; use a complete http/https address, mailto email link or tel telephone link. Save errors should be resolved before closing the editor.
Financial records should never be attached to public page links. If you want to try another layout, duplicate the page and keep the copy as a draft until it is ready.
Related steps
Review an accountant page
Financial records should never be attached to public page links. Use this review before sharing a new page and whenever its destinations change.
Before you start
Have the public page address, a phone, and the intended destination for each button ready. If the page is still a draft, publish only after checking the information. Keep any private customer, guest or client information out of the public content.
Check the journey
- Open the public page from client welcome email. Check that it loads without your dashboard session.
- Select “Book an introduction” and confirm that the receiving page performs that action. Check any opening hours, dates or availability it displays.
- Test “Service scope” on a narrow phone screen. Check that text, forms and consent controls remain usable.
- Check “Document checklist” and “Contact office”. Remove destinations that are no longer maintained rather than leaving unexplained errors.
- Return to Pages and record the review date outside the public page. Make corrections in the editor, publish the updated version and repeat the affected checks.
Expected result
Every button reaches the destination its label promises. Measure appointment requests without collecting financial details. Dashboard views and button clicks are activity counts, not unique people or guaranteed completed actions.
If something is wrong
An unavailable external destination must be corrected at its source or replaced in the page editor. A working preview does not prove that an external booking or checkout completes. Test that flow separately using its normal test process.
Financial records should never be attached to public page links. After an edit, confirm that the page is still published; Save draft deliberately removes it from public access.
Related steps
Build a career coach page
A job seeker needs to understand the session deliverable. This guide creates a page that makes the next action clear.
Before you start
Sign in to ShortFreeURL and open Pages in the dashboard. A standalone page does not require a short domain or a paid link-shortening plan. Prepare the real destinations for Introduction call, Coaching options, Preparation guide, Resources. Example template links are placeholders and must be replaced.
Set up the content
- Choose the career coach template or Create page. Enter a title visitors will recognise.
- Put “Introduction call” first. Give the destination a label that describes the action rather than “Click here”.
- Add “Coaching options”, “Preparation guide” and “Resources”. Use the up/down controls to change their order.
- Use a text block for essential context, a heading to separate topics, and a contact block for a valid email or telephone link.
- Choose a layout and colours with readable contrast. Save draft, check the preview, and publish when the real destinations are ready.
Expected result
The published page has a stable /p/ address and clearly named actions. Open page takes you to the visitor-facing version. Share this address through workshop resource card; customers do not need a ShortFreeURL account to view a published page.
If something is wrong
A draft is intentionally unavailable to the public. Publish the page to make it accessible. Invalid destination schemes are rejected; use a complete http/https address, mailto email link or tel telephone link. Save errors should be resolved before closing the editor.
Do not promise interviews or job offers as guaranteed outcomes. If you want to try another layout, duplicate the page and keep the copy as a draft until it is ready.
Related steps
Review a career coach page
Do not promise interviews or job offers as guaranteed outcomes. Use this review before sharing a new page and whenever its destinations change.
Before you start
Have the public page address, a phone, and the intended destination for each button ready. If the page is still a draft, publish only after checking the information. Keep any private customer, guest or client information out of the public content.
Check the journey
- Open the public page from workshop resource card. Check that it loads without your dashboard session.
- Select “Introduction call” and confirm that the receiving page performs that action. Check any opening hours, dates or availability it displays.
- Test “Coaching options” on a narrow phone screen. Check that text, forms and consent controls remain usable.
- Check “Preparation guide” and “Resources”. Remove destinations that are no longer maintained rather than leaving unexplained errors.
- Return to Pages and record the review date outside the public page. Make corrections in the editor, publish the updated version and repeat the affected checks.
Expected result
Every button reaches the destination its label promises. Separate resource downloads from consultation bookings. Dashboard views and button clicks are activity counts, not unique people or guaranteed completed actions.
If something is wrong
An unavailable external destination must be corrected at its source or replaced in the page editor. A working preview does not prove that an external booking or checkout completes. Test that flow separately using its normal test process.
Do not promise interviews or job offers as guaranteed outcomes. After an edit, confirm that the page is still published; Save draft deliberately removes it from public access.
Related steps
Build an online shop page
A shopper needs delivery conditions before deciding to buy. This guide creates a page that makes the next action clear.
Before you start
Sign in to ShortFreeURL and open Pages in the dashboard. A standalone page does not require a short domain or a paid link-shortening plan. Prepare the real destinations for New arrivals, Shop collections, Delivery information, Customer support. Example template links are placeholders and must be replaced.
Set up the content
- Choose the online shop template or Create page. Enter a title visitors will recognise.
- Put “New arrivals” first. Give the destination a label that describes the action rather than “Click here”.
- Add “Shop collections”, “Delivery information” and “Customer support”. Use the up/down controls to change their order.
- Use a text block for essential context, a heading to separate topics, and a contact block for a valid email or telephone link.
- Choose a layout and colours with readable contrast. Save draft, check the preview, and publish when the real destinations are ready.
Expected result
The published page has a stable /p/ address and clearly named actions. Open page takes you to the visitor-facing version. Share this address through parcel insert; customers do not need a ShortFreeURL account to view a published page.
If something is wrong
A draft is intentionally unavailable to the public. Publish the page to make it accessible. Invalid destination schemes are rejected; use a complete http/https address, mailto email link or tel telephone link. Save errors should be resolved before closing the editor.
An out-of-stock product should lead to a useful explanation. If you want to try another layout, duplicate the page and keep the copy as a draft until it is ready.
Related steps
Review an online shop page
An out-of-stock product should lead to a useful explanation. Use this review before sharing a new page and whenever its destinations change.
Before you start
Have the public page address, a phone, and the intended destination for each button ready. If the page is still a draft, publish only after checking the information. Keep any private customer, guest or client information out of the public content.
Check the journey
- Open the public page from parcel insert. Check that it loads without your dashboard session.
- Select “New arrivals” and confirm that the receiving page performs that action. Check any opening hours, dates or availability it displays.
- Test “Shop collections” on a narrow phone screen. Check that text, forms and consent controls remain usable.
- Check “Delivery information” and “Customer support”. Remove destinations that are no longer maintained rather than leaving unexplained errors.
- Return to Pages and record the review date outside the public page. Make corrections in the editor, publish the updated version and repeat the affected checks.
Expected result
Every button reaches the destination its label promises. Track product visits and confirmed purchases independently. Dashboard views and button clicks are activity counts, not unique people or guaranteed completed actions.
If something is wrong
An unavailable external destination must be corrected at its source or replaced in the page editor. A working preview does not prove that an external booking or checkout completes. Test that flow separately using its normal test process.
An out-of-stock product should lead to a useful explanation. After an edit, confirm that the page is still published; Save draft deliberately removes it from public access.
Related steps
Developer workflows
Listing folders in a domain
1. Prepare access
Create a scoped key in Dashboard → Integrations & API → API. Keep the key in a server environment variable.
2. Select the resource
Select your domain and link in the dashboard. Replace example IDs and URLs with your own.
3. Review the request
List folders before assigning a folder ID to a link. A folder must belong to the same domain as the link.
GET /api/links/folders/42
This is a read/delete request without a JSON body.
4. Run and verify
Read the HTTP status and returned fields. Reopen the record to confirm writes; avoid duplicate retries after a timeout.
Full illustrated guide
Open the guide with screenshots, language examples and troubleshooting
Creating a domain folder
1. Prepare access
Create a scoped key in Dashboard → Integrations & API → API. Keep the key in a server environment variable.
2. Select the resource
Select your domain and link in the dashboard. Replace example IDs and URLs with your own.
3. Review the request
This uses the same folder quota and write permissions as your dashboard. Read the folder list again to confirm it was saved.
POST /api/links/folders
{
  "domainId": 42,
  "name": "Campaigns"
}
4. Run and verify
Read the HTTP status and returned fields. Reopen the record to confirm writes; avoid duplicate retries after a timeout.
Full illustrated guide
Open the guide with screenshots, language examples and troubleshooting
Getting folder details
1. Prepare access
Create a scoped key in Dashboard → Integrations & API → API. Keep the key in a server environment variable.
2. Select the resource
Select your domain and link in the dashboard. Replace example IDs and URLs with your own.
3. Review the request
Replace both IDs. A folder from another domain is not returned.
GET /api/links/folders/42/7
This is a read/delete request without a JSON body.
4. Run and verify
Read the HTTP status and returned fields. Reopen the record to confirm writes; avoid duplicate retries after a timeout.
Full illustrated guide
Open the guide with screenshots, language examples and troubleshooting
Reading Open Graph properties
1. Prepare access
Create a scoped key in Dashboard → Integrations & API → API. Keep the key in a server environment variable.
2. Select the resource
Select your domain and link in the dashboard. Replace example IDs and URLs with your own.
3. Review the request
Read saved Open Graph, Twitter and app-link metadata for this link. The domain ID must match the link.
GET /api/links/opengraph/42/918
This is a read/delete request without a JSON body.
4. Run and verify
Read the HTTP status and returned fields. Reopen the record to confirm writes; avoid duplicate retries after a timeout.
Full illustrated guide
Open the guide with screenshots, language examples and troubleshooting
Finding a link by its path
1. Prepare access
Create a scoped key in Dashboard → Integrations & API → API. Keep the key in a server environment variable.
2. Select the resource
Select your domain and link in the dashboard. Replace example IDs and URLs with your own.
3. Review the request
Use the short path without a leading slash, and select the domain where it exists.
GET /api/links/by-path?domainId=42&path=launch
This is a read/delete request without a JSON body.
4. Run and verify
Read the HTTP status and returned fields. Reopen the record to confirm writes; avoid duplicate retries after a timeout.
Full illustrated guide
Open the guide with screenshots, language examples and troubleshooting
Finding every link for a destination
1. Prepare access
Create a scoped key in Dashboard → Integrations & API → API. Keep the key in a server environment variable.
2. Select the resource
Select your domain and link in the dashboard. Replace example IDs and URLs with your own.
3. Review the request
This returns duplicates with the same exact destination. Encode originalURL and paginate with limit and offset.
GET /api/links/by-original-urls?domainId=42&originalURL=https%3A%2F%2Fexample.com%2Flaunch&limit=20
This is a read/delete request without a JSON body.
4. Run and verify
Read the HTTP status and returned fields. Reopen the record to confirm writes; avoid duplicate retries after a timeout.
Full illustrated guide
Open the guide with screenshots, language examples and troubleshooting
Adding a domain
1. Prepare access
Create a scoped key in Dashboard → Integrations & API → API. Keep the key in a server environment variable.
2. Select the resource
Select your domain and link in the dashboard. Replace example IDs and URLs with your own.
3. Review the request
Use a domain you control. Read the returned DNS instructions, add the records at your DNS provider, then verify the domain. Links become available after DNS and SSL configuration succeeds.
POST /api/domains
{
  "mode": "own",
  "hostname": "go.example.com"
}
4. Run and verify
Read the HTTP status and returned fields. Reopen the record to confirm writes; avoid duplicate retries after a timeout.
Full illustrated guide
Open the guide with screenshots, language examples and troubleshooting
Click totals for domain links
1. Prepare access
Create a scoped key in Dashboard → Integrations & API → API. Keep the key in a server environment variable.
2. Select the resource
Select your domain and link in the dashboard. Replace example IDs and URLs with your own.
3. Review the request
Read-only keys can run this POST report. Counts are grouped by link within your reporting period.
POST /statistics/domain/42/link_clicks
{
  "period": "last30",
  "limit": 25,
  "offset": 0
}
4. Run and verify
Read the HTTP status and returned fields. Reopen the record to confirm writes; avoid duplicate retries after a timeout.
Full illustrated guide
Open the guide with screenshots, language examples and troubleshooting
Deleting a domain
1. Prepare access
Create a scoped key in Dashboard → Integrations & API → API. Keep the key in a server environment variable.
2. Select the resource
Select your domain and link in the dashboard. Replace example IDs and URLs with your own.
3. Review the request
Check the domain and its links before deletion. Export any records you need first. This request changes your workspace.
DELETE /api/domains/42
This is a read/delete request without a JSON body.
4. Run and verify
Read the HTTP status and returned fields. Reopen the record to confirm writes; avoid duplicate retries after a timeout.
Full illustrated guide
Open the guide with screenshots, language examples and troubleshooting
Reading raw domain clicks
1. Prepare access
Create a scoped key in Dashboard → Integrations & API → API. Keep the key in a server environment variable.
2. Select the resource
Select your domain and link in the dashboard. Replace example IDs and URLs with your own.
3. Review the request
Use pagination for click events. Domain IP masking applies to the result. Protect any exported visitor data.
POST /statistics/domain/42/last_clicks
{
  "period": "last30",
  "limit": 20,
  "offset": 0
}
4. Run and verify
Read the HTTP status and returned fields. Reopen the record to confirm writes; avoid duplicate retries after a timeout.
Full illustrated guide
Open the guide with screenshots, language examples and troubleshooting
Updating a domain
1. Prepare access
Create a scoped key in Dashboard → Integrations & API → API. Keep the key in a server environment variable.
2. Select the resource
Select your domain and link in the dashboard. Replace example IDs and URLs with your own.
3. Review the request
Send only the settings you intend to change. Read the domain again to verify the saved configuration.
POST /api/domains/42/settings
{
  "root_redirect": "https://example.com",
  "redirect_404": "https://example.com/not-found"
}
4. Run and verify
Read the HTTP status and returned fields. Reopen the record to confirm writes; avoid duplicate retries after a timeout.
Full illustrated guide
Open the guide with screenshots, language examples and troubleshooting
Domain statistics by interval
1. Prepare access
Create a scoped key in Dashboard → Integrations & API → API. Keep the key in a server environment variable.
2. Select the resource
Select your domain and link in the dashboard. Replace example IDs and URLs with your own.
3. Review the request
Choose hour, day, week or month. Buckets use UTC and the plan retention window. Empty series mean no matching tracked clicks.
POST /statistics/domain/42/by_interval
{
  "period": "last30",
  "interval": "day"
}
4. Run and verify
Read the HTTP status and returned fields. Reopen the record to confirm writes; avoid duplicate retries after a timeout.
Full illustrated guide
Open the guide with screenshots, language examples and troubleshooting
Getting a list of domains
1. Prepare access
Create a scoped key in Dashboard → Integrations & API → API. Keep the key in a server environment variable.
2. Select the resource
Select your domain and link in the dashboard. Replace example IDs and URLs with your own.
3. Review the request
Use the returned domain ID when creating links. A connected domain may still require DNS verification.
GET /api/domains
This is a read/delete request without a JSON body.
4. Run and verify
Read the HTTP status and returned fields. Reopen the record to confirm writes; avoid duplicate retries after a timeout.
Full illustrated guide
Open the guide with screenshots, language examples and troubleshooting
Top values by column and interval
1. Prepare access
Create a scoped key in Dashboard → Integrations & API → API. Keep the key in a server environment variable.
2. Select the resource
Select your domain and link in the dashboard. Replace example IDs and URLs with your own.
3. Review the request
Compare top values across time buckets. Use include and exclude dimension arrays when your plan supports advanced filters.
POST /statistics/domain/42/top_by_interval
{
  "period": "last30",
  "column": "country",
  "interval": "day",
  "limit": 10
}
4. Run and verify
Read the HTTP status and returned fields. Reopen the record to confirm writes; avoid duplicate retries after a timeout.
Full illustrated guide
Open the guide with screenshots, language examples and troubleshooting
Creating your first short link
1. Prepare access
Create a scoped key in Dashboard → Integrations & API → API. Keep the key in a server environment variable.
2. Select the resource
Select your domain and link in the dashboard. Replace example IDs and URLs with your own.
3. Review the request
Replace the example domain ID with your own. Save the returned link ID for updates and analytics.
POST /api/links
{
  "domainId": 42,
  "original_url": "https://example.com/launch",
  "path": "launch"
}
4. Run and verify
Read the HTTP status and returned fields. Reopen the record to confirm writes; avoid duplicate retries after a timeout.
Full illustrated guide
Open the guide with screenshots, language examples and troubleshooting
Top values for a link
1. Prepare access
Create a scoped key in Dashboard → Integrations & API → API. Keep the key in a server environment variable.
2. Select the resource
Select your domain and link in the dashboard. Replace example IDs and URLs with your own.
3. Review the request
Read actual top country counts for this link. You can also choose browser, device, campaign and other documented dimensions.
POST /statistics/link/918/top
{
  "period": "last30",
  "column": "country",
  "limit": 10
}
4. Run and verify
Read the HTTP status and returned fields. Reopen the record to confirm writes; avoid duplicate retries after a timeout.
Full illustrated guide
Open the guide with screenshots, language examples and troubleshooting
High volume link creation
1. Prepare access
Create a scoped key in Dashboard → Integrations & API → API. Keep the key in a server environment variable.
2. Select the resource
Select your domain and link in the dashboard. Replace example IDs and URLs with your own.
3. Review the request
Inspect every item in the response: a batch may contain successful links and item errors. Retry failed items only and respect plan quotas and rate limits.
POST /api/links/bulk
{
  "domainId": 42,
  "links": [
    {
      "original_url": "https://example.com/one"
    },
    {
      "original_url": "https://example.com/two"
    }
  ]
}
4. Run and verify
Read the HTTP status and returned fields. Reopen the record to confirm writes; avoid duplicate retries after a timeout.
Full illustrated guide
Open the guide with screenshots, language examples and troubleshooting
Link statistics by interval
1. Prepare access
Create a scoped key in Dashboard → Integrations & API → API. Keep the key in a server environment variable.
2. Select the resource
Select your domain and link in the dashboard. Replace example IDs and URLs with your own.
3. Review the request
This is a reporting POST, not a mutation. A read-only key can use it; the link must belong to its permitted domain.
POST /statistics/link/918/by_interval
{
  "period": "last30",
  "interval": "day"
}
4. Run and verify
Read the HTTP status and returned fields. Reopen the record to confirm writes; avoid duplicate retries after a timeout.
Full illustrated guide
Open the guide with screenshots, language examples and troubleshooting
Creating links from JavaScript
1. Prepare access
Create a scoped key in Dashboard → Integrations & API → API. Keep the key in a server environment variable.
2. Select the resource
Select your domain and link in the dashboard. Replace example IDs and URLs with your own.
3. Review the request
Use the Node example on your backend. Do not place a secret organization key in public JavaScript. Browser integrations should use a restricted create-only key or your own authenticated backend.
POST /api/links
{
  "domainId": 42,
  "original_url": "https://example.com"
}
4. Run and verify
Read the HTTP status and returned fields. Reopen the record to confirm writes; avoid duplicate retries after a timeout.
Full illustrated guide
Open the guide with screenshots, language examples and troubleshooting
Clearing domain statistics
1. Prepare access
Create a scoped key in Dashboard → Integrations & API → API. Keep the key in a server environment variable.
2. Select the resource
Select your domain and link in the dashboard. Replace example IDs and URLs with your own.
3. Review the request
This permanently clears clicks and conversions and resets link counters. Export needed reports first. Requires admin or owner role, a write-capable key and matching confirm ID.
DELETE /statistics/domain/42/statistics?confirm=42
This is a read/delete request without a JSON body.
4. Run and verify
Read the HTTP status and returned fields. Reopen the record to confirm writes; avoid duplicate retries after a timeout.
Full illustrated guide
Open the guide with screenshots, language examples and troubleshooting
Creating links from a browser
1. Prepare access
Create a scoped key in Dashboard → Integrations & API → API. Keep the key in a server environment variable.
2. Select the resource
Select your domain and link in the dashboard. Replace example IDs and URLs with your own.
3. Review the request
Use the ShortFreeURL browser extension from Dashboard → Browser extension. Configure the workspace URL and a create-only key; choose the active tab to shorten. Never put an API key in the address bar.
POST /api/links
{
  "domainId": 42,
  "original_url": "https://example.com"
}
4. Run and verify
Read the HTTP status and returned fields. Reopen the record to confirm writes; avoid duplicate retries after a timeout.
Full illustrated guide
Open the guide with screenshots, language examples and troubleshooting
Updating a link slug
1. Prepare access
Create a scoped key in Dashboard → Integrations & API → API. Keep the key in a server environment variable.
2. Select the resource
Select your domain and link in the dashboard. Replace example IDs and URLs with your own.
3. Review the request
Choose an available slug. Changing a slug changes the public URL, so update any places that distribute it.
POST /api/links/918
{
  "path": "summer-launch"
}
4. Run and verify
Read the HTTP status and returned fields. Reopen the record to confirm writes; avoid duplicate retries after a timeout.
Full illustrated guide
Open the guide with screenshots, language examples and troubleshooting
Archiving a link
1. Prepare access
Create a scoped key in Dashboard → Integrations & API → API. Keep the key in a server environment variable.
2. Select the resource
Select your domain and link in the dashboard. Replace example IDs and URLs with your own.
3. Review the request
Archive a link to remove it from the default library view. Archive is separate from expiration and deletion.
POST /api/links/918/archive
{}4. Run and verify
Read the HTTP status and returned fields. Reopen the record to confirm writes; avoid duplicate retries after a timeout.
Full illustrated guide
Open the guide with screenshots, language examples and troubleshooting
Unarchiving a link
1. Prepare access
Create a scoped key in Dashboard → Integrations & API → API. Keep the key in a server environment variable.
2. Select the resource
Select your domain and link in the dashboard. Replace example IDs and URLs with your own.
3. Review the request
Restore an archived link to the normal library. Verify its destination and lifecycle settings before distributing it.
POST /api/links/918/unarchive
{}4. Run and verify
Read the HTTP status and returned fields. Reopen the record to confirm writes; avoid duplicate retries after a timeout.
Full illustrated guide
Open the guide with screenshots, language examples and troubleshooting
Deleting a link
1. Prepare access
Create a scoped key in Dashboard → Integrations & API → API. Keep the key in a server environment variable.
2. Select the resource
Select your domain and link in the dashboard. Replace example IDs and URLs with your own.
3. Review the request
Confirm the link ID and export required information before deleting. Use archive when you only want to organize the library.
DELETE /api/links/918
This is a read/delete request without a JSON body.
4. Run and verify
Read the HTTP status and returned fields. Reopen the record to confirm writes; avoid duplicate retries after a timeout.
Full illustrated guide
Open the guide with screenshots, language examples and troubleshooting
Connecting a Namecheap DNS account
1. Prepare access
Create a scoped key in Dashboard → Integrations & API → API. Keep the key in a server environment variable.
2. Select the resource
Select your domain and link in the dashboard. Replace example IDs and URLs with your own.
3. Review the request
Namecheap must be the authoritative DNS host, and its API access must allowlist the deployed server outbound public IPv4. Send this request only from a trusted backend over HTTPS with a scoped ShortFreeURL key; never put the Namecheap key in browser code. The dashboard secure Connect form is recommended. After connection, attach go.yourdomain.com with POST /api/registrars/{connectionId}/attach and body {"hostname":"go.yourdomain.com"}. Public domain hosting must be ready first. See /docs/namecheap-domain-setup.
POST /api/registrars/connect
{
  "provider": "namecheap",
  "user": "your-namecheap-username",
  "apiKey": "YOUR_NAMECHEAP_API_KEY",
  "clientIp": "YOUR_SERVER_PUBLIC_OUTBOUND_IPV4"
}
4. Run and verify
Read the HTTP status and returned fields. Reopen the record to confirm writes; avoid duplicate retries after a timeout.
Full illustrated guide
Open the guide with screenshots, language examples and troubleshooting
Getting a list of links
1. Prepare access
Create a scoped key in Dashboard → Integrations & API → API. Keep the key in a server environment variable.
2. Select the resource
Select your domain and link in the dashboard. Replace example IDs and URLs with your own.
3. Review the request
Paginate with limit and offset. Search and folder filters narrow the result; request only the records needed.
GET /api/links?domainId=42&limit=20&offset=0
This is a read/delete request without a JSON body.
4. Run and verify
Read the HTTP status and returned fields. Reopen the record to confirm writes; avoid duplicate retries after a timeout.
Full illustrated guide
Open the guide with screenshots, language examples and troubleshooting
Getting link information
1. Prepare access
Create a scoped key in Dashboard → Integrations & API → API. Keep the key in a server environment variable.
2. Select the resource
Select your domain and link in the dashboard. Replace example IDs and URLs with your own.
3. Review the request
Read the stored configuration before changing a link. Your key must have access to the link workspace and domain.
GET /api/links/918
This is a read/delete request without a JSON body.
4. Run and verify
Read the HTTP status and returned fields. Reopen the record to confirm writes; avoid duplicate retries after a timeout.
Full illustrated guide
Open the guide with screenshots, language examples and troubleshooting
Finding a link by original URL
1. Prepare access
Create a scoped key in Dashboard → Integrations & API → API. Keep the key in a server environment variable.
2. Select the resource
Select your domain and link in the dashboard. Replace example IDs and URLs with your own.
3. Review the request
URL-encode the originalURL query value. Preserve query strings when searching for the exact destination.
GET /api/links/by-original-url?domainId=42&originalURL=https%3A%2F%2Fexample.com
This is a read/delete request without a JSON body.
4. Run and verify
Read the HTTP status and returned fields. Reopen the record to confirm writes; avoid duplicate retries after a timeout.
Full illustrated guide
Open the guide with screenshots, language examples and troubleshooting
Creating an API key
1. Prepare access
Create a scoped key in Dashboard → Integrations & API → API. Keep the key in a server environment variable.
2. Select the resource
Select your domain and link in the dashboard. Replace example IDs and URLs with your own.
3. Review the request
Open Dashboard → Integrations & API → API. Create a named key with the smallest useful scope and expiry. Copy the secret once into a secret manager. Test read access with this request, then revoke unused keys.
GET /api/domains
This is a read/delete request without a JSON body.
4. Run and verify
Read the HTTP status and returned fields. Reopen the record to confirm writes; avoid duplicate retries after a timeout.
Full illustrated guide
Open the guide with screenshots, language examples and troubleshooting
Using TTL
1. Prepare access
Create a scoped key in Dashboard → Integrations & API → API. Keep the key in a server environment variable.
2. Select the resource
Select your domain and link in the dashboard. Replace example IDs and URLs with your own.
3. Review the request
TTL is a deletion timestamp in this installation, not a duration in seconds. Use expires_at and expired_url for expiration with a fallback instead. Check the saved value after updating.
POST /api/links/918
{
  "ttl": "2030-12-31T23:59:59Z"
}
4. Run and verify
Read the HTTP status and returned fields. Reopen the record to confirm writes; avoid duplicate retries after a timeout.
Full illustrated guide
Open the guide with screenshots, language examples and troubleshooting
Listing country rules
1. Prepare access
Create a scoped key in Dashboard → Integrations & API → API. Keep the key in a server environment variable.
2. Select the resource
Select your domain and link in the dashboard. Replace example IDs and URLs with your own.
3. Review the request
Rules use country codes and destination URLs. Access and changes are restricted by the workspace plan.
GET /api/links/918/country
This is a read/delete request without a JSON body.
4. Run and verify
Read the HTTP status and returned fields. Reopen the record to confirm writes; avoid duplicate retries after a timeout.
Full illustrated guide
Open the guide with screenshots, language examples and troubleshooting
Setting country rules
1. Prepare access
Create a scoped key in Dashboard → Integrations & API → API. Keep the key in a server environment variable.
2. Select the resource
Select your domain and link in the dashboard. Replace example IDs and URLs with your own.
3. Review the request
This endpoint replaces the country rule collection. Read the existing rules first and include any rules you wish to retain.
POST /api/links/918/country
[
  {
    "value": "IN",
    "url": "https://example.com/india"
  }
]
4. Run and verify
Read the HTTP status and returned fields. Reopen the record to confirm writes; avoid duplicate retries after a timeout.
Full illustrated guide
Open the guide with screenshots, language examples and troubleshooting
Removing country rules
1. Prepare access
Create a scoped key in Dashboard → Integrations & API → API. Keep the key in a server environment variable.
2. Select the resource
Select your domain and link in the dashboard. Replace example IDs and URLs with your own.
3. Review the request
Read the current collection, remove the selected rule and submit the remaining collection. The empty array shown here removes all country rules.
POST /api/links/918/country
[]4. Run and verify
Read the HTTP status and returned fields. Reopen the record to confirm writes; avoid duplicate retries after a timeout.
Full illustrated guide
Open the guide with screenshots, language examples and troubleshooting
Setting region rules
1. Prepare access
Create a scoped key in Dashboard → Integrations & API → API. Keep the key in a server environment variable.
2. Select the resource
Select your domain and link in the dashboard. Replace example IDs and URLs with your own.
3. Review the request
Use a supported region code. This replaces the region collection; preserve other region rules in your payload. Location detection depends on the visitor network.
POST /api/links/918/region
[
  {
    "value": "IN-MH",
    "url": "https://example.com/maharashtra"
  }
]
4. Run and verify
Read the HTTP status and returned fields. Reopen the record to confirm writes; avoid duplicate retries after a timeout.
Full illustrated guide
Open the guide with screenshots, language examples and troubleshooting
Listing region rules
1. Prepare access
Create a scoped key in Dashboard → Integrations & API → API. Keep the key in a server environment variable.
2. Select the resource
Select your domain and link in the dashboard. Replace example IDs and URLs with your own.
3. Review the request
Read the rules before editing. Keep the main destination useful for visitors without a matching location.
GET /api/links/918/region
This is a read/delete request without a JSON body.
4. Run and verify
Read the HTTP status and returned fields. Reopen the record to confirm writes; avoid duplicate retries after a timeout.
Full illustrated guide
Open the guide with screenshots, language examples and troubleshooting
Removing region rules
1. Prepare access
Create a scoped key in Dashboard → Integrations & API → API. Keep the key in a server environment variable.
2. Select the resource
Select your domain and link in the dashboard. Replace example IDs and URLs with your own.
3. Review the request
Submit the remaining region rules to remove one rule. An empty array removes all region rules.
POST /api/links/918/region
[]4. Run and verify
Read the HTTP status and returned fields. Reopen the record to confirm writes; avoid duplicate retries after a timeout.
Full illustrated guide
Open the guide with screenshots, language examples and troubleshooting
Creating a mobile-targeted link
1. Prepare access
Create a scoped key in Dashboard → Integrations & API → API. Keep the key in a server environment variable.
2. Select the resource
Select your domain and link in the dashboard. Replace example IDs and URLs with your own.
3. Review the request
The original URL provides the fallback for other visitors. Test both platforms and the desktop fallback.
POST /api/links
{
  "domainId": 42,
  "original_url": "https://example.com",
  "android_url": "https://example.com/android",
  "iphone_url": "https://example.com/ios"
}
4. Run and verify
Read the HTTP status and returned fields. Reopen the record to confirm writes; avoid duplicate retries after a timeout.
Full illustrated guide
Open the guide with screenshots, language examples and troubleshooting
Updating mobile targeting
1. Prepare access
Create a scoped key in Dashboard → Integrations & API → API. Keep the key in a server environment variable.
2. Select the resource
Select your domain and link in the dashboard. Replace example IDs and URLs with your own.
3. Review the request
Set the supported platform destinations and verify the link on each device.
POST /api/links/918
{
  "android_url": "https://example.com/android",
  "iphone_url": "https://example.com/ios"
}
4. Run and verify
Read the HTTP status and returned fields. Reopen the record to confirm writes; avoid duplicate retries after a timeout.
Full illustrated guide
Open the guide with screenshots, language examples and troubleshooting
Adding link expiration
1. Prepare access
Create a scoped key in Dashboard → Integrations & API → API. Keep the key in a server environment variable.
2. Select the resource
Select your domain and link in the dashboard. Replace example IDs and URLs with your own.
3. Review the request
Use an explicit timezone. Expiration is plan-controlled and is separate from TTL deletion.
POST /api/links/918
{
  "expires_at": "2030-12-31T23:59:59Z",
  "expired_url": "https://example.com/offer-ended"
}
4. Run and verify
Read the HTTP status and returned fields. Reopen the record to confirm writes; avoid duplicate retries after a timeout.
Full illustrated guide
Open the guide with screenshots, language examples and troubleshooting
Creating an expiring link
1. Prepare access
Create a scoped key in Dashboard → Integrations & API → API. Keep the key in a server environment variable.
2. Select the resource
Select your domain and link in the dashboard. Replace example IDs and URLs with your own.
3. Review the request
Keep an accessible fallback destination after the offer ends. Verify the saved expiry.
POST /api/links
{
  "domainId": 42,
  "original_url": "https://example.com/offer",
  "expires_at": "2030-12-31T23:59:59Z",
  "expired_url": "https://example.com/offer-ended"
}
4. Run and verify
Read the HTTP status and returned fields. Reopen the record to confirm writes; avoid duplicate retries after a timeout.
Full illustrated guide
Open the guide with screenshots, language examples and troubleshooting
Importing CSV data
1. Prepare access
Create a scoped key in Dashboard → Integrations & API → API. Keep the key in a server environment variable.
2. Select the resource
Select your domain and link in the dashboard. Replace example IDs and URLs with your own.
3. Review the request
Download the sample from Dashboard → CSV Import. For command-line automation, parse CSV with a CSV library and map rows into links JSON before sending batches. Do not send raw CSV to this JSON endpoint.
POST /api/links/bulk
{
  "domainId": 42,
  "links": [
    {
      "original_url": "https://example.com",
      "path": "example",
      "title": "Example"
    }
  ]
}
4. Run and verify
Read the HTTP status and returned fields. Reopen the record to confirm writes; avoid duplicate retries after a timeout.
Full illustrated guide
Open the guide with screenshots, language examples and troubleshooting
Updating link tags
1. Prepare access
Create a scoped key in Dashboard → Integrations & API → API. Keep the key in a server environment variable.
2. Select the resource
Select your domain and link in the dashboard. Replace example IDs and URLs with your own.
3. Review the request
The tag array replaces the current tags. Read and merge existing tags if you want to append instead.
POST /api/links/918
{
  "tags": [
    "launch",
    "newsletter"
  ]
}
4. Run and verify
Read the HTTP status and returned fields. Reopen the record to confirm writes; avoid duplicate retries after a timeout.
Full illustrated guide
Open the guide with screenshots, language examples and troubleshooting
Password protection
1. Prepare access
Create a scoped key in Dashboard → Integrations & API → API. Keep the key in a server environment variable.
2. Select the resource
Select your domain and link in the dashboard. Replace example IDs and URLs with your own.
3. Review the request
Requires a plan with password protection. Verify through the public short-link password form in a private browser window. The API does not reveal the stored password.
POST /api/links/918
{
  "password": "replace-with-a-unique-password"
}
4. Run and verify
Read the HTTP status and returned fields. Reopen the record to confirm writes; avoid duplicate retries after a timeout.
Full illustrated guide
Open the guide with screenshots, language examples and troubleshooting
Generating a QR code
1. Prepare access
Create a scoped key in Dashboard → Integrations & API → API. Keep the key in a server environment variable.
2. Select the resource
Select your domain and link in the dashboard. Replace example IDs and URLs with your own.
3. Review the request
Save the returned image using the response content type. The QR encodes the short URL, so destination updates do not require reprinting.
GET /api/links/918/qr?format=svg
This is a read/delete request without a JSON body.
4. Run and verify
Read the HTTP status and returned fields. Reopen the record to confirm writes; avoid duplicate retries after a timeout.
Full illustrated guide
Open the guide with screenshots, language examples and troubleshooting
Link statistics
1. Prepare access
Create a scoped key in Dashboard → Integrations & API → API. Keep the key in a server environment variable.
2. Select the resource
Select your domain and link in the dashboard. Replace example IDs and URLs with your own.
3. Review the request
Use a read-only key for reporting. New links may have no clicks; distinguish an empty result from a failed request.
GET /api/statistics/link/918
This is a read/delete request without a JSON body.
4. Run and verify
Read the HTTP status and returned fields. Reopen the record to confirm writes; avoid duplicate retries after a timeout.
Full illustrated guide
Open the guide with screenshots, language examples and troubleshooting
Domain statistics
1. Prepare access
Create a scoped key in Dashboard → Integrations & API → API. Keep the key in a server environment variable.
2. Select the resource
Select your domain and link in the dashboard. Replace example IDs and URLs with your own.
3. Review the request
Aggregate statistics are limited to the domain your key can access. Respect the retention and tracked-click limits of the plan.
GET /api/statistics/domain/42
This is a read/delete request without a JSON body.
4. Run and verify
Read the HTTP status and returned fields. Reopen the record to confirm writes; avoid duplicate retries after a timeout.
Full illustrated guide
Open the guide with screenshots, language examples and troubleshooting
Sorting links
1. Prepare access
Create a scoped key in Dashboard → Integrations & API → API. Keep the key in a server environment variable.
2. Select the resource
Select your domain and link in the dashboard. Replace example IDs and URLs with your own.
3. Review the request
Use pagination when ranking a large library. Sorting the link library is separate from filtering individual click events.
GET /api/links?domainId=42&sort=clicks&dir=desc&limit=20
This is a read/delete request without a JSON body.
4. Run and verify
Read the HTTP status and returned fields. Reopen the record to confirm writes; avoid duplicate retries after a timeout.
Full illustrated guide
Open the guide with screenshots, language examples and troubleshooting
Requesting clickstream
1. Prepare access
Create a scoped key in Dashboard → Integrations & API → API. Keep the key in a server environment variable.
2. Select the resource
Select your domain and link in the dashboard. Replace example IDs and URLs with your own.
3. Review the request
Clickstream can contain visitor information. Use minimum necessary fields and protect exported reports. Empty domains return no activity.
GET /api/statistics/clickstream?domainId=42&limit=20&offset=0
This is a read/delete request without a JSON body.
4. Run and verify
Read the HTTP status and returned fields. Reopen the record to confirm writes; avoid duplicate retries after a timeout.
Full illustrated guide
Open the guide with screenshots, language examples and troubleshooting
Requesting top links
1. Prepare access
Create a scoped key in Dashboard → Integrations & API → API. Keep the key in a server environment variable.
2. Select the resource
Select your domain and link in the dashboard. Replace example IDs and URLs with your own.
3. Review the request
Compare top links within the same reporting scope. This installation uses its own statistics route names.
GET /statistics/domain/42/top?column=path&limit=10
This is a read/delete request without a JSON body.
4. Run and verify
Read the HTTP status and returned fields. Reopen the record to confirm writes; avoid duplicate retries after a timeout.
Full illustrated guide
Open the guide with screenshots, language examples and troubleshooting
Getting clicks by link ID
1. Prepare access
Create a scoped key in Dashboard → Integrations & API → API. Keep the key in a server environment variable.
2. Select the resource
Select your domain and link in the dashboard. Replace example IDs and URLs with your own.
3. Review the request
Request each authorized link ID with bounded concurrency. Cache reports and back off on rate-limit responses.
GET /api/statistics/link/918
This is a read/delete request without a JSON body.
4. Run and verify
Read the HTTP status and returned fields. Reopen the record to confirm writes; avoid duplicate retries after a timeout.
Full illustrated guide
Open the guide with screenshots, language examples and troubleshooting
Recording a conversion
1. Prepare access
Create a scoped key in Dashboard → Integrations & API → API. Keep the key in a server environment variable.
2. Select the resource
Select your domain and link in the dashboard. Replace example IDs and URLs with your own.
3. Review the request
Use a real click ID from the referring short link. Repeated submissions create repeated events: deduplicate in your checkout integration. Currency is a three-letter code and value must be non-negative.
POST /api/conversions
{
  "clid": "actual-click-id",
  "value": 49.95,
  "currency": "USD",
  "source": "checkout"
}
4. Run and verify
Read the HTTP status and returned fields. Reopen the record to confirm writes; avoid duplicate retries after a timeout.
Full illustrated guide
Open the guide with screenshots, language examples and troubleshooting
Frequently asked questions
Where do I start?
Connect a domain, create your first link, then open Statistics after the first few clicks. Each of those has its own step-by-step article here.
Is there help for the API?
Yes. The developer portal has a quickstart, guides for common jobs and a reference for every endpoint with runnable examples.
How do I get help from a person?
Open a ticket from the dashboard or the contact page. Automatic checks run on the ticket first and a person answers whatever they cannot.