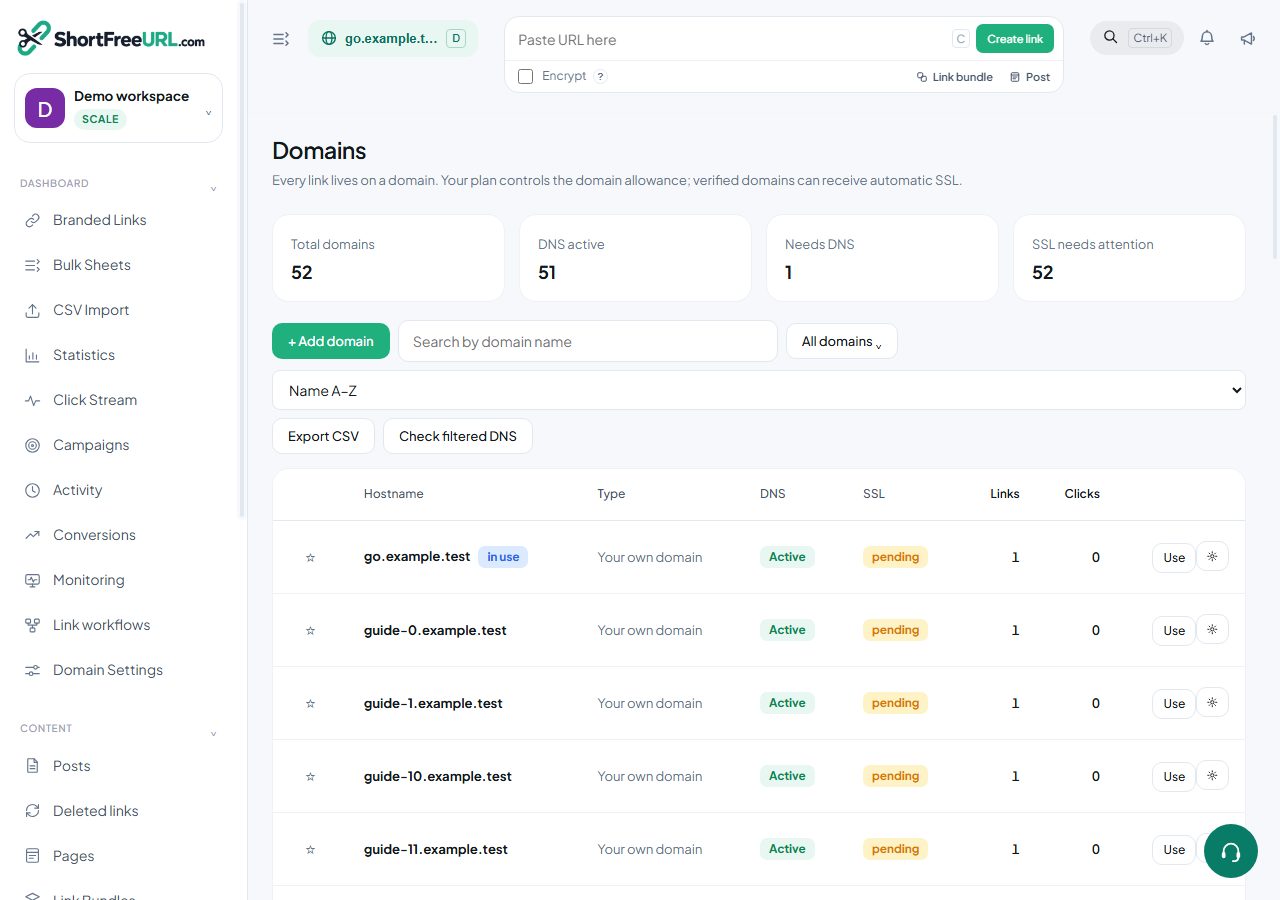
1. Choose your short-link hostname
Open Dashboard → Add Domain. If your main domain already hosts a website, choose a subdomain such as go.yourbrand.com. Keep the website’s DNS records. Add the hostname to your workspace before pointing DNS.
2. Copy the records for your installation
The setup screen shows the operator’s A record for an apex domain, an optional AAAA record for IPv6, or a CNAME for a subdomain. Names under suffixes such as co.uk and co.in use the correct root and subdomain names. Do not copy IP addresses from example screenshots. If the screen says server setup is required, the administrator must complete the next section first.
Change only the records for the chosen short-link hostname. Keep unrelated MX, TXT, website and verification records. A CNAME cannot share a hostname with A/AAAA records. A and AAAA can coexist when both point to the configured server. Review conflicting records instead of deleting every record in your DNS zone.
3. Check DNS and SSL separately
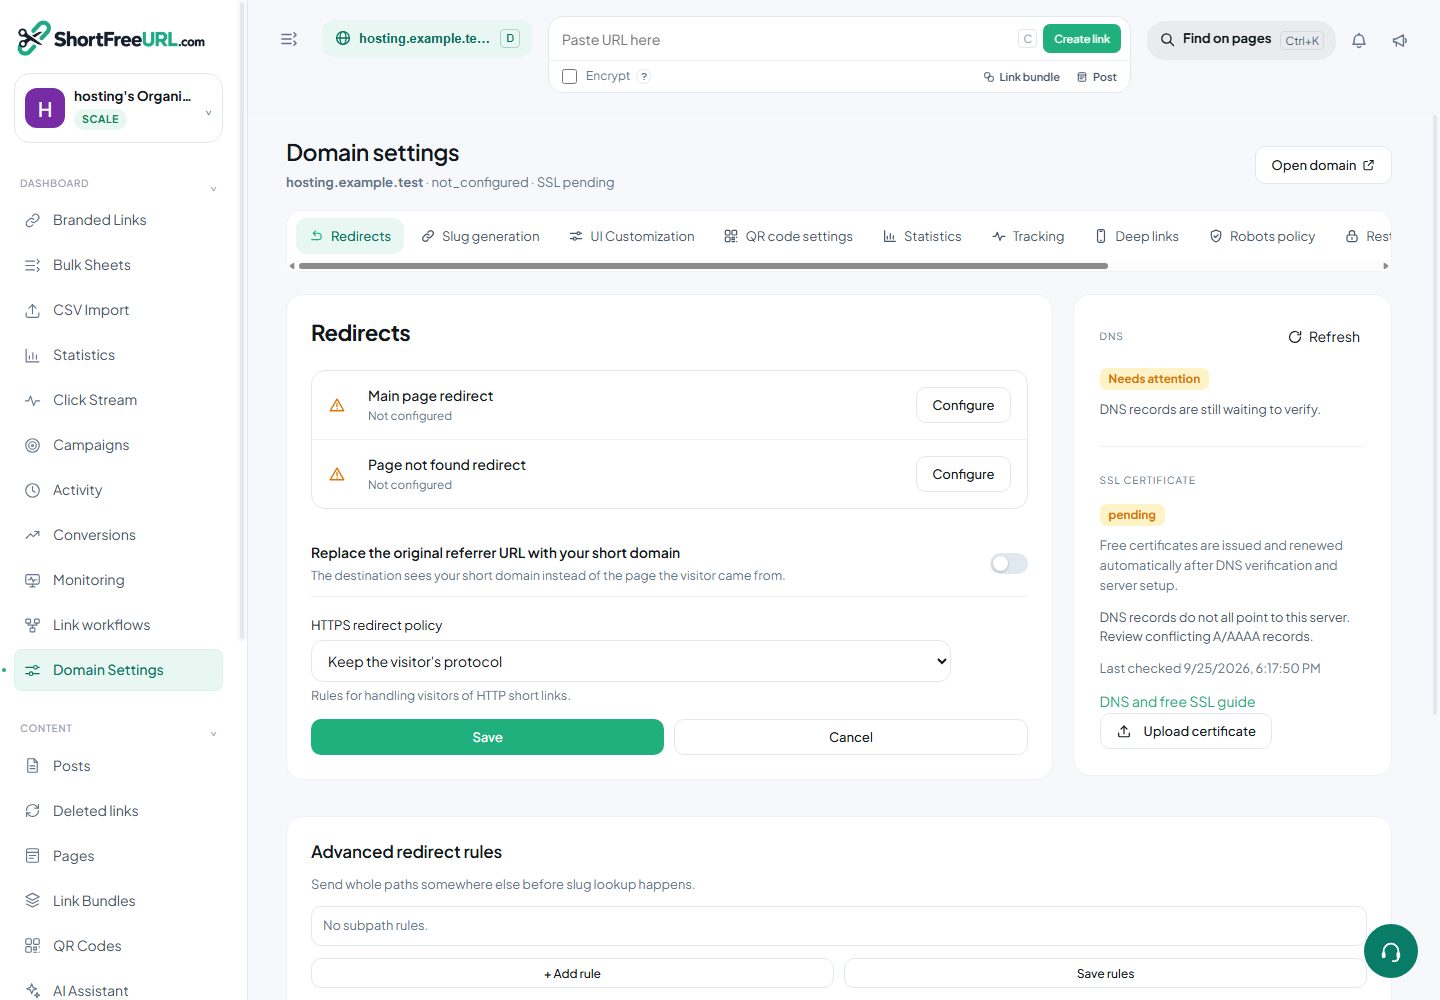
Open Domain settings → Redirects and press Refresh. DNS verified means every returned A/AAAA address matches this installation. SSL verified means an HTTPS check observed a trusted certificate for the exact hostname. DNS readiness alone does not mean a certificate has been issued.
The background job checks bounded batches each minute. Failed checks retry with increasing delay up to 30 minutes; healthy domains are rechecked every six hours. Caddy handles certificate issuance and renewal. DNS propagation and certificate-authority limits can add delay. A domain-ready email is queued once after both checks succeed; delivery status is available in the admin mail centre.
4. Administrator: configure your public server
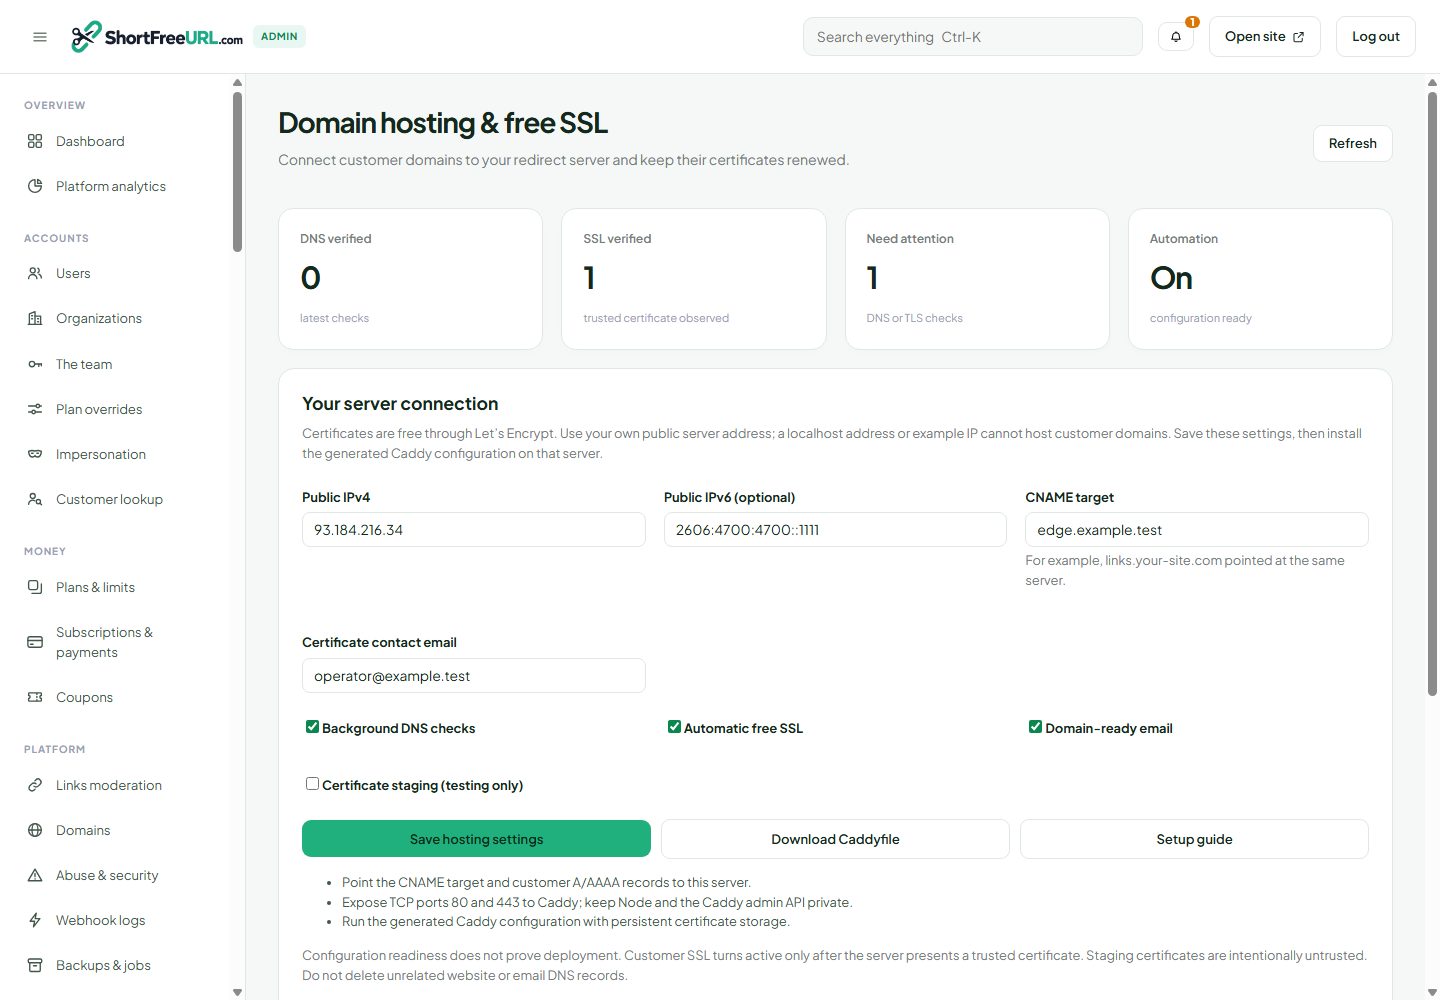
Open Admin → Domain hosting & SSL. Enter the public IPv4 of the server running the redirect application, optional working IPv6, your CNAME target and a certificate-contact email. Point the CNAME target at the same server. Save with background checks and automatic SSL enabled. The application refuses localhost, private addresses and documentation example addresses.
5. Deploy the HTTPS proxy
Install Caddy on that public server using its official installation guide. Download the Caddyfile from the admin page. Check SITE_HOST, APP_HOST, API_HOST, STATS_HOST, DOCS_HOST, DEVELOPERS_HOST and ADMIN_HOST in the application environment: the generated file includes those configured hostnames. Use your own hostnames and point them at this server. Keep the application port and Caddy’s admin API private. Make TCP ports 80 and 443 reachable; UDP 443 is optional for HTTP/3. Persist Caddy’s data directory so certificate keys and renewal state survive restarts.
Validate the downloaded file with caddy validate --config Caddyfile --adapter caddyfile. Install it as your Caddy service configuration, then reload that service. The app must run on the same machine at the loopback port shown in the file. Configure production session secrets, HTTPS app URLs and a mail transport before accepting customers. See the deployment guide in the source delivery for the system-service layout.
The generated on-demand TLS configuration asks the application before provisioning a customer hostname. Unknown, suspended or inactive-workspace domains are denied; DNS must match the operator’s server. External requests to the internal authorization route are blocked by the generated Caddyfile. Each exact customer hostname receives a certificate: a wildcard certificate and a paid certificate service are not required.
6. Test and operate
Use certificate staging while testing issuance repeatedly. Staging certificates are intentionally untrusted and will not show SSL verified. Switch to production issuance for customer traffic. Visit the customer HTTPS link and verify DNS & SSL again. In the admin page, search by domain or customer, inspect the latest error and use Check DNS & SSL. Backups & jobs shows the background domain-hosting job. Pausing automation stops new checks; pausing automatic SSL denies new certificate authorizations. Existing valid certificates are not deleted.
A readiness indicator validates settings only. It does not prove Caddy is installed, firewall ports are open, or a certificate has been issued. This feature provides free certificates; a public server, domain registration and optional mail-provider charges remain separate. Localhost alone cannot serve real customer domains.
Troubleshooting
Missing DNS: check the record name, authoritative provider and TTL. Mixed addresses: fix conflicting A/AAAA records, including unused IPv6. DNS ready but SSL pending: check Caddy service logs, public ports, certificate storage permissions and any CAA policy. Suspended domain: resolve the suspension in admin; a customer refresh cannot reactivate it. Uploaded custom certificates are stored for operator deployment and do not become active merely by uploading them.
Caddy installation · Automatic HTTPS · Caddy on-demand authorization · Let’s Encrypt validation
Find this in your dashboard
- Sign in and select the workspace and domain you want to manage.
- Open Domains. Review the article’s steps and your plan’s available controls.
- Save your changes, reopen the record and verify the saved result. For routing changes, check the short link with a test visit.